Are you looking for how to dry mint in a dehydrator?
If so, then you’ve come to the right place. Here we’ll provide helpful tips on choosing the right food dehydrator for your needs, and preparing the mint before drying it, including how to place the mint leaves evenly on a dehydrator tray to ensure even drying. We will also give advice on how best to store dried mint after it’s been processed with a dehydrator. Whether you’re an experienced chef or just getting started with this type of kitchen appliance, our guide can help make sure your finished product is top-notch when using a food dehydrator to dry out fresh ingredients like mint.
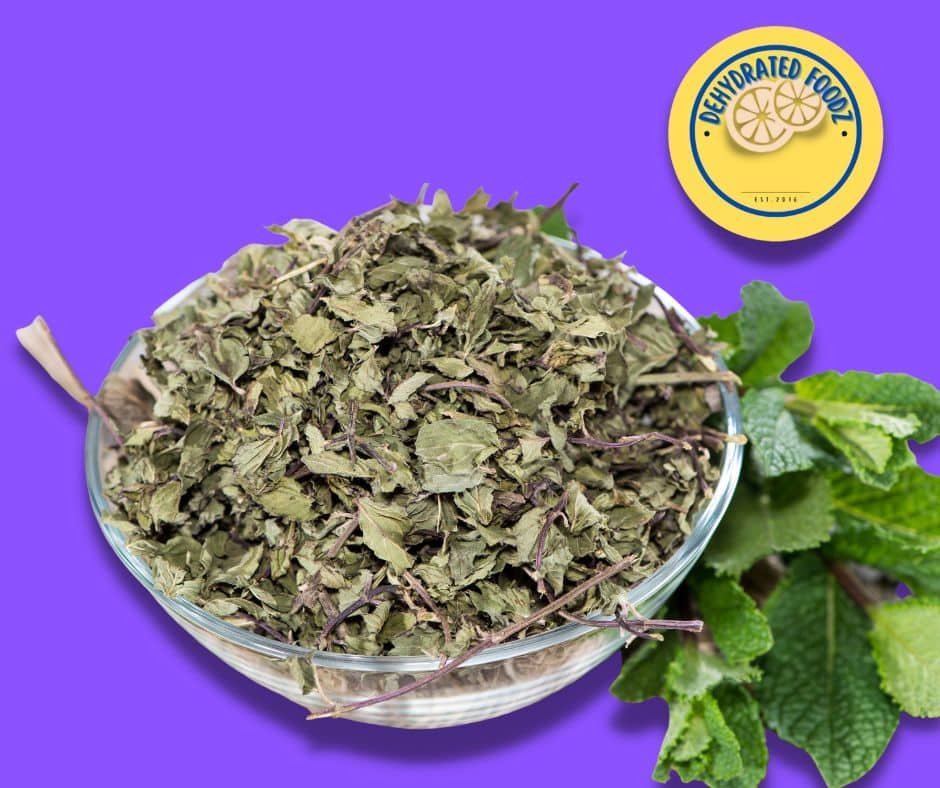
Introduction to Mint Drying
Drying mint is one of the easiest and most effective ways to preserve the fresh flavor of mint leaves for use all year long. Whether you want to enjoy mint tea, add a burst of flavor to salads, or enhance your favorite sauces, having dried mint on hand is incredibly convenient. Dried mint, or dry mint, retains much of the aroma and taste of fresh mint and can be stored for months in airtight containers like glass jars. There are several ways to dry mint, including air drying, oven drying, and using a dehydrator. Each method helps you capture the essence of mint, so you can enjoy its refreshing flavor in teas, recipes, and more, no matter the season. In this guide, we’ll walk you through the best ways to dry mint leaves, from harvesting to storing, so you can make the most of your mint harvest.
Harvesting Mint Leaves
Harvesting mint leaves at the right time is key to getting the best flavor and aroma from your dried mint. The ideal time to harvest mint is in late spring or early summer, when the leaves are lush and packed with essential oils. Mint leaves should be harvested just before flowering for the best aroma. To harvest mint, use clean scissors or garden shears to cut the stems just above a leaf node, making sure to leave at least two sets of leaves on the stem so your mint plant can regrow. This method works for all types of mint, including chocolate mint and apple mint. For the most flavorful results, harvest mint leaves in the morning after the dew has evaporated but before the day heats up—this helps preserve the delicate essential oils that give mint its signature taste. Once harvested, you’re ready to start drying and enjoying your mint in a variety of ways.
Choosing the Right Dehydrator
When it comes to dehydrating mint, choosing the right dehydrator is essential. Various , each with their own individual characteristics and advantages, are available in the present market.
The most common type of dehydrator is a convection-style model. These models use fans to circulate hot air around the food being dried, resulting in faster drying times and more even results. They also tend to be more energy efficient than other types of dehydrators since they don’t require additional heating elements or coils.
Another popular option is a stackable tray-style model, which allows you to stack multiple trays for larger batches of food being dried at once. The advantage here is that you can easily adjust the temperature settings, and they are easy to operate.
Finally, there are solar powered models which use natural sunlight instead of electricity for drying your herbs and spices. Solar powered models are great if you live in an area where sunshine is plentiful but they may take longer than electric models depending on how much sun exposure your location gets throughout the day or year-round.
No matter what type of dehydrator you choose, make sure it has adjustable temperature settings so that you can adequately dry different kinds of herbs like mint without burning them or leaving too much moisture behind, which could lead to spoilage down the line. Additionally, look out for any special features, such as automatic shut-offs, timer functions, digital displays, etc., that might help make easier and more convenient overall.
When selecting a dehydrator, consider the size of your needs and the features that best suit your lifestyle, especially if you plan on dehydrating fruit in a dehydrator. Now, let’s look at the steps for getting your mint ready to be dehydrated with the necessary equipment.
Key Takeaway: When choosing a dehydrator for mint, look for adjustable temperature settings and special features such as automatic shut-offs and timer functions to ensure optimal drying.
Preparing the Mint
Before you begin the , it is important to properly prepare your mint. Always wash your mint before drying, as washing helps remove dirt and critters while preserving aroma and quality. Begin by giving your mint a thorough rinse with cold water. After rinsing, use a salad spinner to swiftly remove excess water from the leaves. Then, pat the leaves down delicately using a kitchen towel for gentle drying. Using sharp implements, snip away any attached stems from the mint leaves after they have been washed.
Finally, spread out your prepared mint onto dehydrator sheets, making sure to arrange individual leaves in a single layer so that none of the pieces overlap each other too much; this will ensure even drying throughout all of the leaves.
Once the mint is prepared, it’s time to move on to the next step in the process: drying. Achieving optimal outcomes necessitates the use of a dehydrator, an apparatus that can help to speed up drying.
Drying mint in a dehydrator is an easy and efficient way to preserve the herb for long-term storage. Here are the steps involved in drying mint:
- The optimal heat for drying herbs is between 95°F and 115°F (35°C – 46°C). Varying your dehydrator’s configuration may be essential; tweak the controls as necessary. If you’re using a fan-forced dehydrator, set it to its highest setting.
2. Place Trays:
Place your trays of fresh mint leaves into the dehydrator with enough space between them so that air can circulate freely around each tray. Make sure not to overcrowd them as this will prevent even drying and could cause mold or bacteria growth due to trapped moisture.
3. Start Dehydrating:
Turn on your and let it run until all of the leaves have dried out completely – usually anywhere from 8-12 hours, depending on how much moisture was left in them before they were placed in the machine. You should check periodically throughout this process by gently touching each leaf; if there’s still some softness present, then continue running it until they are crisp but not brittle when touched lightly with your fingers or tongs/spatula used specifically for food preparation purposes only. The dried mint should be easily crushed by hand. After drying, gently crush the leaves to make crushed mint, which can be stored or used in recipes and teas.
To ensure even results across the entire batch, rotate trays periodically during the dehydration process. This will help distribute hot air evenly within the appliance and prevent any one side from drying faster than others, which could lead to spoilage or mold issues later on after storing away the finished product. For small amounts of mint, microwave drying can be used by drying leaves in short intervals at low settings. This method is quick and effective for preserving small batches of mint.
Once the dehydrating is completed, it’s time to store your dried mint – a measure that will ensure its savor and consistency remain safe for potential usage.
Key Takeaway: A key takeaway from the above is to ensure even drying by rotating trays every few hours and setting the temperature between 95°F-115°F (35°C – 46°C) for optimal results when dehydrating mint in a dehydrator.
Tips for Drying Mint
To get the most out of your mint harvest, it’s important to dry mint leaves quickly and gently to lock in their flavor and aroma. Air drying is a traditional way to dry mint and works well if you have a warm, well ventilated area. Simply gather the mint stems into small bunches, tie them loosely, and hang them upside down away from direct sunlight. For extra protection, you can place the bunches inside a paper bag with holes punched for airflow—just loosely tie the top and hang. If you prefer oven drying mint, preheat your oven to its lowest temperature, spread the mint leaves in a single layer on a cookie sheet, and leave the oven door slightly open to let moisture escape. In the oven, mint leaves should be dried at low temperatures to prevent burning and preserve essential oils. Before drying, always pat dry the mint leaves with a paper towel to remove any excess moisture, which helps prevent mold and ensures your mint dries evenly. Whichever method you choose, make sure the leaves are not overlapping and that air can circulate freely for the best results.
Common Issues with Drying Mint
While drying mint is straightforward, a few common issues can affect the quality of your dried mint leaves. One problem is loss of flavor and aroma, which often happens if the mint is dried too slowly or at too high a temperature. To avoid this, dry mint leaves quickly at a low temperature and store them promptly once they’re completely dry. Another issue is the appearance of brown or black spots on the dried mint leaves, usually caused by excess moisture or contamination during the drying process. To prevent this, always store your dried mint in airtight containers like glass jars, and keep them in a cool, dark place to protect them from light and humidity. By following these tips, you’ll ensure your dried mint stays flavorful and fresh for months.
Storing Dried Mint
Storing dried mint is essential to preserving its flavor and freshness. The secret to maintaining its zest and vibrancy is to ensure it remains distant from heat, light, humidity, and oxygen.
When selecting a container for storage, choose one that’s made of glass or plastic with an airtight lid. For best results, use an air-tight container to preserve the mint’s freshness and flavor for several months. This will help protect the mint from any outside contaminants that could affect its taste or texture. Avoid using metal containers as they can cause oxidation which can lead to spoilage over time. Plastic bags are not recommended for storing dried mint, as they can cause condensation and spoilage.
Store your dried mint in a dark, chill location – like a pantry or cupboard – far from direct light and other heat sources such as stoves and ovens. If you live in an area with high humidity levels, consider placing your container inside another sealed bag or jar before putting it into the cupboard so that no additional moisture gets inside.
Additionally, try not to fill up your containers too much; leaving some room at the top helps prevent condensation buildup within the container itself which could lead to mold growth over time if left unchecked.
Finally, check on your herbs periodically throughout their storage period just in case something does go wrong during this process. If you notice anything off about them, such as discoloration or changes in smell, discard them immediately rather than risk consuming something potentially harmful.
Key Takeaway: Storing dried mint correctly is important for preserving its flavor and freshness, so opt for airtight containers such as glass or plastic, store in a cool, dark place away from heat sources, separate herbs when storing multiple types together, and check periodically.
Using Dried Mint
Dried mint leaves are a versatile addition to your kitchen and can be used in countless recipes. To use dried mint, simply crush the leaves between your fingers or use a food processor to grind them into a fine powder, depending on your needs. You can also store dried mint leaves whole and add them directly to mint tea or other teas for a soothing, aromatic drink. When substituting dried mint for fresh mint in recipes, remember that dried mint is more concentrated—use about one-third to one-half the amount of dried mint compared to fresh. Some great tips for enjoying dried mint include sprinkling it over salads, stirring it into yogurt, or adding it to lemonade and iced tea for a refreshing twist. You can also make a homemade mint sauce for lamb or vegetables, or simply store dried mint in an airtight container to keep it fresh and ready for your next recipe.
FAQs in Relation to How to Dry Mint in Dehydrator
What temperature do you dehydrate mint at?
What is dehydrated mint good for?
Dehydrated mint is a versatile ingredient that can be used in many different recipes. Dehydrated mint offers a strong taste to various dishes, such as salads, soups, dressings, and pasta dishes. You can also grind dried mint leaves into ground mint powder, which is perfect for sprinkling into recipes or using in traditional dishes. Dehydrated mint makes for a great garnish, lending its unique flavor to drinks and cocktails alike. Dehydrated mint has some of the same benefits as fresh mint but with a longer shelf life.
Conclusion
By following these steps, you can be sure that your dried mint will turn out of excellent quality and taste delightful. Drying is a great way to preserve mint for use during the winter months when fresh herbs are not available. With proper storage, it can last up to a year or more. Whether you are using it as an ingredient in recipes or just want to enjoy its flavor on its own, drying mint in a dehydrator is worth trying out. Don’t forget to experiment with other herbs, too – who knows what amazing flavors you might discover when you dry them in a dehydrator?
Are you looking for the perfect way to preserve your mint harvest? A food dehydrator is an ideal solution! With a food dehydrator, you can quickly and easily dry out herbs like mint and other herbs so that they last longer and you can preserve mint for winter use. Plus, our website provides helpful tips on how to get started with using a dehydrator and delicious recipes utilizing dried foods. Check us out today for all of your drying needs!
Hey there, since 2016, my mission has been to provide you with the information and guides you need to make food dehydrating simple and fun. Whether you're a newbie or a seasoned pro, my site offers helpful guides, reviews, and recipes to enhance your dehydrating experience. I take pride in only recommending products I believe in, ensuring my readers' trust. As an affiliate of various programs, including Amazon Associates, your support helps me continue providing quality content. Thanks for stopping by, and happy dehydrating!