

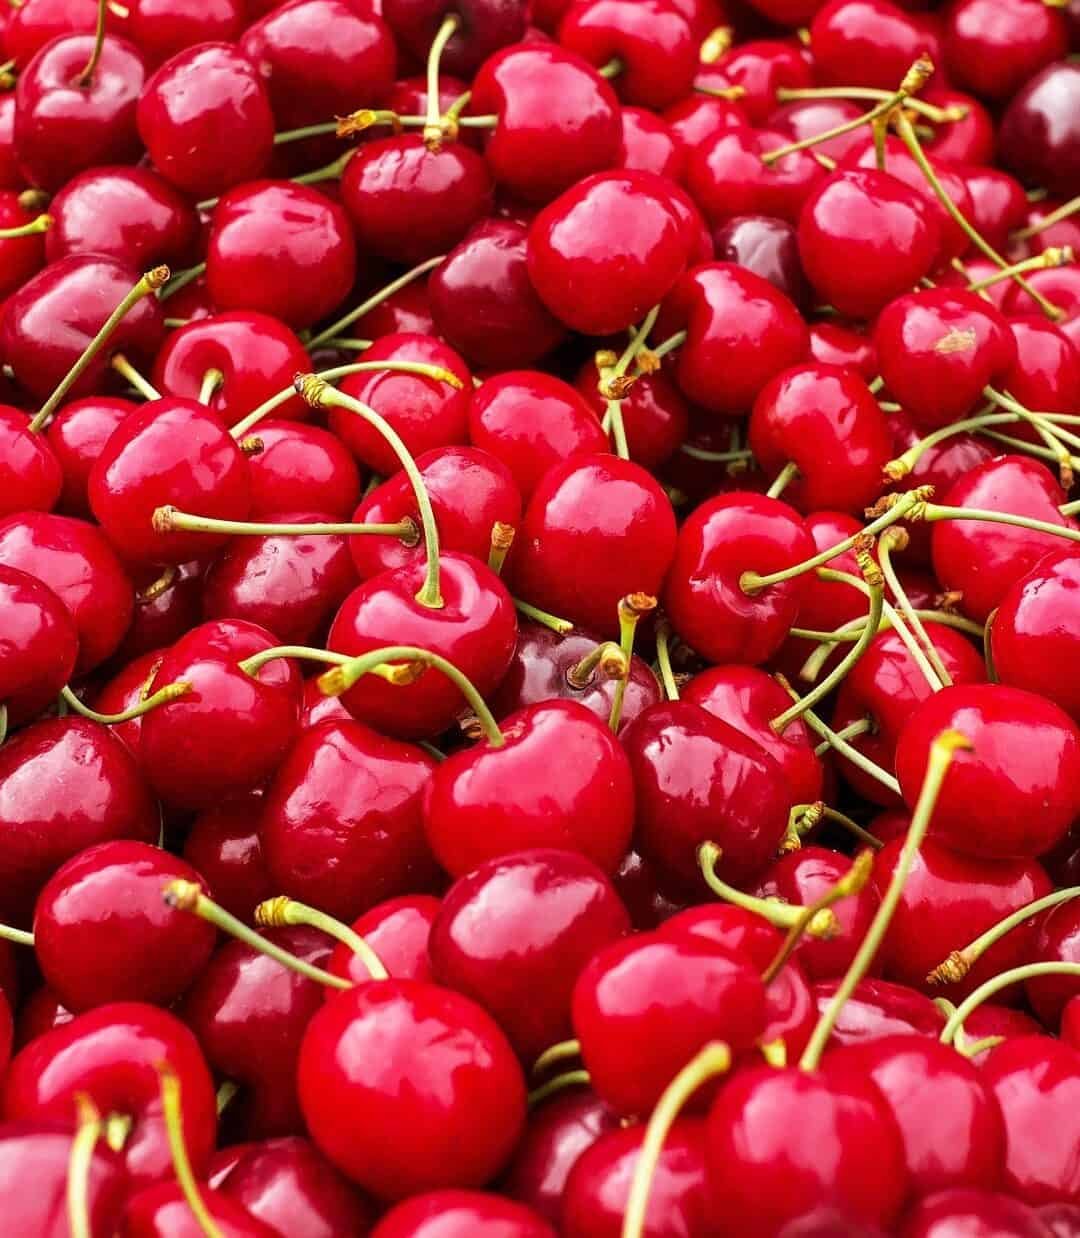
How to Dehydrate Cherries: A Simple Guide for Delicious Snacks
Learn how to dehydrate cherries at home with this simple guide. This guide is perfect for home cooks, snack enthusiasts, and anyone looking to preserve cherries for year-round enjoyment. If you’ve ever wondered about transforming those fresh cherries into delightful dried treats, you’re in the right place. Dehydrating cherries is a fantastic way to preserve their sweet flavor and enjoy them year-round. Whether you’re planning to add them to your morning granola or use them in your favorite baked goods, dried fruits you can dehydrate at home are a versatile and healthy snack.
We’ll cover everything from preparation and dehydration methods to storage, troubleshooting, and creative uses for your dried cherries. In this friendly guide, we’ll walk you through the simple steps of preparing, drying, and storing your cherries, ensuring delicious results every time!
Recipe Table: How to Dehydrate Cherries
| Step | Description | Tips & Notes |
|---|---|---|
| 1. Wash Cherries | Rinse fresh cherries thoroughly to remove dirt and debris. | Use a fruit and veggie wash for extra cleanliness. |
| 2. Pit Cherries | Use a cherry pitter to remove pits efficiently. | OXO cherry pitter is recommended; alternatives include glass straws or melon ballers. |
| 3. Dry Cherries | Pat cherries dry with a clean towel to remove excess moisture. | Removing moisture speeds up drying and prevents spoilage. |
| 4. Optional Soak | Soak cherries in lemon juice or ascorbic acid solution for a few minutes to prevent darkening. | Helps maintain bright color and enhances flavor. |
| 5. Cut Cherries | Cut cherries in halves or quarters to reduce drying time. | Smaller pieces dry faster and more evenly. |
| 6. Arrange on Trays | Place cherries cut side up in a single layer on dehydrator trays or baking sheet lined with parchment paper. | Use silicone mesh screens on dehydrator trays to prevent cherries from falling through. |
| 7. Dehydrate | Dehydrate at 135°F (57°C) in a | Rotate trays every few hours for even drying; drying time varies based on cherry size and humidity. |
| 8. Check Doneness | Cherries are done when leathery, slightly sticky, and no moisture squeezes out when pressed. | Avoid over-drying to prevent hard, brittle cherries. |
| 9. Cool | Let dried cherries cool completely before storage. | Cooling prevents condensation inside storage containers. |
| 10. Condition | Place dried cherries in a jar 2/3 full, shake daily for 7-10 days to equalize moisture. | If condensation appears, return cherries to dehydrator for additional drying. |
| 11. Store | Store dried cherries in an airtight container in a cool, dark place or refrigerate for longer shelf life. | Proper storage keeps cherries fresh for 6-12 months; freezing extends shelf life up to 18 months. |
- Introduction to Cherry Dehydration
- What You Need to Dehydrate Cherries
- Preparing Fresh Cherries
- Drying to Perfection
- Dehydrating Cherries
- Alternative Dehydration Methods
- Drying and Storage
- Long-Term Storage
- Organizing Your Pantry
- Rehydrating Dried Cherries
- Using Dried Cherries
- Tips and Variations
- Converting Fresh to Dried
- Preserving Cherries
- Uses for Dehydrated Cherries
- How to Cool the Dehydrated Cherries
- Conditioning the Dehydrated Cherries
- How Long Does It Take to Dehydrate Cherries
- Troubleshooting Common Issues
- Benefits of Dehydrated Cherries
- Conclusion
- FAQ
Introduction to Cherry Dehydration
If you love cherries and want to enjoy their sweet, tart flavor all year long, dehydrating cherries is the perfect solution. By removing the moisture from fresh cherries, you can create delicious dried cherries that are perfect for snacking, baking, or topping your favorite foods like yogurt and oatmeal. Dehydrating cherries is a simple way to preserve their taste and nutritional value, making it easy to enjoy the essence of cherry season no matter the time of year. Whether you use a dehydrator or your oven, you’ll find that making dried cherries at home is both convenient and rewarding. Plus, you’ll always have a handful of cherries ready to add a burst of flavor to your recipes or to enjoy as a healthy snack—just one of the many benefits of dehydrating food for preservation and convenience.
What You Need to Dehydrate Cherries
If you enjoy making your own snacks, you might also like exploring crunchy dehydrated vegetable snacks made in a food dehydrator.
- A food dehydrator: For consistent results, a
food dehydrator is best. An economical food dehydrator works fine, such as the Presto 06301, but if you dehydrate regularly, consider a high-end food dehydrator for better control and larger batches. The Excalibur dehydrator is a popular and efficient choice for dehydrating cherries in large batches. - Cherry pitter: Using a dedicated cherry pitter tool is recommended for efficient pitting of cherries. The OXO cherry pitter is great for quick and efficient pitting, especially for large batches. Cherry pitters that can handle multiple cherries at once are ideal for processing large quantities.
- Silicone mesh screens: Use silicone mesh screens on dehydrator trays to prevent cherries from falling through the tray holes during drying.
Preparing Fresh Cherries
Before dehydrating, it’s essential to wash and pit your cherries. Pitting cherries is necessary before dehydration to ensure even drying and a pleasant eating experience. Wash cherries before dehydrating them to remove any dirt or debris, and use a dedicated cherry pitter tool for efficient pitting.
Wash and Pit Cherries
- Wash fresh cherries thoroughly to remove any dirt or debris that may be clinging to the surface. It’s essential to start with clean fruit to ensure the best flavor and texture in your dried cherries.
- Use a cherry pitter to efficiently remove the pits from the cherries. This handy tool saves time and effort, making the process much smoother. If you don’t have a cherry pitter, don’t worry—there are alternatives!
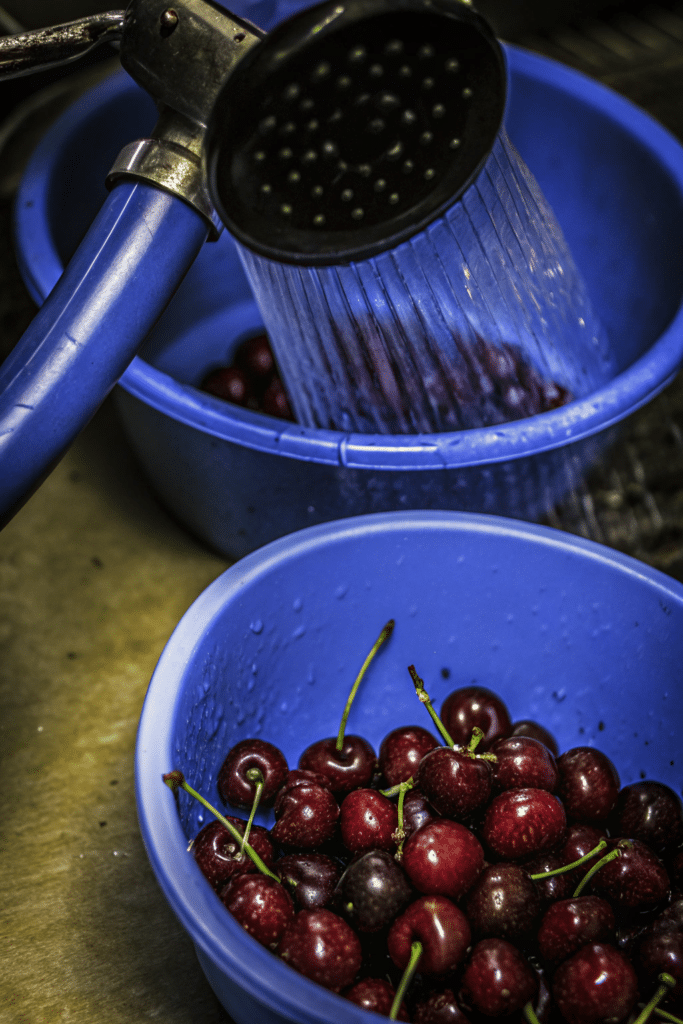
- Pat the cherries dry with a clean towel to remove excess moisture. This step is crucial as it helps speed up the drying process, ensuring that your cherries dehydrate evenly.
- Remove stems and leaves from the cherries. This not only improves the appearance of your dried cherries but also prevents any unwanted flavors from developing during the dehydration process.
- Use a glass straw or a melon baller as a cherry pitter alternative if you don’t have the traditional tool. These items can be just as effective in removing pits, allowing you to prepare large quantities of cherries for drying without hassle.
- To prevent darkening, soak cherries in an acidic solution like lemon juice or ascorbic acid for a few minutes before drying.
Now that your cherries are prepped, let’s explore how to ensure they dry perfectly every time.
Drying to Perfection
- To ensure your cherries are ready for dehydration, you can check them with a quick dip in boiling water. This step helps to burst the skin cells, allowing for more efficient drying. Think of it as giving your cherries a little prep talk before the big dehydrating performance!
- This process also removes the natural wax coating from the skin, which can otherwise hinder the drying process. By doing this, you’re setting the stage for beautifully dried cherries that are ready to shine in your favorite snacks and recipes.
- Whether you choose to check your cherries or not, rest assured that both checked and unchecked cherries can be dehydrated successfully. It’s all about personal preference and the texture you desire.
- Keep in mind that the drying time will vary depending on the power of your dehydrator, the size and moisture content of the cherries, and the humidity in your environment. Some models are more robust than others, so it’s important to monitor the process and adjust as needed.
- If you find that the drying is taking longer than expected, try rotating the trays every few hours. This simple trick can help ensure even drying and prevent any cherries from feeling left out of the dehydration fun.
- Cut cherries in half or quarters to reduce drying time. Smaller pieces dry faster and more evenly.
Now that your cherries are ready and you know how to optimize the drying process, let’s move on to the actual dehydration methods.
Dehydrating Cherries
Arrange cherries in a single layer with cut sides up for optimal drying conditions. This allows for proper airflow and even dehydration.
Dehydrator Method
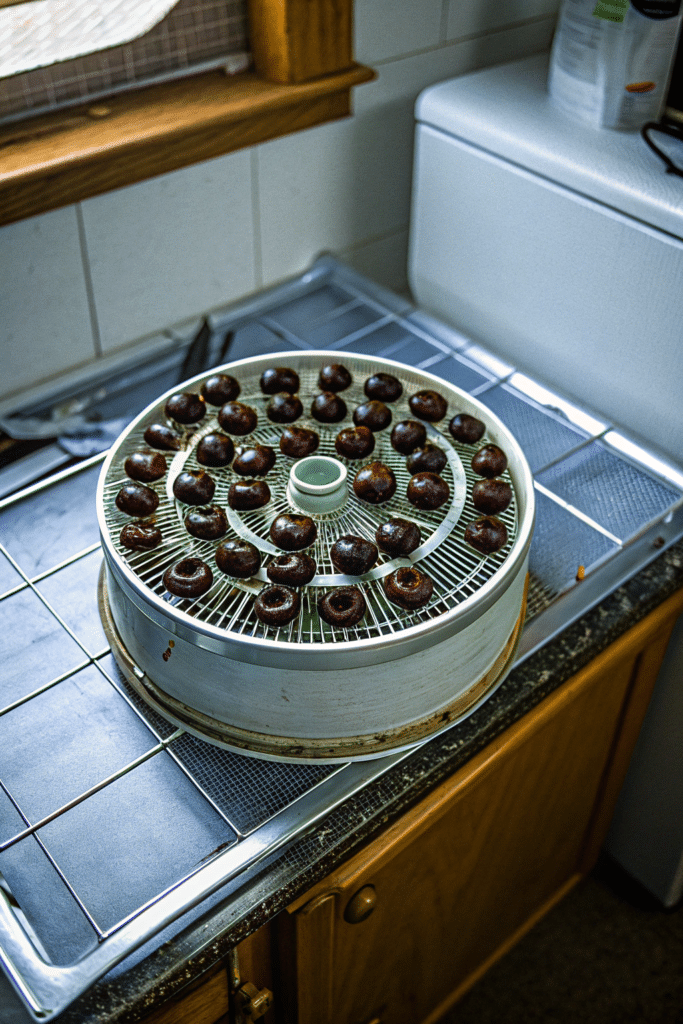
- Arrange the prepared cherries in a single layer, cut sides up, on dehydrator trays lined with silicone mesh screens to prevent cherries from falling through tray holes.
- Set your
food dehydrator to 135°F/57°C. - Dehydrate cherries for approximately 12-36 hours, depending on the size, moisture content, and humidity. Rotate trays every few hours for even drying.
- Cherries are done dehydrating when they are leathery, slightly sticky, and no moisture squeezes out when pressed.
Oven Method
- Preheat your oven to 150°F (or the lowest setting).
- Line a baking sheet with parchment paper.
- Arrange cherries in a single layer, cut sides up, leaving space between each cherry.
- Place the baking sheet in the oven and dry cherries for 10-12 hours, checking occasionally for doneness.
- Cherries are done when they are leathery, slightly sticky, and no moisture squeezes out when pressed.
Now that your cherries are dried to perfection, let’s learn how to store them for long-lasting freshness.
Alternative Dehydration Methods
Don’t have a dehydrator? No problem! You can still dehydrate cherries right in your own kitchen using your oven, or try similar low‑temperature methods when dehydrating blueberries for long‑lasting snacks. To oven dry cherries, start by preheating your oven to its lowest setting, usually between 150°F and 200°F. Line a baking sheet with parchment paper to prevent sticking, then spread your prepared cherries out in a single layer. Let them dry for several hours, checking occasionally to ensure they reach your desired level of chewiness. If you’re feeling adventurous, you can even try sun-drying cherries, though this method takes more time and requires warm, dry weather. No matter which method you choose—oven, dehydrator, or even the sun—the key is to dry the cherries slowly at a low temperature to preserve their natural flavor and texture. This way, you’ll end up with dried cherries that are perfect for baking, snacking, or adding to your favorite dishes, while keeping in mind the nutritional value of dehydrated foods and how dehydration affects nutrients.
Drying and Storage
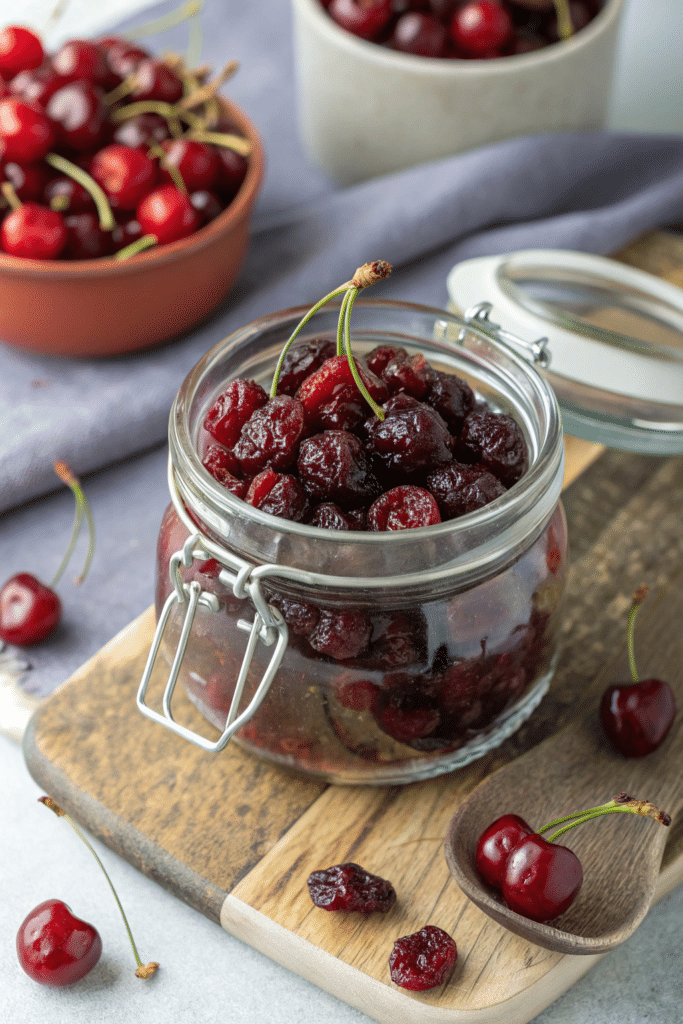
Cherries are done dehydrating when they are leathery, slightly sticky, and no moisture squeezes out when pressed.
Once your cherries are fully dehydrated, let them cool completely before transferring them to an airtight container.
How to Store Dried Cherries
Store the dried cherries in a cool, dark place, such as your pantry. Properly stored dried cherries can last for 6 to 12 months in an airtight container, and they can last about a year in your pantry without significant changes in texture.
For even longer shelf life and to prevent spoilage, you can store dried cherries in the refrigerator. This is especially helpful if you live in a humid climate or want to ensure maximum freshness.
Storage Tips
- Store dried cherries in an airtight container, such as a glass jar, to maintain their delightful flavor and chewy texture. A snug-fitting lid is your cherries’ best friend, keeping them fresh and tasty for whenever you’re ready to snack or cook.
- Keep the container in a cool, dark location, like a pantry or cupboard, to preserve the cherries’ quality. This helps prevent any unwanted moisture or light from sneaking in and spoiling your delicious dried fruit.
- Dehydrated cherries can be stored for at least 12 months, making them a fantastic option for long-term storage. Imagine having a stash of these sweet treats ready to go for any recipe or snack attack throughout the year!
- If you want to extend their shelf life even further, pop them in the freezer where they can last up to 18 months. This way, you can enjoy the taste of cherry season all year round, adding a burst of flavor to your favorite dishes whenever you please.
Dehydrating cherries is a delightful process that requires a bit of patience, but the results are absolutely worth it! Typically, when using a food dehydrator, you can expect the drying process to take anywhere from 12 to 36 hours. This time frame ensures that your cherries achieve that perfect chewy texture while preserving their natural sweetness. However, if you’re using an oven, the drying time might extend to 10 to 12 hours due to the lower temperatures involved.
The drying time can vary depending on several factors, such as the moisture content of the cherries, the humidity in your environment, and the type of equipment you’re using. If you’ve cut the cherries in halves or quarters, they will dry faster compared to whole cherries. It’s like giving them a little head start in the race to become delicious dried treats!
Remember, it’s important to check on your cherries periodically during the process. Rotate the trays if necessary to ensure even drying, and don’t hesitate to give them a little taste test to see if they’ve reached the desired texture.
Now that your cherries are dried and stored, let’s look at how to keep them fresh for the long term.
Long-Term Storage
Once your cherries are perfectly dried, proper storage is essential to keep them tasting fresh and delicious.
How to Store for the Long Term
The best way to store dried cherries is in an airtight container, such as a glass jar or a sturdy plastic container with a tight-fitting lid. For even longer preservation, you can keep your dried cherries in the freezer, which helps lock in their flavor and chewy texture for months on end.
Always store your dried cherries in a cool, dark place, away from direct sunlight, heat, and moisture. This will help prevent them from becoming stale or developing off-flavors, so you can enjoy the taste of cherry season any time you like. With the right storage, your dried cherries can stay fresh and ready to use for up to a year or more.
With your cherries safely stored, let’s organize your pantry for easy access.
Organizing Your Pantry
Pantry Organization Tips
Keeping your pantry organized makes it easy to find and use your dried cherries whenever inspiration strikes. A purposeful pantry system can help you keep track of all your dehydrated fruits and other ingredients. Store your dried cherries in clearly labeled airtight containers, and group similar items together for quick access.
Choose a cool, dry spot in your pantry to help maintain freshness and prevent spoilage. Using baskets or bins can also help keep your pantry tidy and make it simple to see what you have on hand. With an organized pantry, you’ll always be ready to cook, bake, or snack on your favorite dried cherries and other dehydrated fruit recipes for delicious snacks.
Now that your pantry is organized, let’s see how to rehydrate dried cherries for recipes.
Rehydrating Dried Cherries
Rehydrating Methods
- Reconstituting dried cherries is a breeze and can bring a burst of flavor back to your dishes. Simply soak them in water or your favorite liquid, like fruit juice or wine, to give them a new lease on life.
- As a general rule of thumb, use about half the amount of liquid compared to the dried cherries you’re working with. This ratio ensures they plump up beautifully without becoming too soggy.
- Once rehydrated, these cherries are perfect for adding a delightful touch to desserts, baked goods, or even savory recipes. Imagine the possibilities!
- To get started, place the desired amount of dried cherries in a heat-safe bowl. This will be their cozy little spot for a quick soak.
- Pour enough boiling water over the cherries to just cover them. The hot water works its magic, gently coaxing the cherries back to their juicy selves.
- Let the cherries stand for about 10 minutes, or until they’ve absorbed the liquid and are plump and tender. Feel free to taste one to check if they’re just right for your recipe.
Now that you know how to rehydrate dried cherries, let’s explore creative ways to use them.
Using Dried Cherries
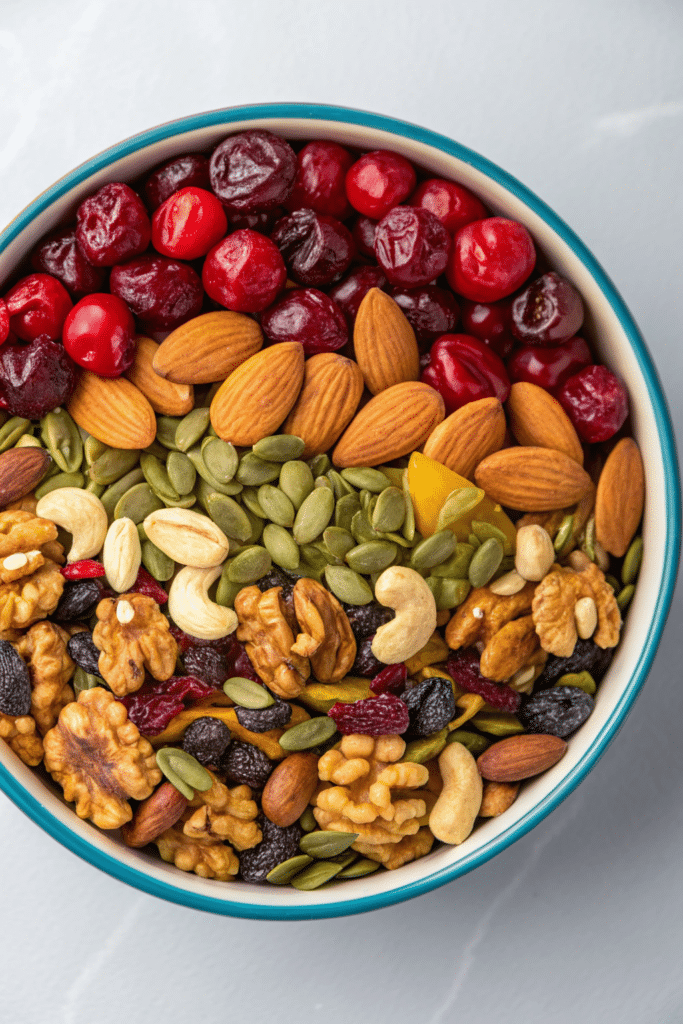
Dried cherries are a delicious addition to many recipes. You can add them to baked goods like muffins, cookies, breads, and cakes for a burst of flavor. Some of our favorite ways to use dried cherries include mixing them into trail mix, sprinkling them over oatmeal, or incorporating them into salads. What are your favorite ways to enjoy dried cherries? Let us know in the comments! And if you’d like another cherry treat, try making homemade cherry fruit leather in the oven or dehydrator.
Delicious Snack Ideas
- Swap out raisins for dried cherries in your favorite recipes to add a sweet and tangy twist that will delight your taste buds.
- Sprinkle dried cherries into your baked goods, salads, and desserts for an extra burst of flavor and color. They make a wonderful addition to muffins, cookies, and even a fresh green salad.
- Enjoy dried cherries as a delightful standalone snack, or mix them into your morning oatmeal or creamy yogurt for a fruity kick that will start your day off right.
- Create your own custom granola bars and trail mix by adding dried cherries. They pair beautifully with nuts, seeds, and other dried fruits, making for a nutritious and satisfying on-the-go snack.
Tips and Variations
Reducing Drying Time
- To achieve perfectly dehydrated cherries, it’s important to prepare them in uniform pieces. This ensures that each piece dries at the same rate, giving you a consistent texture throughout. Whether you cut them in halves or quarters, try to keep the sizes similar for the best results.
- When arranging cherries on the dehydrator trays, leave space between each piece. This allows for proper airflow, which is crucial for even drying. Think of it as giving each cherry its own little stage to shine on!
- Keep an eye on the humidity levels in your environment, as high humidity can extend drying time. If you’re in a particularly humid area, you might need to adjust your drying time accordingly. It’s all about finding that sweet spot for your cherries to dry perfectly—just as you would when dehydrating strawberries using a dehydrator or oven.
- For a quicker drying process, cut cherries in half or quarters. Not only does this speed up the drying time, but it also makes the cherries more versatile for various recipes. Imagine the possibilities with these delightful little bites ready to enhance your meals!
- Cut cherries in half or quarters to reduce drying time.
Experimenting with Flavors
- Add a splash of lemon juice to the cherries before dehydrating for extra flavor. This not only enhances the natural sweetness of the cherries but also adds a delightful tangy twist. It’s like giving your taste buds a little citrusy surprise that makes the dried cherries even more irresistible.
- Mix dried cherries with other dried fruits for a delicious snack. Imagine a medley of flavors and textures, where sweet cherries mingle with chewy apricots, tart cranberries, or even slices of dried apples. This combination creates a snack that’s perfect for any time of day, whether you’re on a hike or just need a quick pick-me-up at work.
- Use dried cherries in savory dishes, such as salads and sauces. These little bursts of sweetness can elevate a simple salad to gourmet status or add a unique depth to sauces. Picture a fresh green salad with dried cherries, goat cheese, and toasted almonds, drizzled with a balsamic vinaigrette. Or imagine a rich, savory sauce with hints of cherry sweetness paired with roasted meats. The possibilities are endless, and your taste buds will thank you!
Converting Fresh to Dried
Fresh Cherries vs. Dried Cherries
- Dehydrating cherries is a fantastic way to remove around 90% of their moisture, transforming them into a deliciously chewy and long-lasting snack. This process not only concentrates their natural sweetness but also preserves their delightful flavor for months.
- When converting fresh cherries to dried cherries, it’s important to note that the method you choose can influence the outcome. Whether you’re using a
food dehydrator , an oven, or even an air fryer, each technique has its own unique way of bringing out the best in your cherries. - To ensure you get the right amount of dried cherries for your recipe, consider using a kitchen scale or a handy conversion chart. This will help you measure out just the right amount, ensuring your dishes are perfectly balanced with that sweet cherry goodness.
- Fresh sweet cherries are perfect for dehydrating, offering a naturally sugary treat that’s hard to resist. On the other hand, if you’re planning to rehydrate your cherries for recipes like pie fillings or sauces, sour cherries might be your best bet. Their tartness adds a wonderful depth of flavor when brought back to their juicy state. You can use similar techniques when dehydrating nectarines in a food dehydrator to enjoy them year‑round.
Preserving Cherries
Freezing Cherries
- Freezing fresh cherries is a fantastic way to preserve their delicious flavor for future use. Whether you’re planning to whip up a smoothie, bake a scrumptious dessert, or simply enjoy them as a cool snack, frozen cherries are incredibly versatile.
- Start by giving your fresh cherries a good wash to remove any dirt or debris. Once they’re clean, pat them dry with a towel to remove excess moisture. This step is important to prevent ice crystals from forming when you freeze them, just as proper prep helps when dehydrating peaches for healthy snacks.
- Next, use a cherry pitter to remove the pits. If you don’t have one, a small knife can do the trick. Just be careful and take your time—after all, you’re preserving these little gems for later enjoyment!
- Once your cherries are pitted, spread them out on a baking sheet lined with parchment paper. This helps prevent them from sticking together as they freeze. Pop the baking sheet in the freezer for a few hours until the cherries are frozen solid.
- After freezing, transfer the cherries to an airtight container or a freezer bag. This keeps them fresh and ready for whenever you need a burst of cherry goodness. Don’t forget to label the container with the date, so you know just how long they’ve been waiting for their moment to shine!
- Frozen cherries are a delightful addition to smoothies, adding a natural sweetness and vibrant color. They also work wonders in baked goods like muffins and pies, where they release their juicy flavor as they bake. And let’s not forget desserts—frozen cherries can be a refreshing topping for ice cream or yogurt, adding a pop of flavor and a touch of elegance.
Uses for Dehydrated Cherries
- Snacking on the go
- Trail mix
- Granola
- Oatmeal cookies
- Salads
You can toss dried cherries into salads, granola, or baked goods for added flavor and texture. For example, combine them with chopped roasted walnuts and sliced pear over a bed of dark leafy greens, such as spinach or arugula. They also work great in grain salads, for example, a mixture of quinoa, fresh mint, dehydrated cherries, sliced oranges, and an orange juice vinaigrette. Alternatively, you can also add them to tuna or chicken salad for use in sandwiches, or bake them into wholegrain muffins.
Be sure to check for any missed pits before eating or using dehydrated cherries, and bite down carefully, as cherry pits can be hard and potentially harmful. If you notice any cherries with mold or excess moisture during storage, toss them out to prevent spoilage.
Now that you know how to use your dried cherries, let’s make sure they’re cooled and conditioned for the best results.
How to Cool the Dehydrated Cherries
To make sure the cherries are thoroughly dried you have to wait until they have completely cooled (the dried fruit should be similar to how cookies up after you take them out of the oven). Switch off the food dehydrator and open it. Leave the dried cherries to cool on the trays for 20 to 30 minutes.
After the cherries have been cooled, break one of the dehydrated cherries in half. There should be no noticeable moisture along the surface of the break.
Now that your cherries are cooled, it’s time to condition them for optimal storage.
Conditioning the Dehydrated Cherries
Conditioning is the process of equalizing the remaining moisture in your dried cherries to prevent spoilage. Condition dried cherries by placing them in a jar and shaking daily for 7-10 days.
Put the dehydrated, cooled cherries into glass jars, only fill the jars about 2/3 full. Cover the jars. Shake the jars a couple of times daily for a week. The jar redistributes the dried cherries as well as any condensation the fruit may still contain.
If any condensation shows up on the sides of the jars, your cherry isn’t dehydrated well just yet, and it needs to go back into the
Once you have finished with conditioning your dried cherries, you need to store them in an airtight container away from heat or direct light. It’s ok to fill the jars fully at this point: the 2/3 full was just for the conditioning side when you needed to be able to shake the pieces around.
With your cherries conditioned and stored, let’s review how long the process takes.
How Long Does It Take to Dehydrate Cherries
Depending on the moisture content, your humidity, your food dehydrator, and whether you’ve cut the cherries or are leaving them intact, your dehydrating times may vary. In a dehydrator set at 135°F/57°C, expect 12-36 hours for cherries to fully dry.
Troubleshooting Common Issues
- If your dried cherries turn out hard or brittle, they may have been over-dried—check them more frequently next time and remove them while they’re still plump and chewy.
- If you notice any signs of mold or spoilage, it’s likely due to excess moisture or improper storage. Always let your cherries cool completely before transferring them to an airtight container, and store them in a cool, dry place away from sunlight.
- If condensation appears in the jar during conditioning, return cherries to the dehydrator to dry more.
- Uneven drying? Rotate trays every few hours and ensure cherries are arranged in a single layer, cut sides up.
Following these simple tips will help you enjoy delicious, perfectly dried cherries every time, and keep your homemade snacks fresh for months to come.
Benefits of Dehydrated Cherries
- They are a good source of copper.
- It boosts your intake of vitamin C
- Each quarter of cup serving of dehydrated cherries boasts a vitamin A content of 1,132 international units.
Conclusion
In conclusion, learning how to make this dehydrated cherries recipe opens up a world of culinary possibilities. Whether you’re snacking on them straight from the jar, mixing them into your favorite trail mix, or using them to enhance baked goods, dehydrated cherries are a delightful addition to any kitchen. With their sweet flavor and chewy texture, they offer a tasty and nutritious way to enjoy cherries all year round.
Did you make this recipe? Let us know in the comments.
For more delicious and mouth-watering recipes, click here!
FAQ
How do you dehydrate cherries?
Dehydrating cherries is a simple and rewarding process that allows you to enjoy their sweet flavor all year round. Start by washing and pitting fresh cherries to ensure they’re clean and ready for drying. Then, place them in a food dehydrator or a low-temperature oven. Let them dry for several hours until they reach that perfect chewy texture. It’s a delightful way to preserve cherries and create a healthy snack that’s both versatile and delicious!

