Welcome to the world of food dehydration! If you’ve ever wondered how to keep your favorite fruits, veggies, or even meats fresh for longer, you’re in the right place. With our instructions for food dehydrator, you’ll be preserving and snacking in no time.
“Dehydrate nature’s bounty and enjoy it all year round.”
Using a food dehydrator can seem a bit scary at first but don’t worry – with our step by step guide and easy to follow food dehydrator instructions you’ll be a pro in no time. From choosing the best produce to dehydrator settings we’ve got you covered. Let’s get started and turn your kitchen into a haven of healthy homemade treats!
Getting Started: Unpacking Your Food Dehydrator
Ready to start the food dehydration adventure? Unpacking your food dehydrator is the first step. Whether you have a Ronco 5-Tray Electric Food Dehydrator, a SAHARA foldable dehydrator, or another brand, the basics are the same. Keep your food dehydrator instructions as a quick reference guide.
Open the box and remove all contents. Check for the main unit, trays, and any additional accessories like fruit roll sheets or jerky guns. Make sure everything is there and in good condition. Save the packaging in case you need to return or exchange your dehydrator.
Now clean all detachable parts including the trays and inside the dehydrator. Even if it looks clean, cleaning removes any residue from manufacturing or packaging. Use mild soap and water, then dry all parts thoroughly before reassembling.
Your dehydrator is now clean and assembled. Find a spot on your countertop or kitchen island. Make sure the area is well ventilated and has good airflow around the unit. This will keep you organized and dehydrating.
Food Dehydrator 101: Key Parts and Functions
Let’s get to know the main components and functions of your food dehydrator before we start cooking!
At the core of any food dehydrator is a heating element and a fan. The heating element heats the air and the fan circulates that warm air throughout the dehydrator, removing moisture from the food inside. This dynamic duo is crucial for even and efficient dehydrating so get to know these parts.
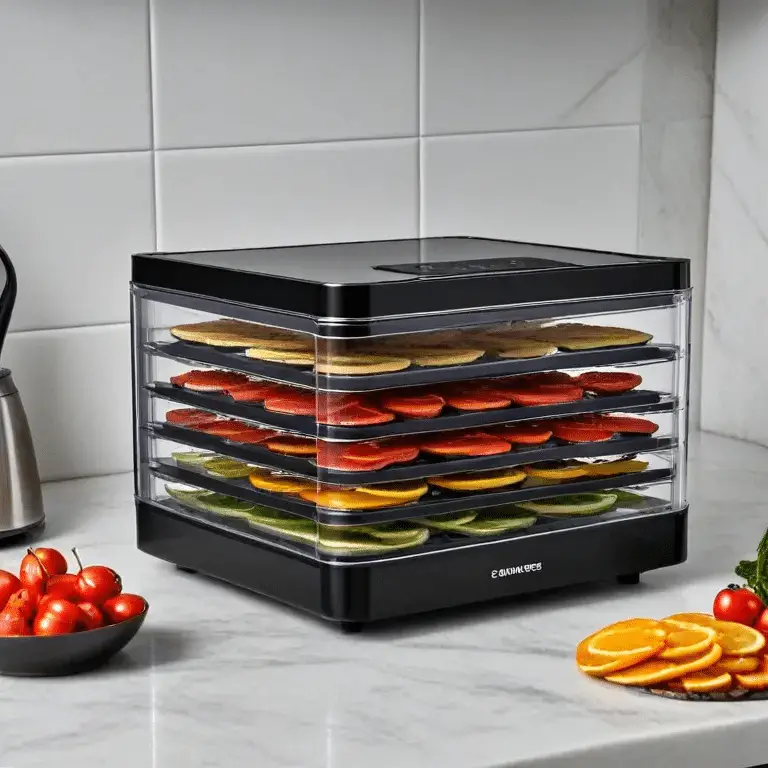
Next, you’ll have stackable trays. These trays allow you to spread out your food items evenly so there’s good airflow around each piece. Depending on your model you may have a few trays or several layers. More trays means you can dehydrate more at once but may require a bit more attention to ensure even drying.
Another important part is the venting system. Usually located at the top or back, the vents release the moisture from your food. Proper ventilation is key to efficient dehydrating, preventing humidity from building up inside the unit. Make sure your vents are clear and working before each use.
Many modern food dehydrators have adjustable thermostat settings so you have control over the drying temperature. This is great as different foods require different dehydrator settings to get the best results. Fruits for example need lower temperatures to preserve their natural sweetness, and meats need higher temperatures to be safe.
Lastly, consider the control panel of your dehydrator. Whether digital or analog this is where you set the temperature and time for your food items. Get to know your control panel and you’ll be able to fine tune the dehydrating process and follow the food dehydrator instructions for each type of food.
Dehydrator Settings: What Works for What
Different foods have different dehydrating requirements and knowing your dehydrator settings is key to getting the best results. For example, apples and bananas do well at 125°F (52°C). These settings will retain the natural sweetness and get that perfect chewy texture. Vegetables need a slightly higher temperature to dehydrate thoroughly without losing their nutrients.
Here’s what works for what:
- Fruits: 125°F (52°C). For strawberries and blueberries start at 135°F (57°C) to help break down the skin.
- Vegetables: 130°F (54°C). Leafy greens may need a bit more time to dry completely.
- Meats: For jerky 160°F (71°C). Make sure your meat is sliced thin and evenly for even drying.
Another tip is to load your dehydrator evenly and not overlap the pieces. This way air can circulate properly around the food and dehydrating will be faster. Remember smaller and thinner pieces dehydrate faster. So if you’re in a hurry cut your food into smaller portions and don’t overload the trays.
Food Dehydrator Manual PDF
Looking for a comprehensive guide to get the most out of your dehydrator? Manuals are the ultimate resource that has specific food dehydrator instructions for your model. Many manufacturers offer downloadable PDF versions of their manuals which can be a lifesaver if you lost your original copy. Let’s find out where to get them.
If you have a popular model like the Nesco Snackmaster FD-75A or the COSORI Premium Dehydrator you’re in luck. Both companies have their manuals available online. Just visit their website and go to the ‘Support’ or ‘Resources’ section. There you’ll find a link to download the manual PDF which has the instructions for food dehydrator use and maintenance.
The Excalibur dehydrator is one of the best on the market and also has their manual available online. This resource has all the dehydrator settings for different food types so you can get the best results. For example, if you want to know the settings for beef jerky or drying vegetables their manual has you covered.
If you have a more specialty model like the SAHARA foldable dehydrator the manufacturer’s website is your best bet. They usually have a support section where you can download the manual PDF. This document will walk you through every function and feature so you can get the most out of your new appliance.
Conclusion: Tips to Get You Started
By following these food dehydrator instructions you’ll be making delicious and healthy snacks in no time in your own kitchen. Remember to follow each step carefully from understanding the dehydrator settings to cutting and arranging your food on the trays. The more you practice the better you’ll get. Happy dehydrating!
Hey there, since 2016, my mission has been to provide you with the information and guides you need to make food dehydrating simple and fun. Whether you're a newbie or a seasoned pro, my site offers helpful guides, reviews, and recipes to enhance your dehydrating experience. I take pride in only recommending products I believe in, ensuring my readers' trust. As an affiliate of various programs, including Amazon Associates, your support helps me continue providing quality content. Thanks for stopping by, and happy dehydrating!