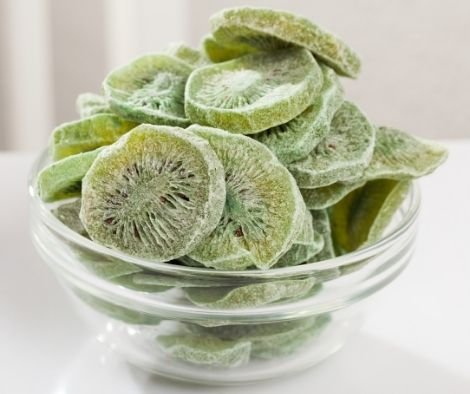
How often have you eaten a dried kiwi slice? If it’s never, don’t worry. Kiwis are almost always fresh and juicy in the grocery store. Dried fruits like apple and banana are popular snacks found in most grocery stores, and dried kiwi is quickly becoming one of the favorite fruits for homemade dried snacks. But if you want to eat delicious dried kiwi slices right now, then this blog post is for you!
Dehydrating kiwi requires minimal prep, making it a quick and easy process that any home cook can do with basic tools.
When drying this healthy snack, all you need is a food dehydrator or oven! In this recipe blog post, we will discuss how to dehydrate kiwi slices. This process is simple and easy- it only takes a few hours before the fruit is ready to eat.
Dehydrated Kiwi Recipe Table
Step
Instructions
Tips
1. Prepare Kiwi
Wash fresh, ripe kiwis thoroughly. Peel if desired.
Leaving skin on adds fiber and nutrients; peel if you prefer a smoother texture.
2. Slice Kiwi
Slice kiwis into thin, even rounds about 1/8 to 1/4 inch thick.
Use a sharp knife or mandolin slicer for uniform slices to ensure even drying.
3. Optional Pre-Treatment
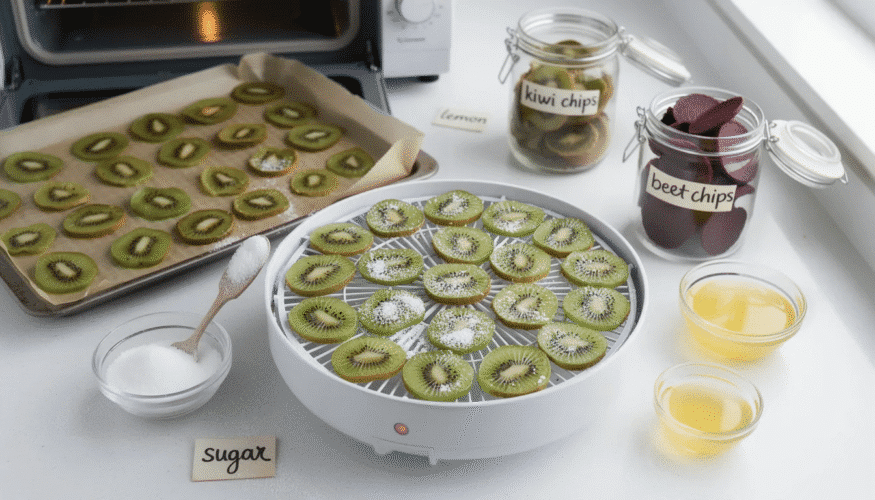
Dip slices in lemon juice or sprinkle with sugar to prevent browning and enhance flavor.
Lemon juice helps preserve vitamin C; sugar adds sweetness if desired.
4. Arrange Slices
Place kiwi slices in a single layer on dehydrator trays or a baking sheet lined with parchment paper.
Avoid overlapping slices to prevent sticking and ensure even drying.
5. Dehydrate
Set dehydrator to 135°F and dry for 6-10 hours until slices are leathery and no moisture remains.
Check slices periodically; drying time varies with thickness and humidity.
6. Oven Alternative
Preheat oven to lowest setting (~150°F). Place slices on parchment-lined baking sheet.
Prop oven door open slightly to allow moisture to escape. Dry for 3-4 hours, flipping halfway.
7. Cool & Store
Let dried kiwi cool completely before storing in an airtight container.
Store in a cool, dark place; use vacuum sealed containers for long-term storage.
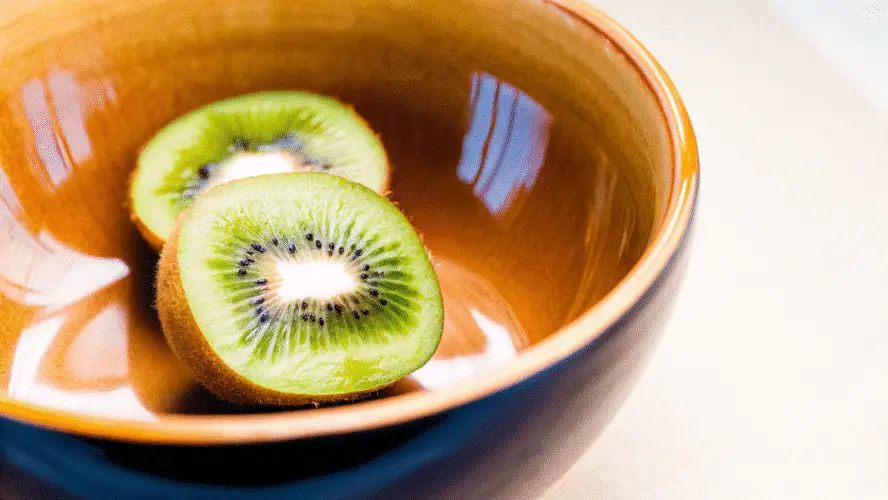
Kiwi fruit is a vibrant, nutrient-packed treat that brings a burst of sweet and tangy flavor to your table. With its signature green flesh and tiny black seeds, kiwi has become a favorite fruit for many, whether enjoyed on its own or as part of a fruit salad. The skin of the kiwi is also edible and can be left on for extra nutrients if desired. But did you know you can preserve that delicious taste and enjoy kiwi all year long by making dried kiwi slices? Dehydrating kiwi is a simple way to transform fresh fruit into chewy, sweet dried kiwi or crispy dehydrated kiwi chips. In this article, we’ll show you how to dehydrate kiwi, so you can savor this unique fruit in a whole new way—perfect for snacking, baking, or adding to your favorite trail mix.
Benefits of Dehydrating Kiwi
Dehydrating kiwi offers a host of benefits, making it a smart choice for anyone who loves healthy snacks. Dried kiwi slices are packed with fiber, vitamins, and minerals, so you can enjoy a nutritious boost with every bite. The dehydration process helps lock in the natural sweetness and tangy flavor of kiwi, while also preserving its nutrients. Dehydrated kiwifruit retains much of the healthful vitality of fresh kiwifruit despite losing some vitamin C. Storing your dried kiwi in an airtight container keeps it fresh for up to six months, allowing you to enjoy this fruit even when it’s out of season. Dehydrating kiwi gives it a longer shelf life compared to fresh fruit, making it easier to store and use over time. Dehydrated kiwi is incredibly versatile—you can add it to homemade trail mix, energy bars, or even blend it into fruit leather for a fun twist, or pair it with other fruits using dehydrated fruit recipes for delicious snacks. Plus, dehydrating kiwi helps reduce food waste, letting you make the most of your fresh fruit and enjoy it in a variety of creative ways.
What You Need
Buy a food dehydrator with an adjustable temperature setting; I use my Excalibur 9-tray dehydrator because of the many things I can make.
Dehydrator rack (helps organize kiwi slices for even drying)
Mesh tray liners (make removal of dried kiwi slices from dehydrator racks easier)
Ovens (if you want to use this method for dehydrating kiwi and other fruits)
Cookie tray for making kiwi chips in the oven
Ingredient
Fresh kiwi fruit
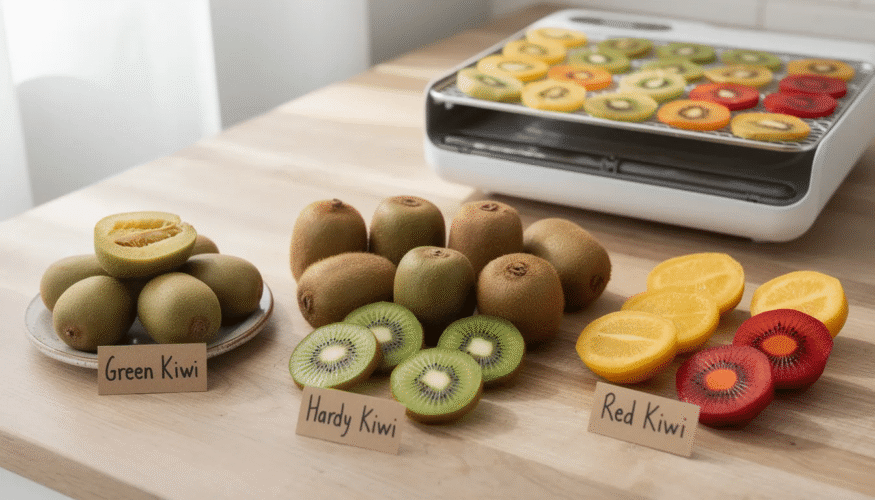
Choosing the Right Kiwi Variety
Selecting the right kiwi is key to making the best dehydrated fruit. For the tastiest results, choose ripe kiwis that yield slightly to gentle pressure and are free from brown spots or blemishes. Hardy kiwi is an excellent choice for dehydrating, thanks to its naturally sweet flavor and soft texture. Ripe kiwis should be used for dehydrating as they have more sugar and will dry faster. You can also experiment with other varieties like golden kiwi or red kiwi—just remember that different types may require a bit longer or shorter dehydration time. No matter which variety you pick, starting with ripe, high-quality kiwis will ensure your dried fruit turns out delicious every time. Regardless of the variety you choose, you can prepare and dehydrate them the same way.
Preparing Kiwi for Dehydration
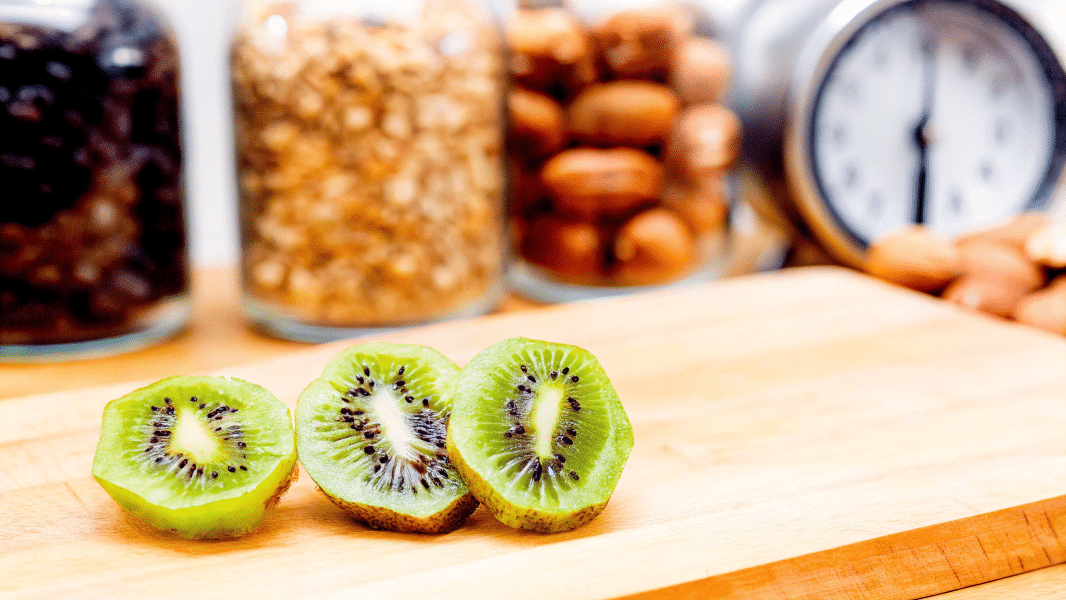
Preparing kiwi for dehydration is quick and easy. Begin by thoroughly washing your kiwi fruit to remove any dirt or residue. Next, use a sharp knife to slice the kiwi into 1/4 inch slices. Cutting the kiwi into consistent inch slices ensures even dehydration and the perfect balance of chewiness and flavor. If you prefer, you can slice the kiwi in half lengthwise before cutting it into thinner pieces. Be sure to remove any seeds or stems as you go. Place the kiwi slices in a single layer on a baking sheet lined with parchment paper, or use dehydrator trays or a cookie sheet if you’re using a dehydrator. Arranging the kiwi in a single layer helps prevent sticking during dehydration. Properly preparing your kiwi ensures even drying and the best possible texture in your finished dried fruit.
How to Dry Kiwi in Dehydrator
First, you need to wash the kiwi fruit before peeling.
Peel the kiwi with a vegetable peeler, then slice it into thin round slices using a sharp knife (1/8 – 1/4 inch thick). You can also leave the skin on for extra fiber and antioxidants. The lighter and riper the fruit, the faster it will dehydrate. Uniform slicing is important for even drying—try to keep your slices as consistent as possible so the mixture dries evenly.
Tip: Dipping the slices in lemon juice can help prevent browning and preserve vitamin C content. You can also add sugar or lemon juice to the kiwi slices before dehydrating to enhance flavor.
Place each sliced piece on your dehydrator tray; as you prepare your food, make sure not to overlap any pieces. Using mesh tray liners can make removal easier after dehydration. Using ripe kiwis will help them dry faster during the drying process.
Place the tray in your Excalibur drying machine. Set the food dehydrator temperature to the lowest temperature possible, ideally 135 F, for 10-18 hours until dry or leathery. Kiwi slices are generally dehydrated within 10 to 18 hours in a dehydrator depending on slice thickness and humidity. This gentle drying process helps preserve vitamins. Check after six hours.
Once ready, remove from your dehydrator and store the dehydrated kiwi slices in an air-tight container. Proper long term storage in airtight containers is important for maintaining the quality of your dried kiwi chips.
This process is not time consuming, and making homemade dehydrated fruits like dried kiwi chips provides a healthy snack option packed with vitamins.
Tip: If your kiwis are not ripe, place them in a paper bag with a banana to speed up ripening before you dehydrate kiwis.
Firstly you will need to wash the kiwis under the tap.
Then it would be best if you sliced your kiwifruit into very thin, uniform slices (¼ inch thick). Uniform slicing is important for even drying. For best results, use a sharp knife or mandoline. To prevent browning and help preserve vitamin c, dip the slices in lemon juice before placing them on the tray. Place the pieces onto a cookie tray lined with parchment paper and place them in an oven preheated to 150-170 degrees Fahrenheit. Set your oven to the lowest temperature possible for gentle, even drying. After placing the kiwi slices in the oven, prop the oven door open slightly to allow moisture to escape and improve the drying process. The time it will take for dehydrating kiwi fruit is about 2-3 hours or longer; this depends on the depth of the fruit slices. Check after the three hours mark to make sure they are dried out. If not, leave them in the oven for a while longer until all the moisture is removed from the fruit and completely dry to the touch. Keep in mind that different ovens may have different temperature settings and airflow, so drying times may vary.
Once the dehydrating process is complete, remove them from the oven, let them cool, and place the fruit in an airtight container until ready for eating, just as you would when dehydrating fruit using a food dehydrator for long-lasting storage. Enjoy your homemade dried kiwi chips, which are a delicious snack packed with vitamin c and nutrients.
Creating Dehydrated Kiwi Chips
Making dehydrated kiwi chips is simple, whether you use a dehydrator or your oven. For a dehydrator, set the temperature to 135°F (57°C) and let the kiwi slices dry for 6-8 hours, checking for a chewy, flexible texture. If you’re using an oven, set it to the lowest setting—usually around 150°F (65°C)—and dry the slices for 3-4 hours, flipping them halfway through for even drying. For an extra burst of flavor, try sprinkling a little sugar or drizzling lemon juice over the kiwi slices before dehydrating. Once your dehydrated kiwi chips are completely cool, store them in an airtight container to keep them fresh and delicious. These sweet, tangy chips can resemble sour gummy candy in both flavor and chewiness, making them a fun, healthy alternative to traditional candies. They make a perfect snack on their own or a tasty addition to your favorite recipes, just like dehydrated beet chips
Creating Fruit Leather
If you’re looking for a fun twist on dried kiwi, try making homemade kiwi fruit leather or experiment with cherry fruit leather made at home for another flavorful, chewy snack option. Start by blending fresh kiwis with a splash of lemon juice—this not only brightens the flavor but also helps prevent browning. For a unique taste, add other fruits like bananas or strawberries to the mix, or follow an apple fruit leather recipe for dehydrator to create layered, multi-fruit snacks. Once your fruit blend is smooth, pour it onto a parchment paper-lined baking sheet or spread it evenly across dehydrator trays; similar methods work wonderfully when making apricot fruit leather in a food dehydrator. Make sure the mixture is about 1/8 inch thick for the best results. Dehydrate at 135°F (57°C) for 6-8 hours, or until the fruit leather is dry to the touch but still flexible. When it’s ready, simply peel the fruit leather off the parchment paper and cut it into strips or roll it up for a tasty snack. Store your homemade fruit leather in an airtight container to keep it fresh and ready to enjoy whenever you need a sweet, chewy treat.
Dehydrating Kiwis in Batches
If you want to make a big batch of dried kiwi slices for snacking or sharing, it’s easy to do! Slice several kiwis into thin rounds and arrange them in a single layer on dehydrator trays or a baking sheet lined with parchment paper. Be sure to leave a little space between each slice so air can circulate and the slices dry evenly. For a sweeter treat, lightly sprinkle cane sugar over the kiwi slices before you start the drying process. Dehydrate at 135°F (57°C) for 6-8 hours, checking occasionally until the dried kiwi slices are chewy and no longer sticky. Once cooled, transfer your dried kiwi to an airtight container to keep them fresh and delicious. Making kiwi slices in batches is a great way to always have a healthy, homemade snack on hand.
Tips:
How to tell if my kiwifruit is dehydrated?
A few ways to know if your kiwi fruit slices are dried out would be:
Should be firm
It should be dry to touch
Common Mistakes to Avoid When Dehydrating
To get the best results when making dehydrated kiwi, watch out for a few common mistakes. First, make sure to slice your kiwi thinly and evenly—thick slices can lead to uneven drying and a chewy, inconsistent texture. Avoid crowding the dehydrator trays or baking sheet; arrange the kiwi slices in a single layer with space between each piece to let air circulate freely. Keep an eye on the drying process to prevent over-drying, which can make dried kiwi slices brittle and less enjoyable to eat. Finally, always store your dried kiwi in an airtight container to protect it from moisture and keep it chewy and fresh. By following these tips, you’ll enjoy perfectly dried kiwi slices every time!
How to Store Dehydrated Kiwis Safely
Once the kiwi slices are dehydrated, they need to be stored in a way that keeps them safe from getting contaminated, following the same best practices used when dehydrating different foods for snacks and meals. Dry fruits and veggies can last for months when stored properly. Conditioning is recommended after drying to ensure even moisture distribution and prevent spoilage. For optimal long term storage of dehydrated fruits, use airtight containers to maintain their quality and vitamin content, preventing moisture and spoilage.
Homemade dehydrated fruits offer more control over ingredients and often retain more natural vitamins compared to those found in grocery stores or most grocery stores, where prepackaged dried fruit may contain added preservatives.
You should keep your dried fruit and vegetables inside airtight containers or bags.
The containers or bags should be placed in cool, dry places without direct sunlight exposure. This may cause them to lose nutritional value over time.
Keeping dehydrated kiwi chips inside the fridge is not advisable. This is because they may get moisture inside if not appropriately stored; however, you can choose this option to keep them for more extended periods but make sure the container is airtight and no moisture is visible. Dehydrated kiwi can last for 6 months to 1 year when stored properly at room temperature.
Also, you should always label your dehydrated food items. This will make it easier to find what you need when cooking or preparing foods from these ingredients.
How to Use Dehydrated Kiwi
Use dehydrated kiwi slices in fruit salads or as a baking ingredient to add flavor and nutrients. Dehydrated fruits like kiwi, apple, banana, pineapple, and peaches are a versatile snack option. If you’re curious about other choices, explore what fruit can I dehydrate to expand your homemade snack lineup.
Make healthy homemade dried kiwis that can be used as an additive for smoothies, yogurt parfaits, excellent ingredient for granola, pancakes, etc. Kiwi jam is another delicious way to preserve your favorite fruits.
Use them as a nutritious candy alternative to satisfy your sweet tooth. Cut them up into bite-size pieces for easy snacking, or enjoy dried kiwi chips for a tangy, sour snack.
This dried fruit can also be used as a sweet treat for children to enjoy or as a healthy snack for day hikes, backpackers, and anyone who appreciates the advantages of dehydrating food for lightweight, long-lasting snacks. Dried kiwi makes a great trail mix ingredient due to its lightweight and sweet flavor. Dehydrated kiwi is a great source of vitamin c, even more than an orange, and pairs well nutritionally with dehydrated citrus fruits and their benefits.
You can add it into a homemade trail mix mixture with other dehydrated fruits like apple, banana, pineapple, and peaches.
Conclusion
Kiwi is a superfood that everyone can benefit from. You don’t need many ingredients to dehydrate kiwi, and they are going to make an excellent snack for later on. I hope this blog post has been helpful! If you want more information about food dehydrator or food dehydrators, check out our website Dehydrated Foodz or contact us!
DannyContent Writer
Hey there, since 2016, my mission has been to provide you with the information and guides you need to make food dehydrating simple and fun. Whether you're a newbie or a seasoned pro, my site offers helpful guides, reviews, and recipes to enhance your dehydrating experience. I take pride in only recommending products I believe in, ensuring my readers' trust. As an affiliate of various programs, including Amazon Associates, your support helps me continue providing quality content. Thanks for stopping by, and happy dehydrating!