We earn a commission if you make a purchase, at no additional cost to you.
09/22/2026 04:39 pm GMT
🍊 Dehydrated Food Info Finder — Temperatures & Drying Times
Choose a category, then pick a food to see its drying temperature and time.
⚠️ Safety Disclaimer: Drying times are estimates and vary based on slice thickness, food moisture content, humidity, and your dehydrator model. Always check for doneness before storing — food should feel dry, leathery, or brittle with no moist spots. Improperly dried food can harbour mould and bacteria. For meat and poultry, follow USDA safe internal temperature guidelines: beef and pork to 160°F (71°C), poultry to 165°F (74°C). Use a food thermometer when in doubt. Store all dehydrated foods in airtight containers in a cool, dark place and discard anything showing moisture, mould, or off odours.
How to Use Dehydrated Foods: Practical Guide to Cooking, Storage, and Everyday Meals
Dehydrated food, dried food, and freeze dried food are lightweight, shelf-stable ingredients that can power everyday meals, trail food, and emergency supplies with minimal effort. The techniques for using them are straightforward once you understand a few core principles.
Using dehydrated foods is mostly about adding the right amount of water, enough time, and good seasoning rather than learning totally new recipes.
Dehydrated vegetables, fruits, and meats shine in soups, stews, casseroles, and one-pot dishes where they can simmer and fully rehydrate.
Proper storage in airtight containers in a cool, dark place-with optional vacuum sealing-keeps most home-dried food fresh from 6 months up to several years depending on the type.
You can combine dehydrated ingredients with pantry staples like canned chicken, rice, and beans to build complete dehydrated meals for any situation.
This guide covers concrete techniques for rehydrating, cooking, combining with other preserved foods, and choosing when to use dehydrated vs freeze dried food.
Introduction: Why Learn to Use Dehydrated Food Now?
Between rising grocery prices, growing interest in home gardening, and the reality of power outages and supply chain disruptions, more people are looking for ways to make their food supply resilient. Backpacking, van life, and off-grid living have also pushed lightweight, shelf-stable ingredients into the spotlight. Dehydrated food fits all of these situations.
So what exactly is dehydrated food? In plain language, it is any food that has been dried using heat and airflow-whether from the sun, an oven, or an electric food dehydrator. Dehydrating removes 85 to 95% of moisture, making food compact and shelf-stable. Freeze dried food goes further, removing up to 99% of moisture through a vacuum process that preserves texture and nutrients better but costs significantly more. The broader term “dried food” usually means dehydrated unless freeze-drying is specified. Sun drying has been used for 12,000 years, making food dehydration one of the oldest preservation methods on earth.
This article will help you with three main situations: everyday cooking from pantry staples, lightweight meals for camping or travel, and long term storage for emergencies. If you can simmer soup or cook rice, you already have the skills you need.
Here is the roadmap: rehydration basics, cooking techniques for vegetables, fruits, and meat, complete meal assembly, outdoor and everyday use, storage and safety, nutrition, and beginner tips.
Dehydrated vs Freeze-Dried vs Other Preserved Foods
Before you start cooking, it helps to understand how dehydrated food compares to other preserved options in your pantry.
Dehydrated foods tend to have a chewy or firm texture. They work best cooked into dishes where liquid and time restore them. Dehydrated food typically has a shorter shelf life than freeze-dried food-usually 6 months to a few years depending on storage. Dehydrated food is lighter and more compact than canned food, making it easier to store in bulk.
Freeze dried food is very light and crispy, rehydrates in minutes, and boasts the longest shelf life-10 to 30 years in commercial packaging. Freeze-dried food lasts longer than dehydrated food, but freeze-drying is more expensive to produce than dehydrating, both in equipment and energy costs.
Canned food like canned chicken, tomatoes, and canned beans is ready to eat and affordable but heavy and has a shorter usable window once opened. Frozen vegetables offer great texture but depend entirely on reliable electricity.
Smart home cooks combine these formats. For example, toss dehydrated vegetables into a pot with canned chicken for a quick soup, or mix freeze dried fruit with dried nuts for trail mix. Dairy products are generally poor candidates for home dehydration, but commercially freeze dried dairy-powdered milk, cheese bites, yogurt drops-can be purchased and used like any other dry ingredient.
Understanding these differences helps you pick the right ingredient for each recipe and storage goal.
Rehydration Basics: How to Bring Dehydrated Foods Back to Life
Mastering rehydration-water ratio, time, and temperature-is the single most important skill for making dehydrated foods taste like real food. Rehydrating dehydrated foods properly is key for maintaining their nutritional value and getting the texture you want.
Here are the general rules of thumb:
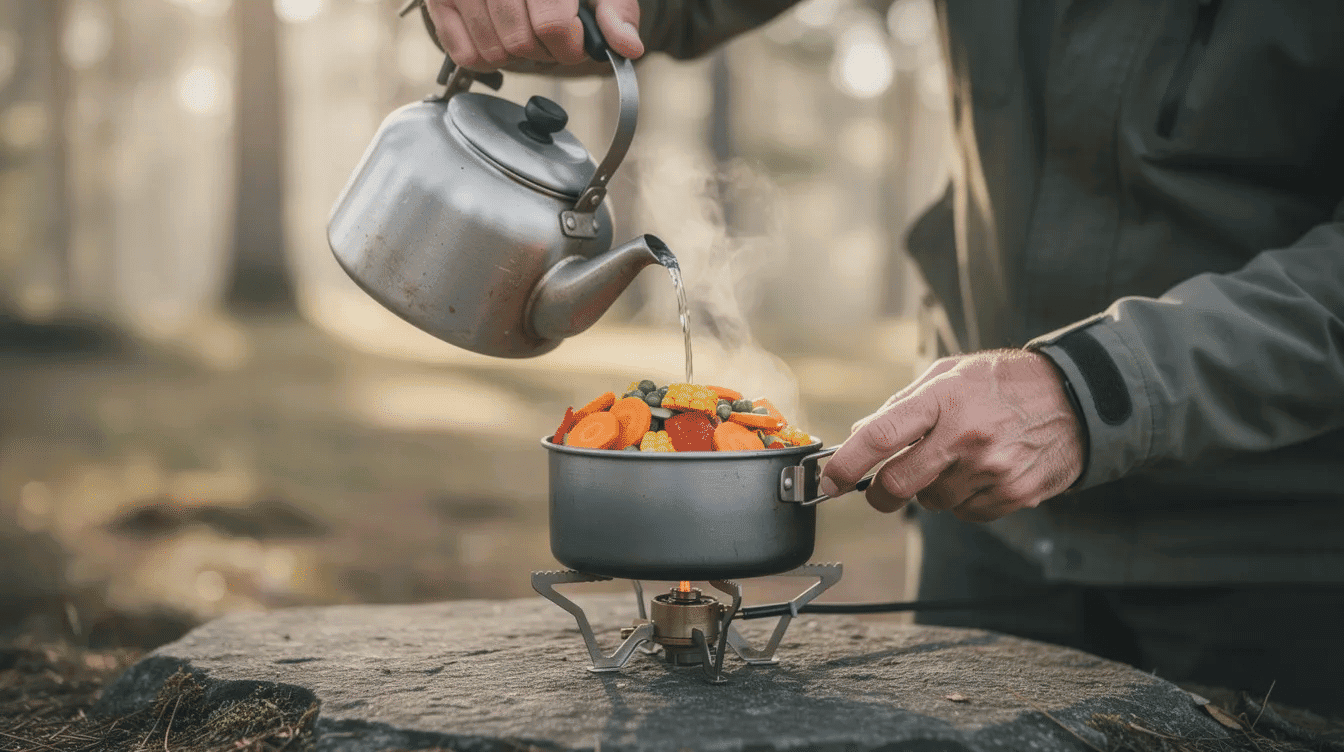
Most vegetables: Use roughly equal parts boiling water to dry volume. Dehydrated vegetables take about 20 minutes to rehydrate, or you can simmer them directly in the dish for 15 to 30 minutes. Many dehydrated vegetables return to a texture similar to fresh ingredients when soaked properly.
Dried fruit: Use equal parts or slightly less water. Soak in cool or warm water for 20 to 60 minutes depending on thickness. Thinner sliced fruit rehydrates faster.
Dehydrated meats: Cover fully with hot water and soak 30 to 60 minutes before cooking, or simmer longer inside the recipe. Meat can also be soaked for a couple of minutes before cooking if sliced very thin.
For full dehydrated meals-soups, stews, rice-based dishes-use equal parts water to rehydrate dehydrated meals as a starting point (about 1 to 1.5 cups water per cup of combined dry ingredients), then adjust based on desired thickness. Rehydrated meals generally need 15 to 25 minutes to reconstitute. Add extra water when using significant amounts of dehydrated food, since dry ingredients absorb more liquid than you might expect.
Practical tools that help: an insulated mug or pot cozy for backpackers, a thermos or lidded pot at home, and a kitchen scale for more precise measurements when dialing in new recipes.
A note on cold soaking: you can add cold water to many grain-based or vegetable meals and wait several hours for a no-cook lunch. This works well for ultralight hikers, though it is less reliable or safe with dehydrated meat unless you follow up with thorough cooking.
Best Ways to Cook with Dehydrated Vegetables
Dehydrating vegetables is one of the most popular entry points into food dehydration because it is low-cost, easy to DIY, and the results are incredibly versatile across soups, casseroles, and skillet meals.
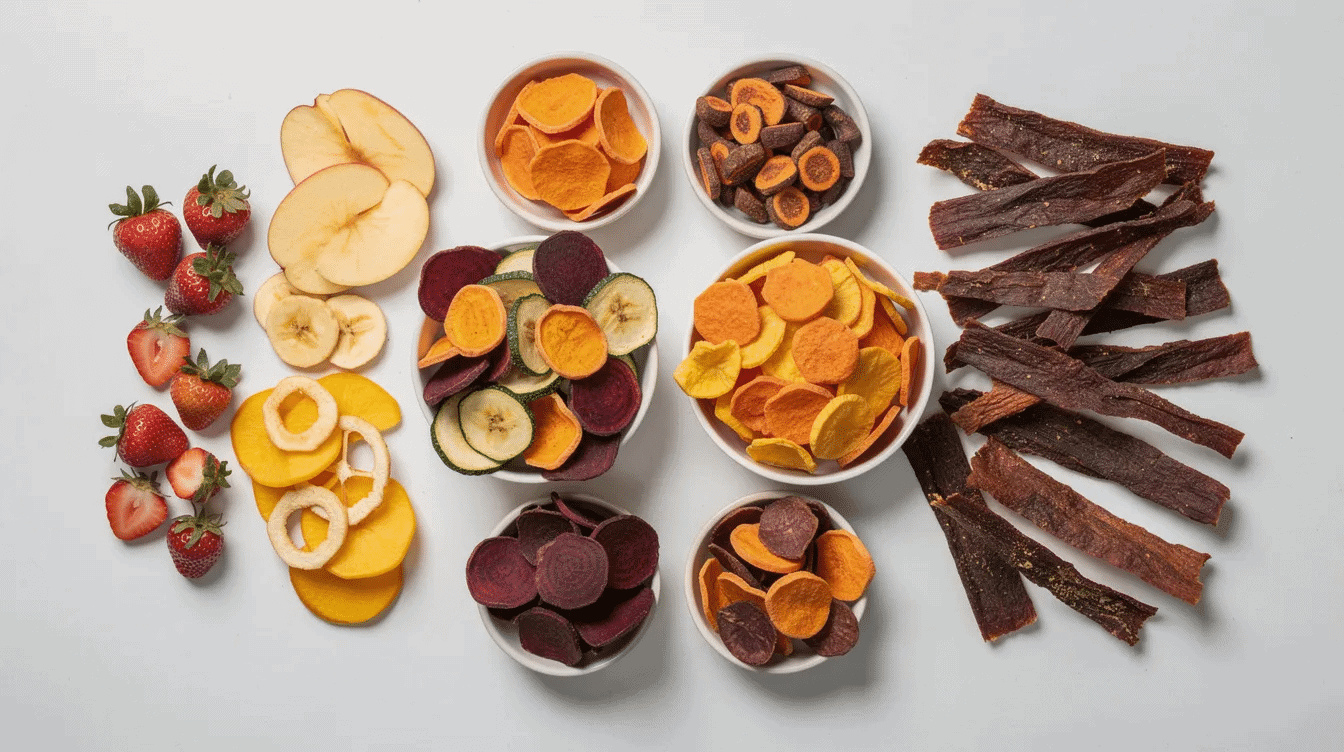
Popular veggies to keep on hand include onions, bell peppers, tomatoes, carrots, celery, mushrooms, spinach, kale, sweet potatoes, butternut squash, green beans, and mixed soup blends. If you are choosing what to dry first, focus on the best vegetables for food dehydration. Most vegetables dehydrate at 125°F for 4 to 10 hours, depending on water content and slice thickness.
Blanch vegetables for 2 to 5 minutes before dehydrating to inactivate enzymes that cause color and flavor loss during storage.
To use dehydrated vegetables in cooking:
Add them at the start of simmered dishes-soups, chili, curry, jambalaya-so they have at least 15 to 25 minutes in hot liquid. Dehydrated foods can be added directly to liquid-rich recipes like soups and stews without pre-soaking.
Increase the broth or water slightly, about 1/4 to 1/2 cup extra liquid per cup of dried veggies, to compensate for absorption.
Texture expectations vary. Onions, peppers, and tomatoes rehydrate very well. Potatoes, large carrots, and broccoli may remain softer or smaller than fresh and work better in stews than as stand-alone sides.
For quick sides, try rehydrated mashed potatoes with dried spinach stirred in, or vegetable fried rice from pre-cooked dehydrated rice plus mixed dried veggies. Season generously: dehydrated vegetables often need extra salt, spices, and a bit of cooking oil or butter to taste as rich as fresh or canned versions.
How to Use Dehydrated Fruit in Everyday Meals and Snacks
Dehydrating fruit concentrates natural flavor, extends shelf life dramatically, and creates snacks that are portable enough for school lunches, hiking, and travel. A dedicated collection of dehydrated fruit recipes for delicious snacks can give you even more ideas. Dehydrated fruits can be used in various meals and snacks, from breakfast to dessert.
Common uses include snacking straight from the jar, mixing into homemade granola, stirring into oatmeal or yogurt, and baking into muffins, zucchini bread, and cookies. Adding dried fruits and vegetables to baked goods increases nutrition without changing flavor profiles noticeably.
To rehydrate dried fruit for a softer texture:
Cover with hot water or fruit juice for 15 to 30 minutes for oatmeal and compotes.
Soak overnight in the refrigerator for cold breakfast bowls or desserts.
Dried fruit also works in savory dishes: Moroccan-style couscous with dried apricots, rice pilaf with dried cranberries, or pork tenderloin glazed with a sauce made from rehydrated apples. Remove skins from fruits like peaches by dipping them in boiling water before dehydrating for a smoother finished product. A splash of lemon juice or ascorbic acid on sliced fruit before drying prevents browning and preserves color.
Keep in mind that dehydration concentrates natural sugars, so portion sizes matter-especially for people monitoring blood sugar. The sugar content of a cup of dried fruit is far higher than a cup of fresh fruit. Read labels on commercial dried fruit and choose unsweetened options when possible.
You can also turn dried fruit back into purees by soaking and blending, creating fruit sauces, fruit leather, pie fillings, or baby food when fresh fruit is out of season.
Dehydrated Meats, Canned Chicken, and Protein Options
Protein is the trickiest part of dehydrated meals, especially for backpacking meals, boating, and emergency kits. Fat is the enemy of long-term dried meat storage, which is why lean meats work best for food dehydration. Use only lean meats with less than 10% fat for dehydration to prevent rancidity.
Home-dried or commercially dehydrated ground beef (sometimes called “gravel”) used in tomato sauce, chili, and casseroles.
Dehydrated or freeze dried chicken, turkey, and sausage crumbles for one-pot dinners.
Jerky as a snack versus an ingredient-jerky needs long simmering to soften enough for cooking.
Lean meats should be dehydrated at 145 to 165°F. The USDA recommends cooking meat to an internal temperature of 160°F for beef and 165°F for poultry before dehydrating. Dehydrate meat at 145°F to 165°F for 4 to 10 hours until completely dry throughout, with no cool or soft spots.
Canned chicken fits naturally into this ecosystem. It offers reliable texture where dehydrated chicken sometimes falls short, mixes easily with dehydrated vegetables and instant rice for fast soups and stews, and requires no rehydration time. Pair it with canned beans for added protein and fiber. A common 12.5-oz can of chicken equals roughly 3/4 cup of dried chicken if dehydrated, which is useful when converting recipes.
Freeze dried meats rehydrate faster and hold their shape better than dehydrated versions, but they cost significantly more. A practical approach: mix small amounts of freeze dried meat with cheaper dehydrated or canned options to balance taste, texture, and budget. Avoid extra fat in any dried meat preparation, as it accelerates spoilage.
Dehydrating and Using Herbs for Maximum Flavor
One of the most rewarding things you can dehydrate herbs for is preserving surplus basil, parsley, thyme, oregano, rosemary, mint, and chives from a home garden for year-round use, especially when you prioritize top herbs to dehydrate for health benefits.
Basic home methods include air drying in bundles, low-temperature oven drying, or using a food dehydrator set to around 95 to 105°F. The focus here is not the full drying process but how to use the finished product.
Substitution rule: Use roughly 1 teaspoon dried for every 1 tablespoon fresh. Crush dried herbs between your fingers just before adding to release volatile oils and aroma.
Typical uses for dehydrated herbs:
Seasoning rehydrated soups and stews
Making herb blends (Italian seasoning, taco mix, herbes de Provence)
Mixing into herb butters or compound butters
Brewing herbal teas from dehydrated mint, lemon balm, or chamomile
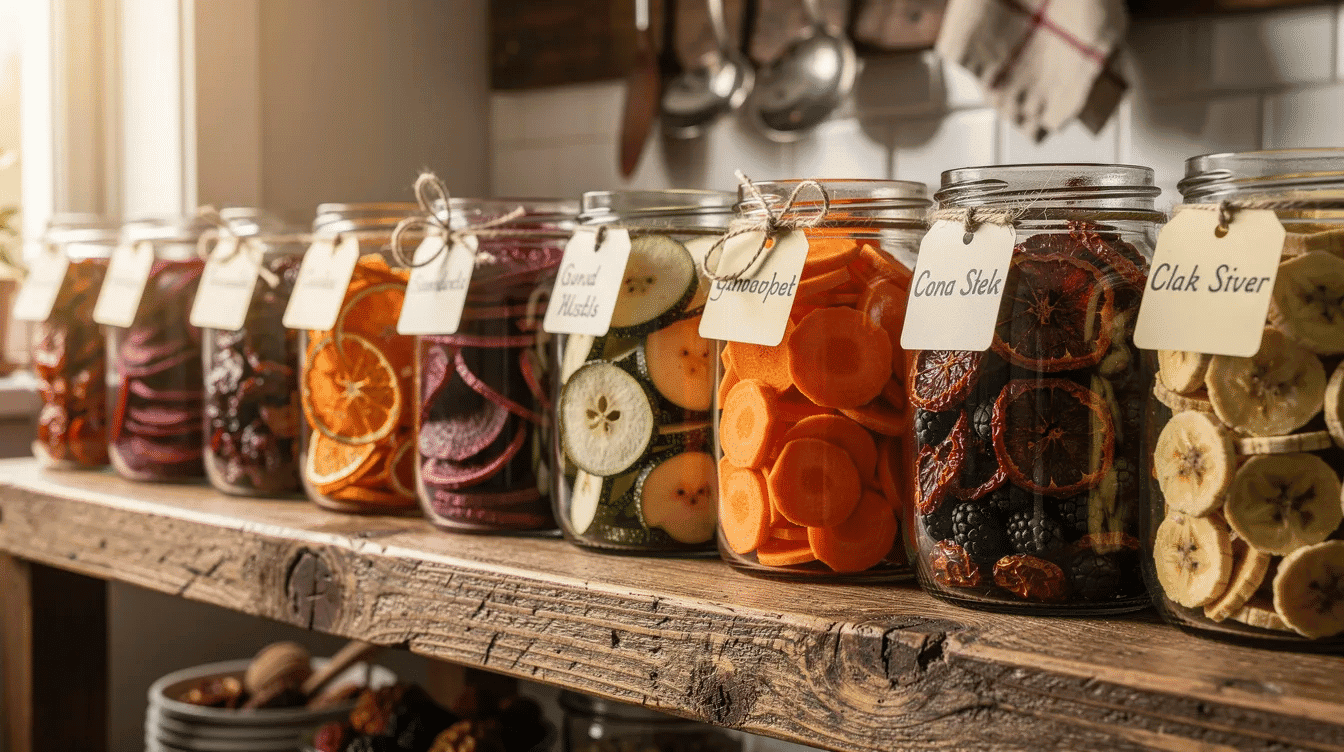
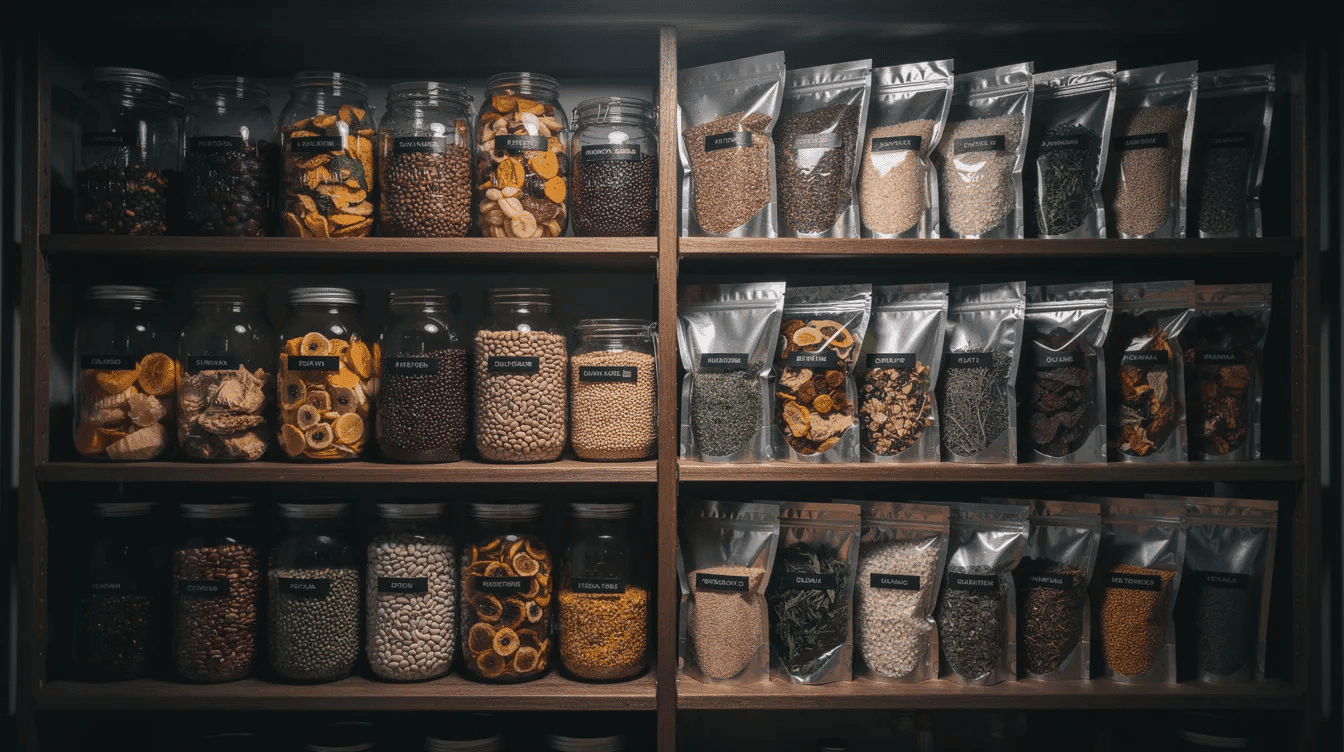
Store dehydrated herbs in small, airtight glass jars away from light and heat. Label each jar with the herb name and drying date, and aim to use within 1 to 2 years for peak flavor. Dehydrated herbs are especially powerful in low-salt cooking because they intensify flavor without adding sodium-a meaningful advantage for anyone on a restricted diet.
Combining Dehydrated Foods into Complete Meals
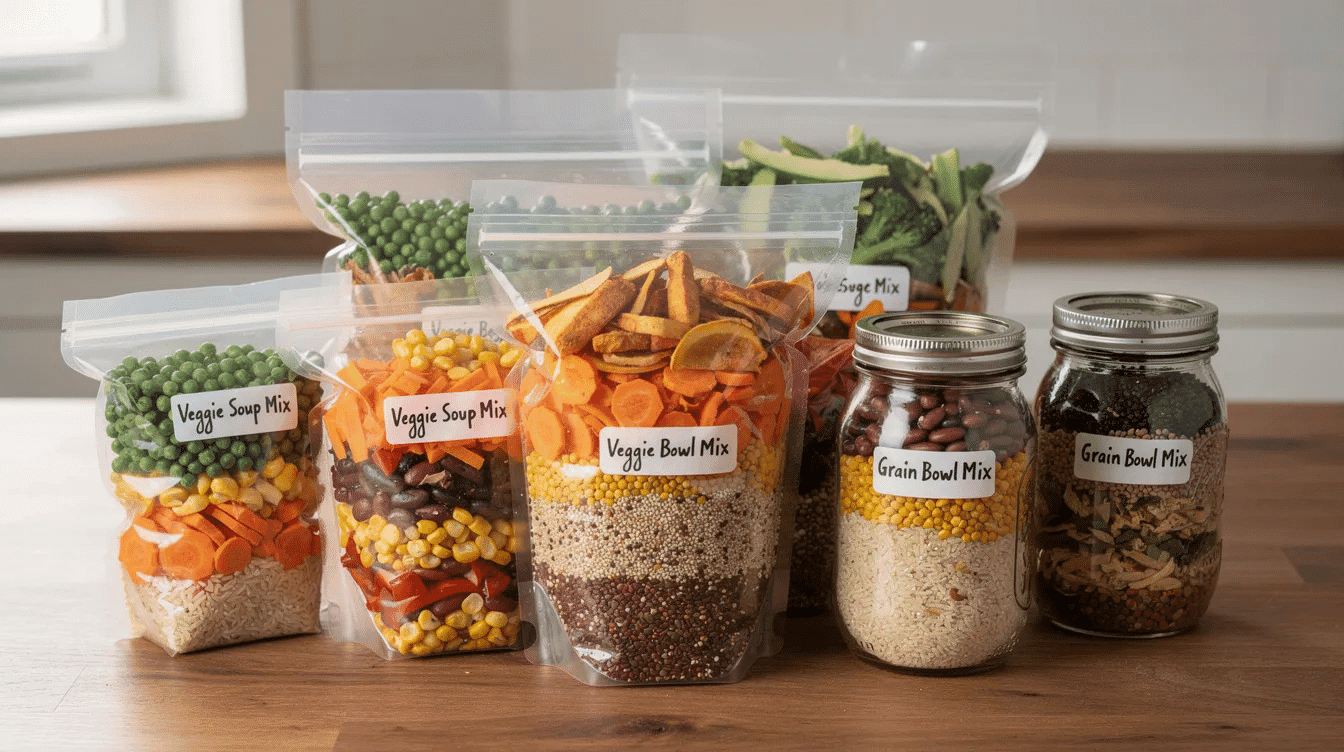
The most efficient way to use dehydrated foods is to combine them into “meal kits”-everything for one dish measured into a single bag or jar. Once you understand what foods can be dehydrated for snacks and meals, dehydrated foods help create instant meal mixes by combining them with grains and seasonings, turning a shelf of ingredients into grab-and-go dinners.
A balanced dehydrated meal follows this structure:
Base: rice, pasta, couscous, quinoa, or instant potatoes
Vegetables: 1 to 2 types of dehydrated vegetables
Protein: dehydrated meat, freeze dried meat, or canned chicken added at cooking time
Flavor: bouillon, dried herbs, spices, powdered tomato sauce, and a small packet of cooking oil to add before serving. If you want a creamy element, shelf-stable options like powdered sour cream work better than home-dried dairy products.
Here are a few meal ideas:
Taco rice bowl: instant rice, dehydrated black beans, dried corn, tomatoes, onions, taco seasoning. Top with fresh or canned additions later.
Creamy vegetable pasta: pasta, dried mushrooms, carrots, and spinach with a shelf-stable cheese sauce packet and a drizzle of oil.
Trail-ready soup mixes: combine dried veggies, bouillon, and tiny pasta shapes in a bag for instant soup mixes on the trail or at the office.
Pack these meals for different contexts: vacuum sealing portions for long term storage, zip bags for weekly meal prep, or mason jars for pantry convenience. Write cooking instructions and water quantities directly on the bag or lid so future-you doesn’t have to guess.
Using Dehydrated Foods for Camping, Backpacking, and Travel
Dehydrated foods are lightweight and portable, ideal for outdoor activities where every ounce counts. Whether you are thru-hiking a long trail, road-tripping in a van, or boating for a week, dehydrated food solves the weight-and-refrigeration problem in one move.
Breakfasts: oats with dehydrated fruit, powdered milk, and cinnamon
Lunches: wraps with jerky and nut butter, cold-soaked grain salads, or trail mixes of nuts, seeds, and dried fruit
Dinners: complete backpacking meals that cook in one pot-pasta with dehydrated veggies and meat, or rice bowls with pre-mixed seasoning
Packing tips: Use resealable Mylar or sturdy freezer bags. Divide portions by day. Include small packets of cooking oil and seasonings. At higher altitudes and colder temperatures, rehydration takes longer-plan accordingly.
To minimize fuel use on the trail:
Pre-soak meals in cold water for 30 to 60 minutes, then bring to a brief boil and insulate the pot with a cozy.
Choose ingredients like instant rice, quick-cooking pasta, and thinly sliced veggies that rehydrate faster.
Food safety matters outdoors too. Keep high-fat items and dehydrated meat for shorter trips, rotate your stock annually, and store unused trip food back at home in cool, dark conditions. Nonstick sheets or parchment paper in your cook kit make cleanup easier when simmering sticky rehydrated meals.
Using Dehydrated Foods in Everyday Home Cooking
Dehydrated food is not just for emergencies or the backcountry. It is an everyday pantry convenience that saves mid-week grocery trips and helps reduce food waste by preserving surplus produce from your garden or a bulk farmers market haul.
Weeknight dinner ideas:
Toss a handful of dehydrated veggies into jarred tomato sauce or canned soup to bulk up nutrition.
Add pre-soaked dried vegetables to eggs, frittatas, and casseroles.
Stir dehydrated vegetables into slow cooker meals where they can hydrate all afternoon alongside chicken, beans, or frozen vegetables.
Quick breakfast and snack uses:
Dried fruit and nuts stirred into yogurt or overnight oats
Homemade instant oatmeal packets with oats, dried fruit, powdered milk, and cinnamon-your own snacks ready in minutes
Grinding dehydrated vegetables into powders creates flavorful seasonings and thickeners you can add to smoothies, sauces, and baby food
Gradually replace grocery items:
Keep jars of dried onions, peppers, and mixed vegetables for recipes that usually start with chopping fresh produce.
Reach for dehydrated garlic and onion when fresh prices spike or quality is poor in winter.
Experiment by swapping some fresh ingredients in your favorite recipes with dehydrated equivalents. Track the extra water needed and taste results in a notebook-within a few tries, you will have the ratios memorized.
Storage, Shelf Life, and Safety of Dehydrated Foods
Proper storage is just as important as the drying process itself. Even perfectly dried food will spoil if stored carelessly. Dehydrated food can be prepared for long term storage with a few straightforward practices, and understanding how long dehydrated food lasts helps you match storage methods to your goals.
Best storage practices:
Store dehydrated food in airtight containers-mason jars, Mylar bags, or vacuum-sealed bags.
Keep everything in a cool, dark place, ideally under 70°F (21°C). Dehydrated vegetables should be stored in low humidity environments.
Use oxygen absorbers for long term storage of low-moisture, low-fat foods like grains and vegetables. Vacuum sealing adds another layer of protection against moisture and air.
Realistic shelf-life ranges:
Dried fruit: around 1 to 2 years at room temperature; longer if vacuum-sealed and kept cool. Store dehydrated fruits in a cool, dark place for maximum longevity.
Dehydrated vegetables and herbs: 1 to 3 years.
Dehydrated meats: several months at room temperature if very lean and thoroughly dried; up to 1 year when frozen and vacuum sealed.
Signs of spoilage: mold, off-smells, color changes, soft or sticky textures returning, or rancid taste in nuts and high-fat items. Discard anything questionable.
Food safety basics for meat: Follow USDA guidance and heat meat to 160 to 165°F before dehydrating. Avoid dehydrating high-fat items or most dairy products at home because residual fat and moisture encourage spoilage.
Nutritional Pros and Cons of Dehydrated Foods
Dehydrating food concentrates calories, fiber, and many minerals while reducing some heat-sensitive vitamins-primarily vitamin C, thiamine (B1), and folate. If you are worried about nutrient loss, look at how dehydration affects different nutrients. Dehydrating reduces food moisture to 5 to 20%, which means nutrients per gram increase for everything that survives the drying process.
Nutritional advantages:
Higher fiber per bite from dehydrated fruits and vegetables supports digestion.
Good retention of minerals like iron, magnesium, and potassium, plus many phytonutrients.
Dehydrating food preserves more nutrients than canning because it uses lower temperatures and there is no canning liquid to pour off and lose water-soluble vitamins into.
Home-dehydrated foods contain no artificial additives compared to many commercial options, giving you full control over what you eat.
Potential downsides:
Calorie and sugar density in dried fruit makes portion control important for weight management and blood sugar monitoring.
Commercial products may include added sugar, salt, or preservatives. Read labels and choose unsweetened, low-sodium options.
A BYU study of freeze-dried foods stored for 50 years found that thiamine losses reached 78% in beef and 49% in green beans over time-even under optimal conditions. Nutrients continue to degrade slowly during storage, so rotating stock and using a first-in, first-out approach matters.
Because dehydrated foods contain very little water, anyone relying heavily on them-hikers, preppers eating from emergency stocks-needs to drink extra fluids. To get the most from them, it helps to understand the nutritional value of dehydrated foods in the context of your overall diet. Use a mix of fresh food, frozen vegetables, canned food, and dehydrated options for the best dietary balance. If you have medical conditions such as sodium restrictions, discuss high-intensity dried food intake with your healthcare provider.
Beginner-Friendly Tips to Start Dehydrating and Using Your Own Food
Step 1: Buy a few commercial dehydrated foods-vegetable soup mixes, dried fruit, or a simple dehydrated meal-and practice rehydrating and cooking with them.
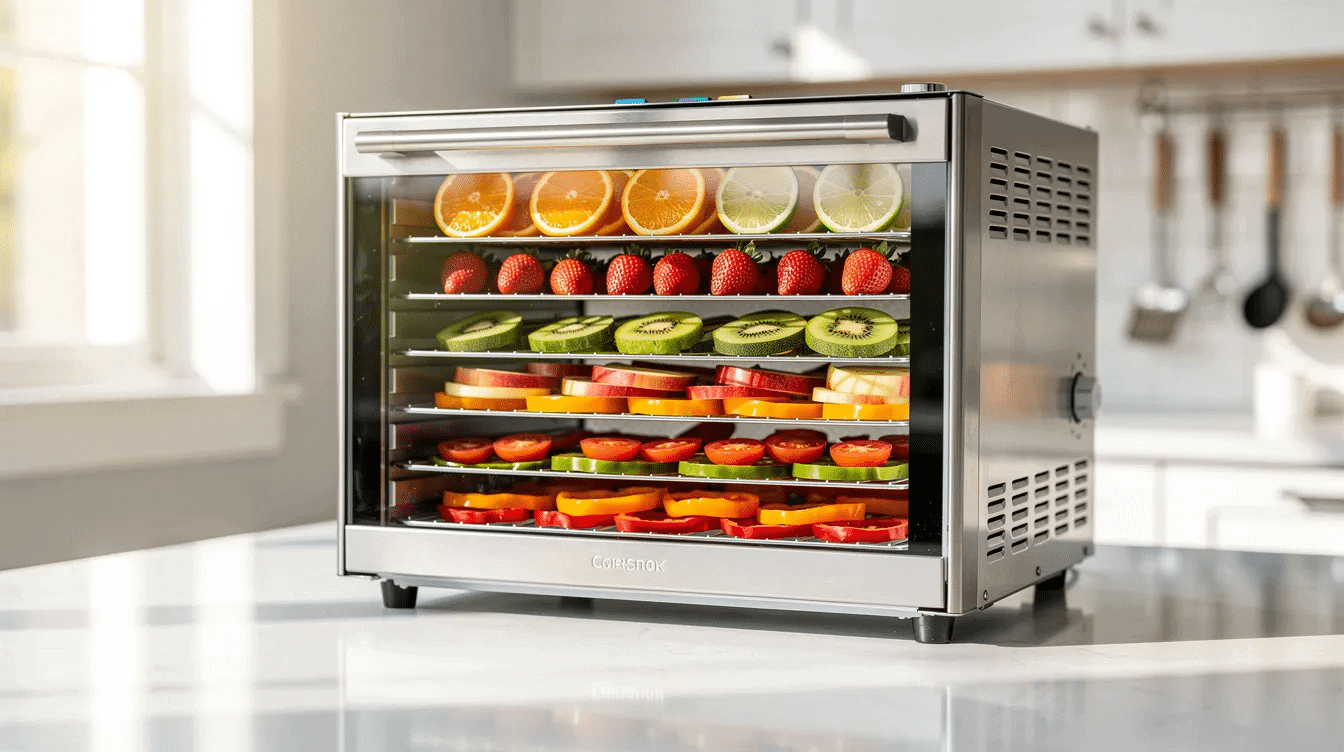
Step 2: Dehydrate beginner-friendly items at home. Apple slices, bananas, onions, and carrots are forgiving and teach you the basics. You can start with oven drying, which requires temperatures around 140°F, or invest in a basic electric food dehydrator. Electric dehydrators dry food quickly with fans and temperature control, making the process nearly hands-off.
Step 3: Move to full meals-spread chili or pasta sauce onto dehydrator trays lined with nonstick sheets and dry for several hours, then store in portions for trips or busy nights.
Key technique: Slice fruits and vegetables 1/4 to 1/2 inch thick for even drying. Spread pieces in a single layer on rotating trays so air circulates freely.
Gear that helps: a mid-range food dehydrator with adjustable temperature, sharp knives, a cutting board, silicone or mesh tray liners, and airtight containers for storing dehydrated food.
Keep a record of drying times, temperatures, water ratios, and taste notes so future batches are consistent. Within a few weekends, you can have a small pantry of homemade dehydrated meals ready for busy work nights, last-minute campouts, or unexpected emergencies.
FAQ: Common Questions About Using Dehydrated Foods
This section answers the practical questions that come up most often once people start cooking with dehydrated ingredients.
How much water do I need to rehydrate different types of dehydrated foods?
Most dehydrated vegetables and mixed meals start with roughly 1:1 water to food by volume-use equal parts water to rehydrate dehydrated meals as a baseline. Meat sometimes needs slightly more water and longer soaking time (30 to 60 minutes). Experiment in 1 to 2 tablespoon increments of extra water until the texture matches what you want, and note your adjustments on the recipe for next time. Many manufacturers print specific ratios and times on packaging; follow those first when available, then tweak to your preference.
Can I safely dehydrate dairy products at home?
Most dairy products-milk, cheese, yogurt, cream-are not good candidates for home food dehydration because their fat and protein content makes them prone to spoilage and off-flavors. Commercial freeze dried dairy is produced with specialized equipment and food safety controls that are not practical in a home kitchen. Safer alternatives include powdered milk, commercial dry cheese sauce packets, and shelf-stable plant-based creamers. These let you achieve creamy meals without the risk of drying dairy at home.
What’s the difference between dehydrated meals and “just-add-water” freeze dried meals?
Both are designed for convenience, but freeze dried meals usually rehydrate faster, feel closer to fresh food in texture, and can be eaten after simply adding hot water to the pouch. Many dehydrated meals need a few minutes of simmering, more careful water measurement, and sometimes longer rest time. The cost difference is significant: freeze dried packages are often much more expensive per serving, while DIY dehydrated meals are cheaper but require more prep work and basic cooking equipment.
How can I tell if my home-dehydrated food is dry enough for storage?
Use these texture tests after cooling a sample completely (warm food always feels softer than it actually is):
Fruits should feel leathery and pliable but not sticky.
Vegetables should be brittle or very hard, snapping rather than bending.
Meats should be dry and hard throughout, with no cool or soft spots when broken open.
If in doubt, return items to the dehydrator for another hour and re-test. You can also store a test jar at room temperature for a week and check for condensation inside, which signals that more drying was needed.
Can I mix different foods on the same dehydrator tray or in the same batch?
Dehydrate foods together only if they require similar temperatures and drying times; otherwise, some items will over-dry while others remain moist. Strong-smelling foods like onions, garlic, and hot peppers can transfer their aroma to milder foods when dried together, so separate trays or batches are recommended. Once foods are fully dry and cooled, they can be combined in meal kits for storage-just make sure all ingredients are truly low-moisture before packaging them together, and eat higher-fat items sooner.
DannyContent Writer
Hey there, since 2016, my mission has been to provide you with the information and guides you need to make food dehydrating simple and fun. Whether you're a newbie or a seasoned pro, my site offers helpful guides, reviews, and recipes to enhance your dehydrating experience. I take pride in only recommending products I believe in, ensuring my readers' trust. As an affiliate of various programs, including Amazon Associates, your support helps me continue providing quality content. Thanks for stopping by, and happy dehydrating!