We earn a commission if you make a purchase, at no additional cost to you.
🍊 Dehydrated Food Info Finder — Temperatures & Drying Times
Choose a category, then pick a food to see its drying temperature and time.
⚠️ Safety Disclaimer: Drying times are estimates and vary based on slice thickness, food moisture content, humidity, and your dehydrator model. Always check for doneness before storing — food should feel dry, leathery, or brittle with no moist spots. Improperly dried food can harbour mould and bacteria. For meat and poultry, follow USDA safe internal temperature guidelines: beef and pork to 160°F (71°C), poultry to 165°F (74°C). Use a food thermometer when in doubt. Store all dehydrated foods in airtight containers in a cool, dark place and discard anything showing moisture, mould, or off odours.
Mastering the Art: How to Dry Flowers in a Book Like a Pro!
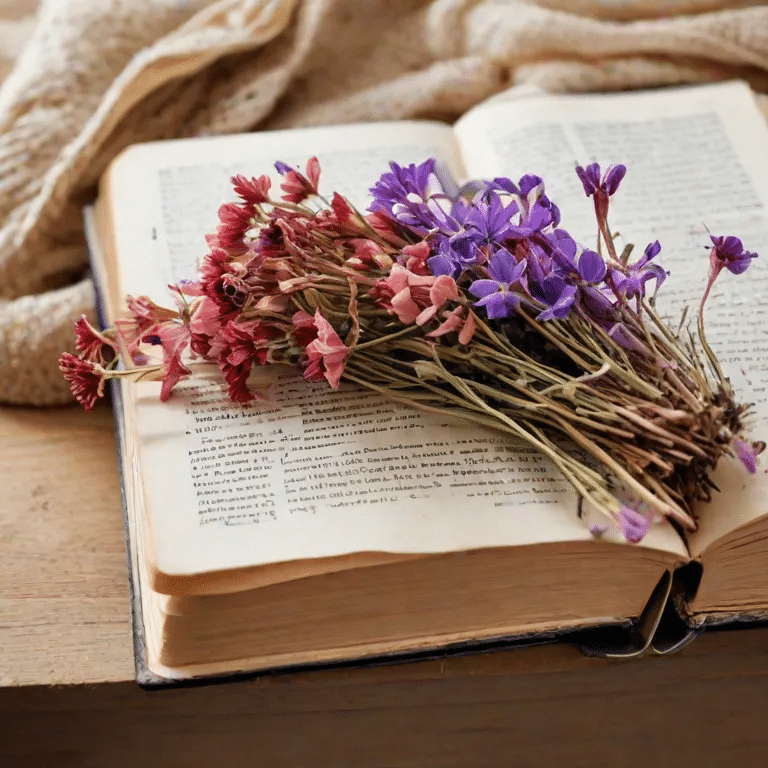
Feeling excited about freezing time and capturing the allure of blooming beauty? We bet you are! There’s an unmatched joy in safeguarding the brilliant hues and fragile outlines of your top-choice flowers. Even better, the delight isn’t just in the final product, but in the journey of learning how to dry flowers in a book – a process that’s as meditative and soothing as it is creative!
Imagine: Creating a keepsake from a memorable day by saving the bouquet, a token of love, or perhaps a bloom from your garden that caught your eye.
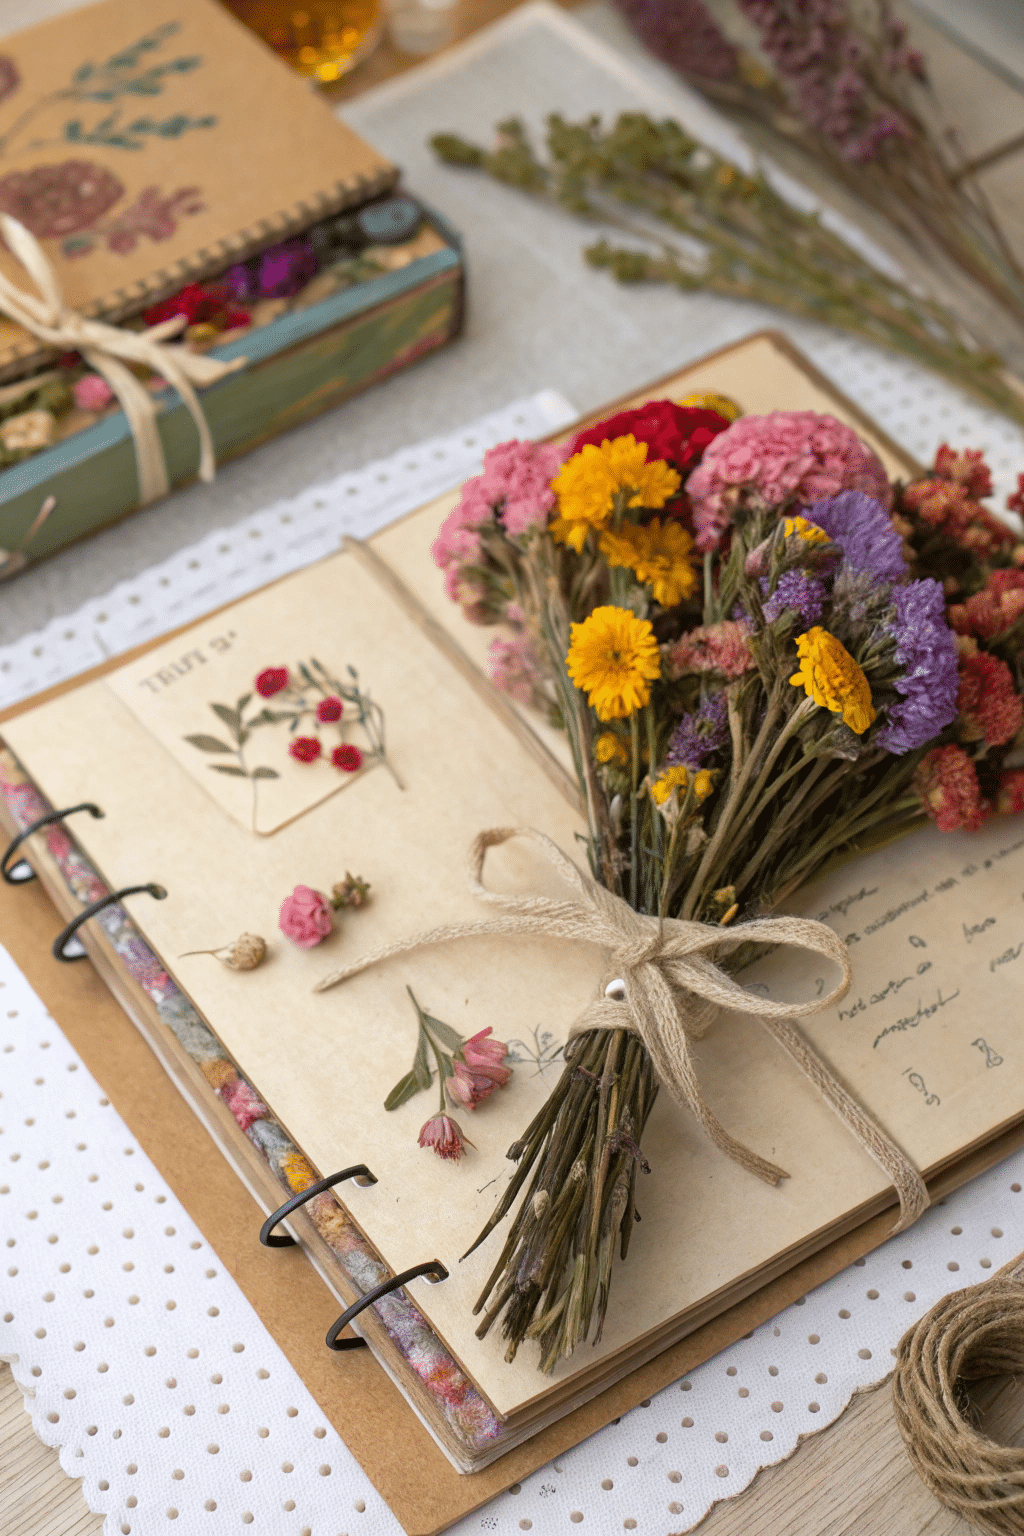
Visualize: Transforming your journal or scrapbook into a botanical wonder with pressed flowers decorations.
Picture: Crafting unique, heartfelt gifts for your loved ones. Let a piece of nature bring your heartfelt messages to life!
Flowers are the music of the ground. From the earth’s lips, spoken without sound.” – Edwin Curran
It’s time to bring this music home, don’t you think? So, let’s dive into the fun world of drying flowers in a book. Ready to get started? We can’t wait to explore this journey with you! Grab your favorite blooms, a hefty book, and let’s make some floral magic happen!
Essential Supplies for Pressing Flowers: What You Need
Who said you need to be an experienced botanist to dry flowers? We have great news, friends! You’ve got the essential supplies right in your home! Forget the gadgets and gizmos – it’s the simple things that make a real difference.
Now, you’ll need some absorbent paper to place your flowers between. This can be newspaper, printer paper, blotting paper – even flat coffee filters and facial tissues (make sure they’re untreated) will work. The paper acts like a sponge, drawing moisture out of your floral beauties, ensuring they dry flat and maintain their color.
Besides paper, you will need a sturdy book. Hardcovers are best because they are weighty and flat. Old phone books or heavy textbooks are perfect for this process. Remember, you want something hefty that won’t warp under the pressure!
Believe it or not, that’s all you need! No special tools, no fancy equipment. Just your fresh flowers, some absorbent paper, and a good old sturdy book. Can you believe that these simple things found in your house can accomplish such a beautiful craft?
Once you gather these materials, we’ll dive right into the pressing process. Just know, even though you’re using basic materials, the results will be anything but ordinary!
Gathering Your Floral Stars: Best Flowers for Drying in a Book
Wow, where do you even start when choosing your floral stars? With so many beautiful flowers out there, it can feel a little overwhelming, right? But don’t worry, we’re here to help you hand-pick the best choices.
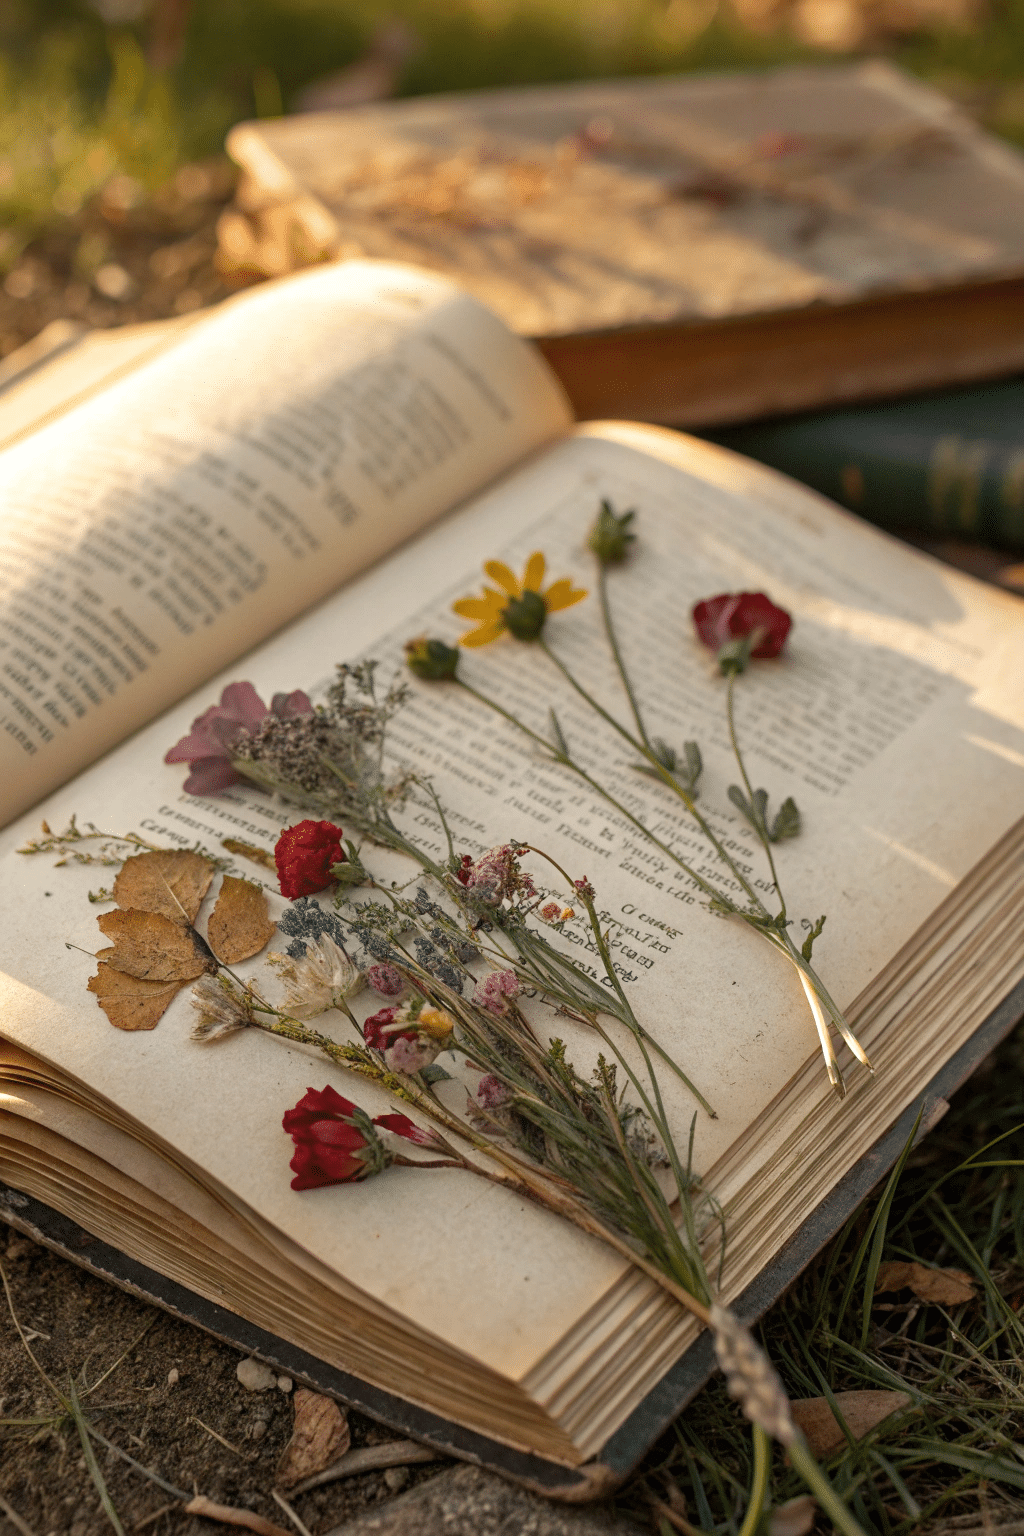
Firstly, let’s make it clear: not all flowers are created equal when it comes to drying in a book. You’ll want to look for thin, open-faced varieties and wildflowers, which are particularly good candidates. Pick flowers that have a flat shape, as they will press well and maintain more of their original color and form. Think marigolds, pansies, or even the dainty daisy!
Then, make sure the flowers you choose are in their prime. Avoid flowers that are too old or wilted, as they might not dry well. Also, remember to pick the flowers during a dry day to reduce moisture.
But remember, the most important thing: choose flowers that make your heart sing! After all, these are going to be a permanent part of your home decor, a scrapbook, or a gift for your loved ones. So let’s choose blooms that connect with your own style and passion. Your flowers, your rules! Isn’t that exciting?
The Art of Flower Pressing: A Step-by-Step Guide on How to Dry Flowers in a Book
Alright, folks, buckle up! We’re about to embark on an exciting flower-pressing journey together. With just a handful of supplies, a dash of patience, and a sprinkle of creativity, we’re going to transform nature’s beauty into a lasting keepsake. Are you ready?
Step one: start with choosing a flowering wonder from your garden. Remember to pick a bloom that’s hydrated, free of tear and wear. Nobody likes a limp flower, do they?
Next, open up your chosen book, preferably a sturdy one that’s not too valuable (just in case things get a little messy!). Keep a few pages empty in the front – we want our flower sandwiched snugly in the middle of the book. Open up to your start page and place a sheet of parchment paper on it. Why parchment paper, you ask? It helps absorb moisture, prevents ink transfer from the book, and is less likely to stick to your flowers. Pretty neat, right?
Gently place your flower on top of the parchment paper. Take care to position it face down, unfolding petals and arranging it exactly how you’d like it to look once dried. Overlapping petals can end up stuck together, and we just can’t have that!
Once the bloom is set, place another sheet of parchment paper on top and turn the next few pages of the book over it. The flower is officially in its cozy paper bed, ready to be pressed to perfection!
Alright, the fun part— applying pressure! Shut the book and place some heavier books or objects on it. Trust me, the additional weight helps a bunch in getting those flowers flat!
Last, but not least— wait. Yes, patience is key here. Ideally, leave your flowers to press for about 10 days or so. The lower the moisture level in the bloom, the better your results will be.
Remember to handle it gently; it will be pretty delicate after its transformation.
The Right Time: Optimal Season for Drying Flowers
So, we’ve already established that pressing flowers requires some preparation and patience, right? But the question remains, when exactly is the best time to gather those blossoms? Let’s dive into it!
There’s a popular misconception that flowers can be picked and dried at any time. While it’s technically true you could do this, for the most beautiful and successful results, you’ll want to be a bit more strategic. Seasonality and timing are everything in the world of flowers, and that extends to the art of drying them too!
A rule of thumb is to pick your flowers in late spring and throughout the summer, which are peak blooming seasons for most flowers. The exact timing can vary depending on the type of flower and your geographical location, so it’s a good idea to do some research in advance!
Unlike some might think, the best time of day to pick your flowers isn’t the afternoon – it’s actually the morning! Why, you ask? It’s simple: by the afternoon, flowers have been basking in the sun and their petals may have started to wilt. In the early morning, after the dew has dried but before the heat of the day, flowers are at their freshest and most vibrant. Plus, it’s a wonderfully serene and peaceful time to be out in nature, wouldn’t you agree?
Keep this in mind: always pick more flowers than you think you’ll need, as not every bloom will dry perfectly. And remember, freshness is key – the fresher the flower, the more beautiful the result!
Protect Your Petals: Precautions to Take During the Drying Process
Here are some precautions you should take to ensure the process goes smoothly and your blooms retain their natural beauty.
First up—you guessed it—always select flowers that are completely dry. If your picked flowers have even a hint of moisture, kick them to the curb! Wet petals run the risk of developing mold, which will rip all the hard work right out from under you! Your best move is to pluck your flowers just after they’ve been basking in the midday sun, ensuring they’re dry and have not been affected by dew or rain. Plus, isn’t there something pure and beautiful about the sun-bathed flower? Absolutely!
Your second golden rule: Treat your blooms like little living works of art, because that’s what they are! When pressing, be gentle. The clearer and more visible the petals are laid down in the book, the better they’ll look when dried. Give them the respect they deserve, and they’ll reward you with their enduring charm.
And then there’s the no-go zones: heat, sunlight and moisture. Once your flowers are dry, keep them in a cool, dark place. Exposure to sunlight and heat can lead to color loss, while any contact with moisture invites the risk of mold.
Lastly, ever thought about using your microwave to speed up the drying process? Smart thinking, but proceed with caution! Microwaves can have a habit of discoloring or potentially damaging the blooms. So, tread gently in unknown waters and always remember, slow and steady often wins the race when it comes to preserving your botanical beauties.
Handcrafted Press: DIY Flower Press Made from Wood
Ready for an adventure in woodworking as well? Don’t worry, you don’t need to be a seasoned carpenter to make your own flower press. In fact, the process is pretty straightforward. Let’s jump right in and learn how to make a DIY flower press out of wood!
First, you’ll need two pieces of plywood, both around 9″ x 12″ in size. These will create the top and bottom panels of your flower press. You’ll also need four bolts about 6″ long, four washers and four wing nuts that fit your bolts.
Get your woodworking gloves on and let’s start drilling! You will need to drill holes in each corner of your plywood pieces, roughly about 1″ from the edge. The holes must match the size of your bolts. Then, you insert your bolts through the holes in one piece of plywood, arrange your flowers between layers of cardboard and paper, and top with the second plywood piece. To finish up, push the bolts through the top piece of wood, add your washers, and screw on the wing nuts. Just like that, you’ve built yourself a DIY flower press!
Anyway, make sure your gloves are off before dealing directly with flowers for their delicate nature. One tip – wait for about 2 to 4 weeks before checking on your blooms. They should be dry and ready for your craft project by then! Isn’t it amazing to look at the transformation?
Keep in mind, while a flower press offers more control over the drying process and saves space, drying flowers in a book is still a great method, especially for beginners or for those short on time or materials.
Adding a Personal Touch: Decorating Your Dried Flowers
You’ve successfully dried your flowers, and they’re ready for you to add your personal touch, making them uniquely yours. Now it’s time to let your creative juices flow.
Firstly, try adding some shine to your flowers by gently brushing on a thin layer of clear, quick-drying acrylic paint. This not only highlights the natural beauty of the flower but also adds an additional layer of protection. Glitter, anyone? If that’s your style, sprinkle a light dusting of your favorite color over the wet paint for a little extra sparkle. Remember, the sky’s the limit here! You can use a variety of colors and textures to make your dried flowers truly unique.
What about mounting your dried flowers? Have you considered that? They can be transformed into stunning wall art by simply framing them. Choose a minimalist frame to let the flowers stand out, or go for something more ornate if that’s more your vibe. As you select your frame, consider also using a complementary, colored mat to make your dried flowers pop.
Do you write letters or make hand-crafted cards? Adding a dried flower to your art could make it even more personal and meaningful. You could even create bookmarks with smaller blooms or petals – they’re the perfect way to bring a bit of nature into your favorite novel!
And how about jazzing up your journals? These beautiful dried flowers can be used to decorate the pages of your diary, adding a whimsical and vibrant touch to your storytelling and daily reflections. Aren’t they just wonderfully versatile?
But here’s an important tip. When you’re handling your dried flowers, be sure to use tweezers to prevent any damage. After all, you’ve taken such care in preserving them, haven’t you?
The options for decorating with your dried flowers are endless. What’s important is that you have fun expressing your unique style and personality through this age-old craft of flower drying.
Flower Power: How to Use Your Dried Blooms Creatively
Isn’t it wonderful that you can use your dried blooms in a variety of ways? Their beauty transcends their fresh lifeline – a testimony to nature’s true wonders! With your dried flowers in hand, let’s get started on how to bring their charm into your life and home.
Firstly, we have framed flower art. Picture your wall adorned with a dried rose, subtly telling its own story of timelessness within a gorgeous frame. All you need is to carefully arrange your dried flowers on a cardboard or thick paper and place it inside a frame. Don’t forget! The frame is part of the art too. Think about whether a rustic wood frame or a sophisticated gold frame would best suit your bloom and overall decor. Isn’t this an exquisite idea for a DIY wall decor?
Ready for another idea? How about bookmarks? Yes, you read that right! Create your own natural bookmark by embedding dried flowers in clear, self-adhesive paper. Allow your favorite literature to bloom anew each time you open your book! Isn’t this the perfect way to savor the sentiment of a book and a flower together?
Do you love crafting personal gifts for your loved ones? Imagine dressing up your cards or letters with a touch of preserved petals and stems. They’ll burst with joy seeing these flowers – a symbol of the love and effort you poured into making the card. After all, who wouldn’t be thrilled to receive such a heartfelt present?
By now, you must be brimming with enthusiasm to embark on this wonderful journey of craft and creativity. Let’s give those dried flowers a second life, and in the process, maybe we’ll breathe new life into our homes too!
To even further the lifespan of your precious blooms, consider sealing them with a clear, UV resistant spray. This will protect your blooms from damage by sunlight, keeping their vibrant colors intact as long as possible. You see, there’s no end to what we can create when we combine nature’s beauty with a dash of creativity and a sprinkle of care!
Common Mistakes to Avoid When Drying Flowers in a Book
Oh, we all know nobody’s perfect, and sometimes mistakes can happen, especially when we’re trying something new. But don’t worry – we’ve got your back! When drying flowers in a book, there are a few common errors we want you to avoid to ensure that you’re successful on your floral drying journey.
First thing’s first – not all flowers are created equally, especially when it comes to drying them in a book. Remember our talk on best flowers for this method? Right, flowers that are thicker and hold a lot of water may not be your ideal candidates here. These may look pretty, but they could also spell disaster and potentially ruin your book. Hence, we’d recommend using thin flowers like wildflowers or open-facing varieties.
Secondly, not every book is made for this project. Choose a book that can withstand the transfer of liquid and color from the flowers. Using a valuable or sentimental book is a big no-no. You wouldn’t want your favorite novel or a cherished family photo album getting stained, now would you?
Next on our list is the common mistake of not using parchment paper when pressing flowers. It’s your barrier between the book pages and the flowers to avoid the book pages getting ruined. So, always make sure to place a sheet of parchment paper between the flowers and the book pages.
Time, is of the essence during the drying process. Not giving your flowers adequate time to dry is another slip you want to sidestep. As we’ve mentioned before, flowers require around 10 days to dry completely when using the book method. If rushed, the flowers might not dry properly leading to mold or decay, and we don’t want that, do we?
Last but not least, let’s not forget about our tech-savvy friends who choose to microwave the flowers sandwiched between paper in a book. Microwaving can be a quick solution, yes, but too much heat may cause the flowers to wither or burn. Be sure to keep an eye on them and use short time increments to prevent any flower calamity.
Teaching Children to Press Flowers
Often, the best memory I have of my childhood involves making something. I am glad my kids also love crafts. As young children, our kids and I worked hard together at home. Isn’t it wonderful to share the magic of nature with the little ones? Pressing flowers is an engaging and educational activity that allows children to nurture their creativity, practice patience, and learn about the beautiful world of plants.
Caring For Your Floral Keepsakes: Maintaining the Longevity of Dried Flowers
Great job on drying your blooms! They’re now ready for showing off or using in crafts. Now, let’s talk about keeping them perfect.
Keep your dried flowers away from moisture, heat, and direct sunlight. These can cause your flowers to mold or break down. So, choose a cool, dry spot out of direct sunlight for your flowers.
Isn’t it delightful how something as simple as pressing flowers in a book can offer such a gratifying experience, creating breathtaking pieces of art or sentimental keepsakes? By following careful procedures and tips, you can perfect this craft, turning any book into a homemade flower press!
So, ready to venture into the enchanting world of flower pressing? Let the petals tell their tales!
DannyContent Writer
Hey there, since 2016, my mission has been to provide you with the information and guides you need to make food dehydrating simple and fun. Whether you're a newbie or a seasoned pro, my site offers helpful guides, reviews, and recipes to enhance your dehydrating experience. I take pride in only recommending products I believe in, ensuring my readers' trust. As an affiliate of various programs, including Amazon Associates, your support helps me continue providing quality content. Thanks for stopping by, and happy dehydrating!