You’re three days into a July backpack on the John Muir Trail in California, standing at 10,000 feet with tired legs and a growling stomach. The freeze-dried pouch you packed costs $12 and tastes like salted cardboard. There’s a better way.
This guide focuses on concrete, field-tested backpacking recipes built from 100% grocery store ingredients—not pricey premade meals that drain your wallet and disappoint your taste buds.
Save 60-70% compared to commercial freeze dried backpacking meals by building your own dehydrated meals at home
Control sodium and additives while tailoring recipes to your daily mileage and elevation gain
Learn planning basics, essential cooking gear, and detailed recipe ideas for every meal
Master both hot one-pot dinners and no-cook cold soak options for fuel-free nights
Walk away with templates you can mix and match for trips from overnight to week-long
Understanding how much food to carry is the foundation of every successful backpacking trip. Get it wrong, and you’ll either bonk on a big climb or haul unnecessary weight over every pass.
A 150-pound hiker covering 10-15 miles daily typically needs 3,000-3,500 calories. Bump that to a 190-pound hiker tackling steep Colorado routes with 4,000+ feet of elevation gain, and you’re looking at closer to 4,000 calories to maintain energy.
Rule of thumb: Plan for 25-30 calories per pound of body weight per day. A 160-pound hiker would calculate: 160 × 27.5 = 4,400 calories on big-mile days, or roughly 160 × 25 = 4,000 on moderate terrain.
Caloric density matters: Aim for foods delivering 120-150 calories per ounce. High-density winners include many foods that can be dehydrated for snacks and meals such as olive oil (240 cal/oz), peanut butter (165 cal/oz), nuts (160-180 cal/oz), instant potatoes (100 cal/oz), and instant rice (105 cal/oz).
Boost calories easily: Carry a small HDPE bottle of olive oil or grab single-serve packets. Two tablespoons per dinner adds 240 calories with almost no weight penalty.
Snack strategy: Target 30-60 grams of carbohydrates per hiking hour. Solid options include trail mix, Cheddar Goldfish, Snickers bars, gummy bears, dates, and dried fruit.
Test before you commit: Do a one-day hike near home with your planned food quantities. If you end the day ravenous or with a pile of leftovers, adjust before the real trip.
Backpacking Cooking & Food Storage Gear
Some hikers chase ultralight minimalism with titanium sporks and alcohol stoves. Others want the comfort of a real hot meal after 12 hours on trail. Either approach works—what matters is matching your cooking gear to your trip length and food plan.
For a 2-7 day trip, here’s a simple, realistic kit:
Stoves with flame control: The Soto WindMaster handles wind well and simmers nicely for recipes requiring low heat. The Jetboil Stash integrates with its pot for fuel efficiency. The MSR PocketRocket Deluxe offers precise control for actual trail cooking. Choose based on whether you’re boiling water only or doing real one-pot cooking.
Pot sizing: 600-700 mL works for solo hikers eating one-pot backpacking meals. Bump to 900-1,000 mL for two people. Hard-anodized aluminum or titanium with nonstick or ceramic coating makes cleanup far easier.
Utensils: One long-handled spoon or spork is enough. A flat-edged spoon scrapes one-pot meals without scratching coatings—important when you’re eating directly from the pot.
DIY pot cozy: Cut foam sleeping pad scraps into a sleeve that wraps your pot. This keeps “just add water” recipes hot while they rehydrate, which also works well with store-bought dehydrated backpacking meals, reducing fuel use by letting you turn off the stove earlier.
Food storage: Odor-resistant bags contain smells. Zip-top freezer bags work for meal prep and cold soaking. Where required (like Yosemite under current regulations), bear canisters like the Garcia or BearVault are mandatory—plan your food volume to fit.
Luxury item: A small insulated mug (3-4 oz) keeps evening drinks or instant coffee hot while you watch the sunset. Worth the weight on cool-weather trips.
Backpacking Pantry: Where to Find Lightweight Ingredients
Nearly everything for these homemade backpacking recipes can be bought at big-box stores like Walmart, Target, and Kroger. A few specialty items come from online suppliers, but you can build complete trail meals from your local grocery store.
Carbohydrate bases: Instant rice (Minute Rice), instant potatoes (Idahoan packets), ramen noodles, couscous, instant polenta, and pre-cooked pouches like Ben’s Ready Rice for no-cook nights. Most grocery stores stock all of these in the rice or international aisles.
Protein options: Tuna and chicken foil packets, summer sausage, hard salami, beef jerky, TVP (textured vegetable protein), instant refried beans, and powdered eggs like OvaEasy. You can also dehydrate chicken for backpacking to add lightweight protein. Hard cheese like aged cheddar or gouda travels well for 3-5 days without refrigeration.
Vegetables and fruits: Store-bought dried mushrooms, sun dried tomatoes, freeze-dried peas and corn from camping aisles, and bulk dehydrated veggies from online suppliers like Harmony House. Dehydrated meal-in-a-jar recipes are another way to pre-pack veggies and grains. Dried fruit (apricots, raisins, cranberries) adds sweetness and calories to breakfasts.
Calorie boosters and flavor makers: Mini bottle of olive oil, peanut butter packets, powdered cheese, bouillon cubes, pesto mix, curry paste packets, soy sauce packets, and hot sauce packets grabbed from restaurants. If you dehydrate ingredients using an Instant Pot, you can turn them into lightweight, packable flavor bombs. A seasoning packet from ramen or taco seasoning transforms bland carbs into a savory dish.
Freeze-dried fruit: Target and Walmart carry freeze dried strawberries, mango, and blueberries in the snack aisle. You can also make freeze dried strawberries at home for custom trail mixes. Long shelf life makes them perfect for breakfasts, desserts, or trail snacks.
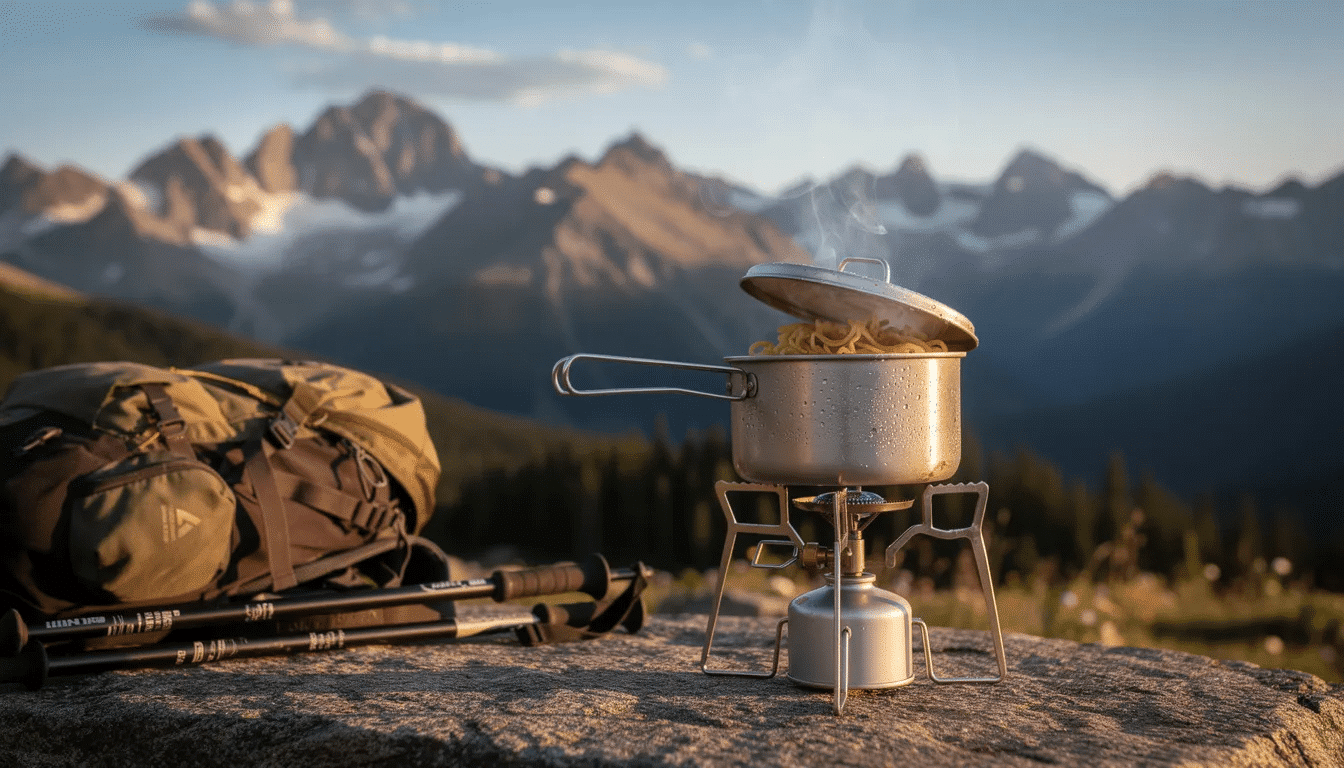
Hot Backpacking Recipes: One-Pot & Just-Add-Water Meals
All hot recipes in this section are designed for one small pot, minimal fuel, and simple cleanup—ideal after 12+ mile days when you want a hot meal without the hassle.
Each recipe idea lists core ingredients, rough proportions, and trail prep methods targeting realistic serving sizes for hungry hikers. These dinner recipes assume a lightweight canister stove, though most can be adapted for freezer-bag cooking using a mylar or freezer bag plus a pot cozy, just like many dehydrated camping food options sold in outdoor shops.
Sunrise Hash Browns & Trail Eggs
This hearty breakfast fuels big climb days—think summit mornings on Colorado’s Fourteeners when you need calories before the alpine start.
Ingredients per person: Instant hash browns (~3 oz), OvaEasy egg crystals (~½ cup mixed), 1 tablespoon oil, optional bacon bits or fully cooked real bacon
At home preparation: Pack hash browns and seasonings (salt, black pepper, garlic powder) in one bag. Egg crystals go in another. Oil travels in a leakproof bottle.
Trail method: Rehydrate hash browns in cold water in the pot, drain excess, then fry lightly in oil stirring frequently. Add egg mixture and cook on low heat, stirring constantly until set.
Variations: Wrap in tortillas with hot sauce packets to make breakfast burritos for the first two mornings of your trip. Clients love this upgrade over plain instant oatmeal.
Creamy Pesto Angel Hair with Chicken
A fast, high-calorie dinner for the last night of a backpacking trip when you’re down to minimal fuel but still want comfort food.
Ingredients: Angel hair pasta (3-4 oz dry), dry pesto sauce mix, grated Parmesan, a foil pack of chicken, sun dried tomatoes, 1-2 tablespoons olive oil
Home packing: Pasta in one bag, dry mix and cheese in another, chicken in original packet, tomatoes in a tiny snack bag, oil in micro bottle
Trail cooking: Boil pasta until just tender, leave a small amount of starchy water. Stir in pesto mix, tomatoes, chicken, and add olive oil until creamy. Cover and use a pot cozy to finish if needed.
Calorie count: 700-900 calories depending on oil and cheese quantities—a delicious way to end a long hike
Garnish ideas: Extra Parmesan, crushed red pepper for heat
Loaded Mac & Cheese After Dark
A classic comfort backpacking recipe perfect for chilly evenings on shoulder-season trips in places like the White Mountains in late September.
Ingredients: One box mac & cheese (or single-serve packet), powdered milk, optional butter powder, bacon bits or summer sausage chunks, dehydrated veggies like peas or broccoli, olive oil
At home preparation: Combine pasta, milk powder, and dried veggies in one bag. Keep cheese packet separate. Pre-dice sausage and vacuum-seal for trips up to 5 days.
Trail method: Boil pasta and veggies together, drain most water, stir in cheese mix, milk powder, oil, and meat until sauce is thick and glossy
Monster Mac version: Add extra oil and cheese to hit 1,000+ calories—ideal for big-mile days when the calorie count matters most
Cleanup tip: Add a splash of boiling water after eating and scrape with spoon to avoid stuck cheese
Moroccan-Style Couscous with Apricots
A fragrant, quick-cooking dinner ideal at high camps where fuel and oxygen are limited—think camps over 10,000 feet in the Sierra Nevada.
Ingredients: Instant couscous, diced dried apricots, sliced almonds, a pinch of ras el hanout or curry powder, salt, True Lemon packet, olive oil, optional foil packet of chicken
Home packing: Couscous, fruit, nuts, and spices all in one bag. Label with water volume needed (e.g., “add ¾ cup boiling water”). Chicken and oil separate.
Trail prep: Pour boiling water into pot with couscous mix, stir, cover, and let sit 5-7 minutes. Add olive oil, chicken, and True Lemon at the end and fluff.
Variations: Substitute instant bulgur or quinoa for hikers wanting more fiber and protein. This great recipe adapts to whatever grains you prefer.
Trail Fried Rice with Veggies & Egg
A versatile way to turn instant rice and pantry veggies into a satisfying meal for one or two hikers.
Ingredients: Instant white rice, freeze-dried mixed vegetables, soy sauce packets, sesame oil if available, egg crystals, optional diced jerky or shelf-stable tofu cubes
At home preparation: Rice and dehydrated veggies in one bag, egg powder in another, sauces in a small zip bag or pill organizer-style container
Trail method: Rehydrate rice mixture and veggies with hot water. Scramble egg mixture in a bit of oil in the pot first. Then stir in rice/veggies, soy sauce, and sesame oil to finish.
Vegetarian/vegan version: Skip eggs and add extra nuts or tofu for protein; for low-carb hikers, adapt this into ketogenic backpacking meals by emphasizing fats like oils, nuts, and seeds instead of rice.
Efficiency note: Cook eggs first, then mix everything—minimizes pot scrubbing at meal time
Chili Lime Peanut Noodles
A fast, spicy noodle backpacking recipe inspired by street-food flavors, perfect when hikers crave something bold after days of bland trail meals.
Ingredients: Ramen noodles or thin rice noodles, peanut butter packets, chopped peanuts, chili flakes, brown sugar, ground ginger, soy sauce, True Lime packet or lime powder
At home preparation: Dry noodles in one bag with chili and ginger. Sauce components measured into a small screw-top container or zip bag. Peanuts kept separate for topping.
Trail cooking: Simmer noodles until soft, pour off most water leaving a few tablespoons. Stir in peanut sauce mixture until thick. Finish with lime and peanuts.
Flavor balance: Sweet-salty-spicy-sour—adjust ratios to taste. Restaurant soy sauce packets or travel condiment kits from Trader Joe’s work great.
Cheesy Rice & Beans Trail Bowl
A budget-friendly, filling dinner popular on long-distance trails like the Pacific Crest Trail.
Ingredients: Instant rice, instant refried beans or instant black beans, taco seasoning, shredded hard cheese (cheddar or pepper jack), handful of corn chips or Fritos for crunch
Home packing: Rice, beans, and taco seasoning combined in one bag labeled with water volume. Cheese wrapped separately in waxed paper. Chips stored in a hard container to avoid crushing.
Trail prep: Add boiling water to rice and bean mix, let sit until thick, then stir in cheese. Crumble chips over the top just before eating.
Scaling: This recipe doubles or triples easily for group trips—adjust water proportionally
Key stats: High caloric density from cheese and chips, plus complete protein from rice and beans
No-Cook & Cold-Soak Backpacking Recipes
No-cook and cold soak backpacking recipes are valuable when fire bans are in place, fuel is low, or you’re too tired to cook after a brutal day. Cold soaking involves adding water to a meal in a jar or sturdy bag, then letting it rehydrate while you hike.
These methods shine for lunches on hot days in Utah canyons, stormy evenings above tree line when cooking outside the tent is unsafe, or ultralight thru-hikes where weight and simplicity matter most. Each option below uses concrete, store-bought ingredients with suggested soaking times.
Overnight Oats in a Cold-Soak Jar
A grab-and-go breakfast mixed the night before and eaten right out of a plastic jar or wide-mouth bottle.
Ingredients: Instant oatmeal (plain or flavored), powdered milk or plant milk powder, chia seeds, dried fruit (raisins, dried cherries), sugar or honey packets, pinch of cinnamon
At home preparation: Combine all dry ingredients per serving in labeled bags. Note typical water amount (about ½-¾ cup per serving) on each label.
Trail method: Add cold water at camp the night before, stir in the jar, let sit 4-8 hours. Add nuts or nut butter in the morning for extra calories.
Texture adjustments: More water = creamier oats. Less water = thicker, chewier texture. Add a little more water if you like it loose.
Cold-Soaked Granola & Milk
An ultrafast breakfast or on-trail lunch requiring zero fuel and minimal cleanup.
Ingredients: Crunchy granola (with chocolate or dried fruit), powdered whole milk or coconut milk powder, optional freeze-dried strawberries or blueberries
At home preparation: Pack granola and milk powder together in single-serve bags. Keep fruit separate for extra crunch.
Trail use: Add cold water directly to the bag or jar, stir, wait 2-3 minutes, eat. Adjust sweetness with sugar packets.
Speed advantage: Ready within minutes of waking up—pack up quickly and start hiking
Bagel & Smoked Salmon Trail Brunch
A luxurious first- or second-day meal when carrying slightly heavier, more perishable ingredients is still safe.
Ingredients: Dense bagels (everything or plain), vacuum-sealed smoked salmon, single-serve cream cheese, optional capers or dried chives
Packing: Keep salmon in factory vacuum pack, bagels in a crush-resistant corner of the pack, cream cheese cups in a small insulated pouch if weather is warm
Trail assembly: Spread cream cheese on bagel, top with salmon, sprinkle capers or herbs. Best eaten within 1-2 days for food safety.
Morale boost: This “fancy” trail food delivers approximately 500-600 calories per bagel sandwich and feels like a restaurant meal on the trail
Pita & Hummus Lunch Wraps
A vegan-friendly no-cook option using dehydrated hummus mix available in outdoor stores and online.
Ingredients: Dehydrated hummus powder, olive oil, water, pita bread, add-ins like sun dried tomatoes, olives, or cucumber slices on shorter trips
At home preparation: Pre-portion hummus mix into small bags labeled with water and oil amounts. Store pitas in a gallon zip-top bag to stay flexible.
Trail method: In a cup or small container, mix hummus powder with a splash of oil and cold water until spreadable. Fill pita halves and top with extras.
Versatility: Leftover hummus becomes a snack dip for crackers in the evening—nothing goes to waste
Uncooked Pasta or Couscous Salads
Cold pasta or couscous salad works as a mid-trip treat when hikers crave something more like “real food” without trail cooking.
Ingredients: Pre-cooked shelf-stable pasta pouches or tiny pasta shapes that soften in cold water, dehydrated vegetables, olive oil, Italian seasoning, salami cubes or feta for early days
At home preparation: Combine pasta and dry veggies in a bag. Pack oil and seasoning in a mini bottle. Keep meat or cheese separate in insulated pouch if perishable.
Trail method: Cover pasta and veggies with water in a container, let soak 30-60 minutes while hiking, drain excess, add oil, seasoning, and protein
Flavor profiles: Try “buffalo-style” with hot sauce and cheese, or Mediterranean with olives and sun dried tomatoes
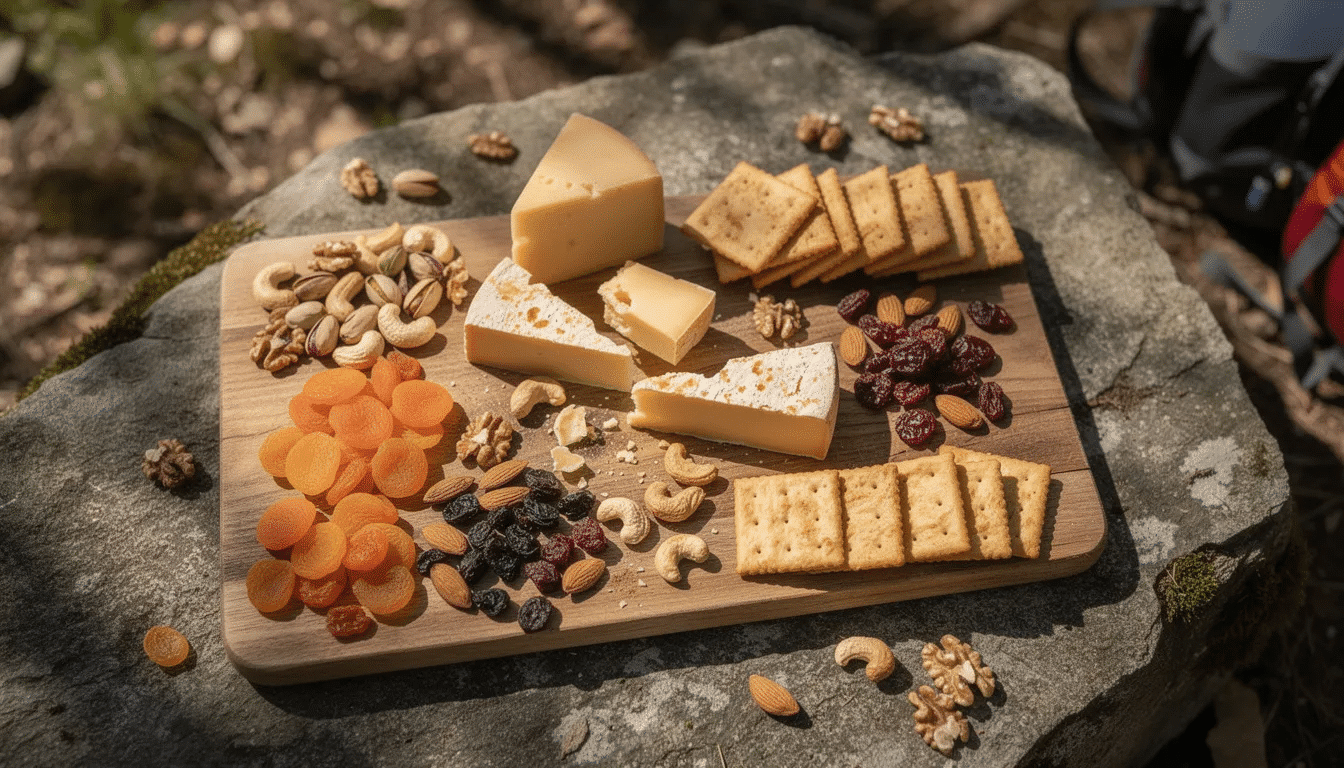
Backpacking “Charcuterie” Snack Dinner
A stove-free “grazing” dinner perfect for warm summer nights or when you reach camp very late and don’t want to cook.
Components: Hard salami or summer sausage, hard cheese (aged cheddar, gouda), crackers, nuts, dried fruit, dark chocolate squares
Packing: Cut sausage and cheese into manageable chunks at home, keep in separate small bags. Crackers and nuts in their own bags to avoid crumbs.
Group option: Spread items on a cutting board or clean bear canister lid for a shared “board” that scales easily
Nutrition: High in fat and protein—works especially well the night before a big climb or long day when you need sustained energy
Follow the “one per hour” rule with rotation: bars, trail mix, candy, snacks like jerky, electrolyte drinks
Target 100-200 calories per snack, 30-60g carbs per hiking hour
Don’t forget dessert: Dark chocolate, freeze-dried fruit, cookies
Trail Cleanup: How to Wash Dishes Responsibly
Good ultralight backpacking recipes are only “good” if they can be cleaned up with minimal water and minimal impact on streams and lakes.
Leave No Trace basics: Strain food particles using a small mesh strainer or bandana. Pack out all food scraps. Use biodegradable soap at least 200 feet (about 70 adult steps) from water sources.
Three-step cleaning routine: Scrape pot completely with spoon. Add a small amount of hot water and wipe with a dedicated cloth or scrubber. Disperse strained gray water widely away from camp.
Skip the pot entirely: Many meals in this guide can be eaten directly from freezer bags or mylar “cook-in-bags,” eliminating pot washing altogether.
Minimal kit: Pack a tiny dropper bottle of concentrated soap and a 2-inch square of cut-down sponge—total weight just a few grams.
Putting It All Together: Sample 3-Day Backpacking Menu
Here’s a concrete example menu for a 3-day, 2-night trip in late August in Washington’s Alpine Lakes Wilderness, using recipes from this article.
Day 1:
Breakfast: No-cook at trailhead—bagel with peanut butter, banana (eat fresh food first)
Lunch: Snack-style mix of trail mix, beef jerky, cheese, crackers eaten over several breaks
Dinner: Loaded Mac & Cheese After Dark with dehydrated peas and summer sausage
Estimated calories: 3,200-3,500
Day 2:
Breakfast: Overnight oats with chia, dried cherries, and almond butter
Lunch: Pita & hummus wraps with sun dried tomatoes
Dinner: Moroccan-style couscous with apricots and chicken, plus simple fruit crisp dessert (freeze-dried apples topped with granola and brown sugar)
Estimated calories: 3,000-3,400
Day 3:
Breakfast: Sunrise hash browns & trail eggs before early hike out
Lunch: Snack-heavy while hiking—bars, gummy bears, nuts, remaining crackers
Dinner: Charcuterie-style snack board back at the car to celebrate
Estimated calories: 2,800-3,200
This menu scales easily for longer trips—simply repeat Day 2’s pattern and vary the dinner recipes to avoid food fatigue on your next backpacking trip.
Further Resources & Next Steps
Experiment with one or two new backpacking food ideas on your next overnight before committing them to a week-long trek
Keep a simple food log after each trip noting which meals were favorites, which felt heavy, and which ran short on calories
Adapt more recipes for dietary needs (gluten-free, vegetarian, dairy-free) by swapping carb bases and proteins while following the same templates
Print or save a checklist of core pantry ingredients and equipment so pre-trip shopping for backpacking recipes is faster—check what you have, buy what you need, and hit the trail with confidence
Dehydrating food at home with a food dehydrator opens even more possibilities for custom trail meals and lightweight dehydrated backpacking meals, but start with these grocery store basics first. Master the fundamentals, test on short trips, and build your personal recipe collection one successful dinner at a time.
DannyContent Writer
Hey there, since 2016, my mission has been to provide you with the information and guides you need to make food dehydrating simple and fun. Whether you're a newbie or a seasoned pro, my site offers helpful guides, reviews, and recipes to enhance your dehydrating experience. I take pride in only recommending products I believe in, ensuring my readers' trust. As an affiliate of various programs, including Amazon Associates, your support helps me continue providing quality content. Thanks for stopping by, and happy dehydrating!