We earn a commission if you make a purchase, at no additional cost to you.
09/22/2026 04:39 pm GMT
🍊 Dehydrated Food Info Finder — Temperatures & Drying Times
Choose a category, then pick a food to see its drying temperature and time.
⚠️ Safety Disclaimer: Drying times are estimates and vary based on slice thickness, food moisture content, humidity, and your dehydrator model. Always check for doneness before storing — food should feel dry, leathery, or brittle with no moist spots. Improperly dried food can harbour mould and bacteria. For meat and poultry, follow USDA safe internal temperature guidelines: beef and pork to 160°F (71°C), poultry to 165°F (74°C). Use a food thermometer when in doubt. Store all dehydrated foods in airtight containers in a cool, dark place and discard anything showing moisture, mould, or off odours.
Sun Food Drying Rack: Complete Guide to Solar Food Dehydration at Home
Turning a bumper harvest into shelf-stable pantry staples doesn’t require fancy equipment or a single watt of grid electricity. A sun food drying rack-whether it’s a simple mesh screen propped on sawhorses or a fully enclosed solar food dehydrator-lets you harness free heat and moving air to preserve fruits, vegetables, herbs, and even meat at home. This guide walks you through how sun drying works, which rack styles suit different living situations, and how to prepare, load, dry, and store food safely from your first batch of apple slices to full-season tomato runs.
Quick Answer: What Is a Sun Food Drying Rack and Why Use One?
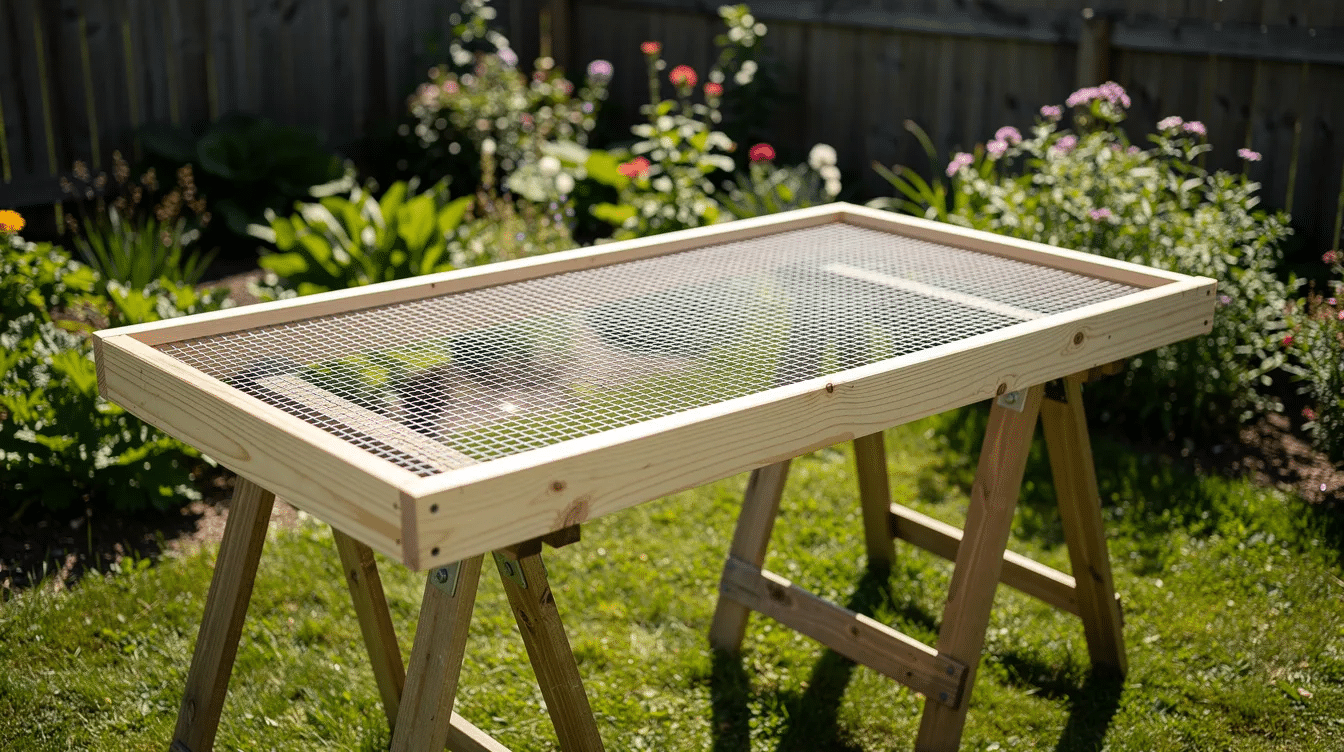
A sun food drying rack is a ventilated frame or enclosed solar food dehydrator designed to remove moisture from fresh food using sunlight and warm air. Some versions are as basic as a wood frame with mesh screen; others are cabinet-style units with glazing, a drying chamber, and controlled air flow. Both accomplish the same process: drying food by inhibiting bacteria and mold growth through moisture removal, extending the shelf life of seasonal produce after harvest.
The core benefits are straightforward:
Zero running cost. Solar drying uses zero electricity, making it an excellent way to preserve food without adding to energy bills.
Low-tech reliability. Fewer mechanical parts mean fewer breakdowns.
Nutrient retention. Dehydrated foods lose only 3–5% of nutritional value-far less than many high-heat methods like boiling water baths used in canning.
Season-long preservation. In most temperate climates, you can dry garden produce from roughly June through October.
Common use cases include:
Sun drying tomatoes into halves or strips
Drying herbs like basil, oregano, and thyme for year-round seasoning
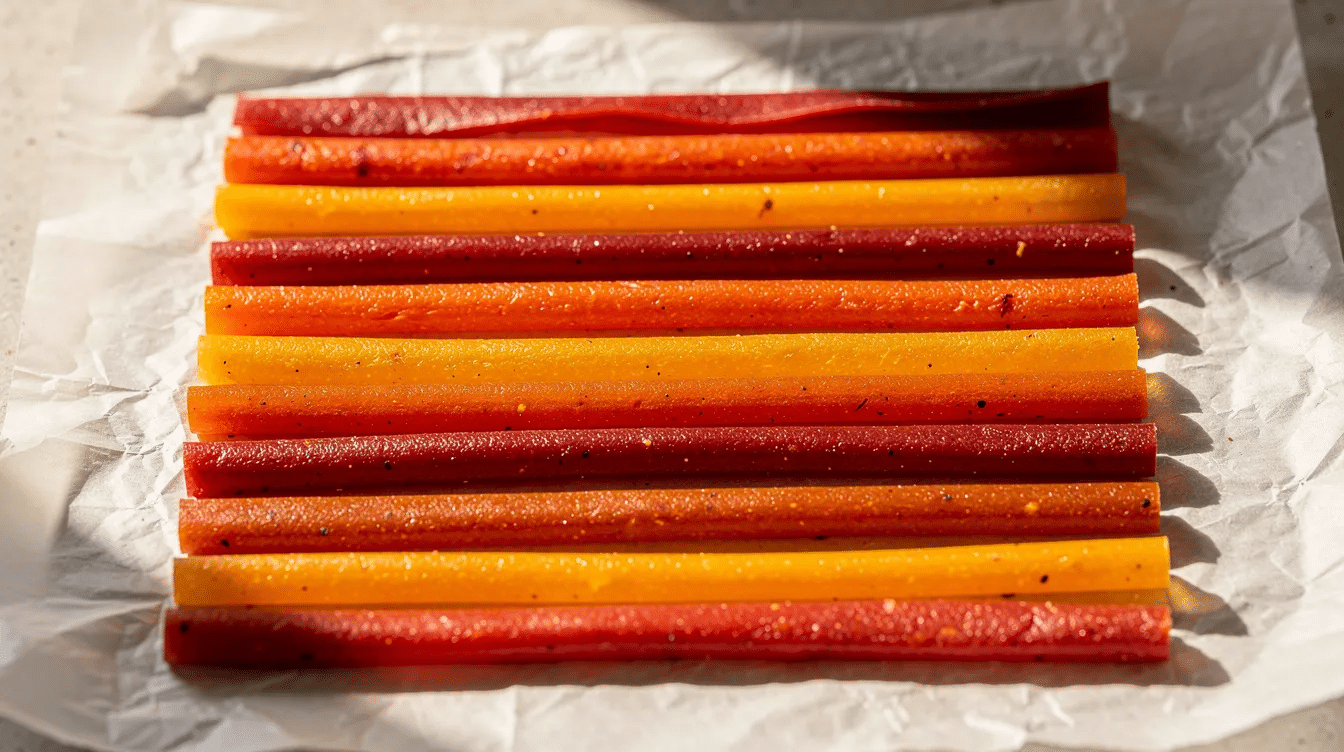
Making fruit leathers from overripe peaches, bananas, or berries
Emergency food preservation during power outages or off-grid living
Preserving excess fruits and vegetables instead of discarding them during peak harvest seasons
Since 2020, a family in southern Arizona has used a 10-tray cabinet-style solar dehydrator to dry 30–40 pounds of produce per week at peak season-tomatoes, peppers, and okra-rotating trays at midday for even results.
How a Solar Food Dehydrator & Drying Rack Actually Work
Drying food works by reducing moisture content to levels where spoilage organisms can’t survive. For most fruits, the target is roughly 10–20% final moisture; for vegetables, often 5–10%. When food is dry, it weighs 10–20% of its original weight.
Here’s the mechanism in a solar food dehydrator:
Heat absorption. Sunlight strikes a collector surface (often painted black) or the glazed top of the drying chamber. This converts solar radiation into heat, warming the air inside.
Convection and air flow. Solar heated air rises naturally through the drying chamber and over the drying trays. Cool air enters through lower intake vents, replacing the rising warm air and creating continuous circulation. Sun food drying allows for improved airflow, critical for consistent drying.
Moisture removal. As heated air passes over food surfaces, it picks up water vapor and carries it out through upper exhaust vents. Maintaining good airflow is essential for successful sun drying operations.
Temperature range. A well-designed solar dehydrator maintains a temperature inside the chamber of roughly 110–140°F (43–60°C). A minimum temperature of 85°F (30°C) is required for effective drying, though higher temps speed the process significantly.
The difference between an open drying rack in direct light and an enclosed solar food dryer is control. Open racks rely entirely on ambient conditions. Enclosed units trap and direct heat, regulate air entering the chamber, and protect food from dust and insects.
Proper airflow prevents “case hardening,” where the outside of a slice dries too fast and seals moisture inside. In a well-designed solar dryer under favorable conditions, thin apple slices (about 1/8 inch thick) can dry in a single sunny summer day in a dry climate like California’s Central Valley.
Advantages of Sun Food Drying vs. Electric Dehydrators and Ovens
Why choose a sun food drying rack over a plug-in food dehydrator or your kitchen oven? The differences come down to cost, nutrition, quality, and environmental impact.
Running cost. Drying 10 lb of apples in an electric dehydrator can use 2–4 kWh of electricity. Over a full season of regular use, those costs add up. A solar food dryer uses no grid electricity at all.
Nutrient preservation. Lower temperatures in solar drying (40–60°C) preserve heat-sensitive compounds better than oven drying at 170–200°F. Research comparing solar versus oven drying of leafy greens found solar methods retained more vitamin C, calcium, and iron. Gentle solar-powered drying retains most of the original vitamins and minerals.
Quality. Slower, gentler drying keeps color, aroma, and texture intact. Herbs hold their essential oils. Fruits stay chewy rather than brittle. This matters especially for fruit leathers and delicate berries.
Environmental footprint. No fossil-fuel-derived electricity, and you’re rescuing surplus garden produce that might otherwise rot-reducing food waste at the source. Solar drying is a sustainable method for preserving food, maintaining natural nutritional value.
Space and weight. Dried fruits and vegetables take up less space than canned or frozen produce, and dried foods are lightweight, making storage simpler.
Seasonal savings example: If you dry 100 lb of tomatoes and peppers from August through September using a sun food drying rack, you avoid purchasing commercial sun-dried products that retail at $8–$15 per pound-while also skipping the electricity bill from running a food dehydrator daily.
Main Types of Sun Food Drying Racks and Solar Dryers
Not every setup suits every situation. Here are the main categories:
Simple flat drying racks. A wood or metal frame with food-safe mesh, typically 24×36 inches, raised on bricks or sawhorses. Good for small batches, patios, and occasional use. Easy to purchase or build.
Hanging mesh drying racks. Tiered nylon or polyester bags with zippered compartments, each roughly 24×16 inches. Collapse flat for storage. Ideal for herbs, berries, and seeds on balconies or campsites where space is limited.
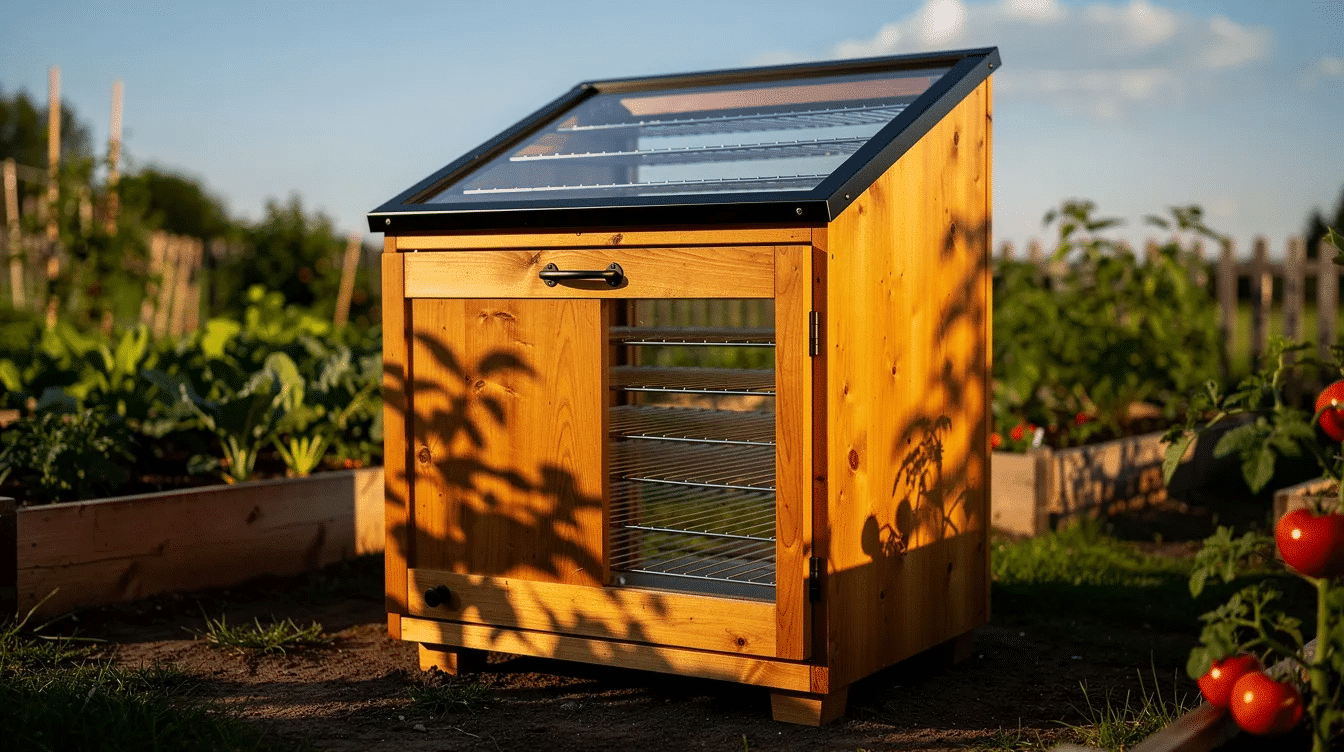
Cabinet-style solar food dehydrators. Enclosed chambers with glazed tops, dark absorber surfaces, vented air flow, and multiple sliding drying trays-often 8–12 trays, each about 12×24 inches. These handle larger garden harvests and give you far more control over temperature and air flow than open racks, and many solar food dehydrator models are designed specifically for this purpose.
Hybrid oven/sun food drying racks. Multi-level metal racks sized to fit inside a standard kitchen oven or a box-style solar oven. Useful when weather interrupts sun drying and you need to finish a batch indoors at a low oven temperature.
Specialty and multipurpose racks. Collapsible camping racks, racks marketed for jerky or seafood drying, and multi-purpose designs that double as herb dryers or snack racks. Many feature wheels for easy repositioning throughout the day.
When to choose what: Apartment or balcony dwellers do well with hanging mesh racks or compact flat racks. Homesteaders processing large harvests benefit from a cabinet-style solar dehydrator with 8+ trays.
Key Features to Look For in a Food Drying Rack
Buying or building a drying rack that lasts multiple seasons means paying attention to several details:
Materials. Use food-safe screening materials like stainless steel or plastic for drying racks. Wood frames should be food-grade hardwoods (oak, maple) or sealed softwood with non-toxic finish. Avoid bare galvanized metal in contact with food-it can corrode and leach zinc.
Mesh size and air flow. Mesh must be fine enough to hold chopped herbs and small berries (1–2 mm openings) but open enough for air circulation underneath. Cover the drying rack with fine mesh or food-safe netting to keep insects away while allowing airflow.
Protection from direct sunlight. Solar food dryers can include features to protect food from direct sunlight while allowing air movement-useful for delicate herbs and light-colored fruits that brown in harsh direct light.
Size and capacity. A 3-tier rack with 20×24-inch trays can hold around 10–15 lb of sliced produce per load, depending on slice thickness.
Insect and dust protection. Look for integrated screens, zippered mesh doors, or enclosed drying chambers that seal out flies and debris.
Durability. Rustproof coatings on metal, weather-resistant finishes on wood, UV-resistant plastic mesh, and strong stitching on fabric racks for repeated folding.
Cleanability. Removable screens and smooth surfaces let you wash trays with hot soapy water between batches. No cracks or splinters where bacteria can hide.
Built-in monitoring. The Dehytray solar food drying rack, for example, includes a hygrometer so you can track humidity inside the chamber without opening it.
Setting Up a Sun Food Drying Rack: Location, Orientation, and Safety
Placement matters more than most people expect. Get it wrong and you’ll fight slow drying, mold, or contamination.
Find full sun. Position your rack or solar dehydrator in a sunny spot that receives at least 5–7 hours of direct sun between roughly 10 a.m. and 5 p.m. Keep away from trees that cast shifting shade and from dusty roads or driveways.
Orientation. Face the collector or glazed side south in the Northern Hemisphere (north in the Southern Hemisphere). If using flat trays, tilt them very slightly so condensation runs off rather than pooling.
Climate check. Ideal solar drying conditions include low humidity and strong sunshine. Ambient temperatures above about 75°F (24°C) give the best results. In damp climates, bring food inside at night to prevent moisture re-condensation on the food.
Safety. Place racks out of reach of pets and wildlife. Anchor or weight the frame against wind. Keep racks away from garages, paint storage, or treated lumber where chemical fumes could taint food.
Urban settings. Balconies and flat rooftops work well if structurally sound. Check building rules before mounting anything permanently.
Monitoring tools. An outdoor thermometer and a small hygrometer let you log conditions. A kitchen scale helps you track weight loss in sample pieces to know when drying is complete. On sunny days, rotate food items daily and rotate the racks 180° for even drying.
Preparing Food for Drying: Best Practices for Fruits, Vegetables, and Herbs
Good preparation is half the battle. Rushed prep leads to uneven results and wasted food.
General steps. Harvest at peak ripeness-morning is best for herbs, fully ripe but firm for fruits. Wash thoroughly under clean running water, drain or spin dry, and trim damaged portions.
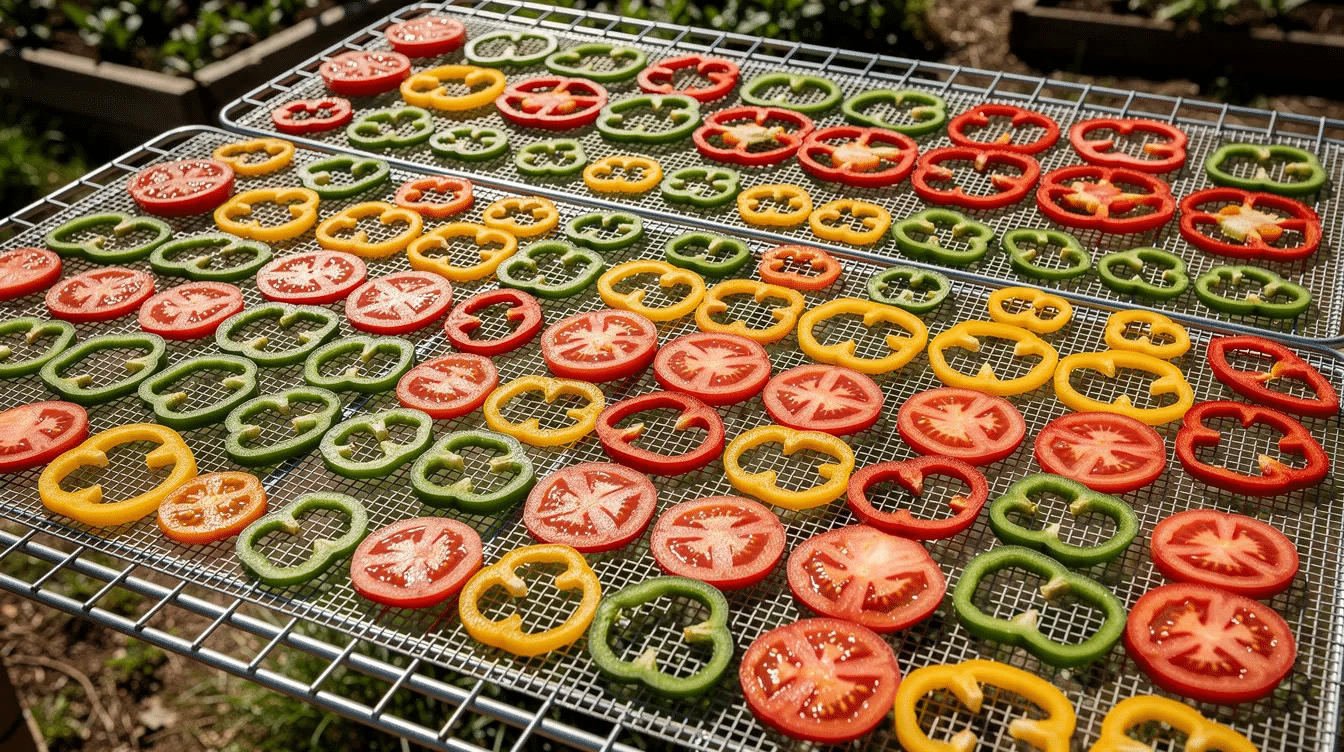
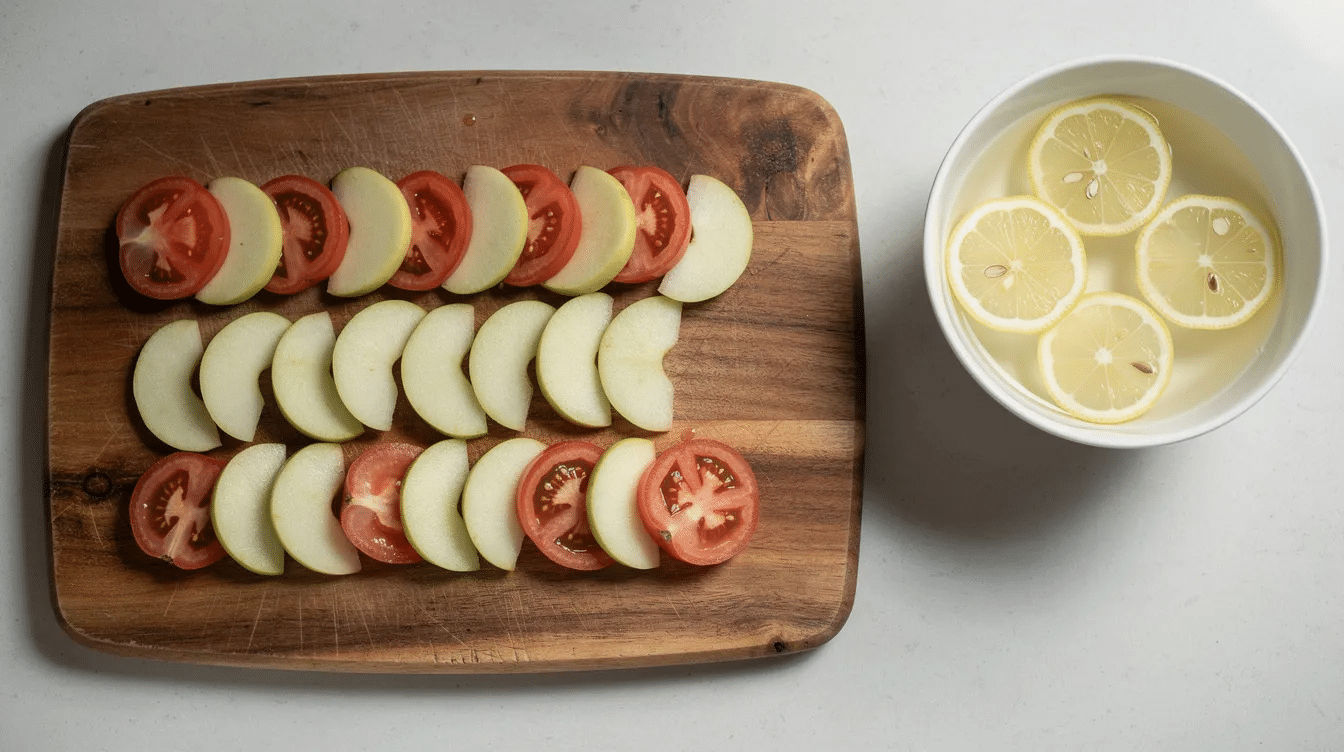
Slicing. Slice produce into uniform pieces so it dries evenly. Aim for 1/8–1/4 inch thick for most fruits and vegetables. Apple rings at 1/8 inch and tomato slices at 1/4 inch are reliable starting points. Use a sharp knife or mandoline for consistency.
Pre-treatments for fruits. Dip apples, pears, and peaches in ascorbic acid or lemon juice solution (1 tablespoon lemon juice per cup of water) to reduce browning, just as you would when dehydrating fruit using a food dehydrator. This is optional but noticeably improves color in the finished product.
Light brining for vegetables. A quick soak in light brine improves flavor and texture for eggplant, zucchini, and summer squash strips.
Optional blanching. Dense vegetables like carrots, green beans, and peas benefit from 2–3 minutes of steam blanching followed by a cold water plunge. Blanching preserves color, shortens drying time, and deactivates enzymes that cause off-flavors in storage. Virginia Tech’s extension guide lists detailed blanching times for dozens of vegetables.
Herb prep. Harvest leafy herbs like basil, oregano, and mint just before flowering for peak flavor. Strip leaves from thick stems but keep delicate sprigs intact. If dust is a concern, gently shake or brush leaves rather than soaking them.
Meat safety. Trim visible fat from meat before drying. Keep raw meat on separate cutting boards from plant foods, and sanitize knives between food types.
Loading Drying Trays and Racks Correctly
How you load trays directly affects drying speed and quality.
Single layer. Food should be spread in a single layer on drying trays-no overlapping-with roughly 1/8–1/4 inch of space between pieces for air circulation.
Tray order. In a cabinet-style solar food dehydrator, place thicker or moister foods (tomato halves, peach slices) on the upper, hotter trays where temperature inside the chamber peaks. Put thinner slices and herbs on lower, cooler trays where air entering is still relatively cool.
Rotate regularly. Swap top and bottom trays every 1–2 hours on very sunny days. This evens out heat exposure and prevents over-drying on top while the bottom stays moist.
Fruit leathers. Pour purees onto solid, food-safe plastic or silicone sheets placed on drying racks. Spread to about 1/8 inch thick using a spatula, leaving a half-inch border around edges.
Loading density. Keep it to about 2–3 lb of sliced apples per standard 12×18-inch tray. Overloading slows drying and invites mold.
Pre-load cleaning. Wash and fully dry trays before each new batch to remove residual moisture or mold spores from previous loads.
Typical Drying Times and How to Tell When Food Drying Is Complete
Drying times vary with climate, slice thickness, and food type. Here are rough ranges under good summer sun with ideal solar drying conditions-low humidity and strong sunshine:
Food
Approximate Drying Time
Apples (1/8-inch slices)
6–10 hours
Tomatoes (1/4-inch slices)
1–2 days
Peppers (strips)
8–12 hours
Leafy herbs
3–6 hours
Fruit leathers
8–12 hours
Bananas (1/4-inch slices)
1–2 days
Research on a portable indirect solar dryer tested over 16-hour periods found that apple slices reached about 15% moisture in roughly 11 hours, while tomatoes dropped to approximately 5% moisture in about 10 hours. Bananas and oranges required significantly longer.
Texture tests:
Dried food should feel leathery and pliable without stickiness. Fruits should bend without snapping, with no moist center when cut open.
Most vegetables are dry when they are brittle and shatter when bent.
Herbs should crumble easily between your fingers.
Weight test: Weigh sample pieces before and after. Fruits lose approximately 80% of their moisture during drying; vegetables lose about 90%. If the food weighs around 10–20% of its original weight, moisture content is in the safe zone.
Warning signs food isn’t done: Cool, moist centers when you slice a piece open, visible condensation forming inside a storage jar after a few hours, or any hint of stickiness in thick slices. If nighttime humidity threatens to undo your progress, bring trays indoors and resume sun drying the next morning.
Making Fruit Leathers on a Sun Food Drying Rack
Fruit leathers are thin, chewy sheets of concentrated fruit puree-a perfect way to use overripe bananas, peaches, or late-summer berries that are too soft to eat fresh but too good to discard, whether you’re making classic rolls or experimenting with apricot fruit leather in a dehydrator.
Base recipe:
Wash and pit your fruit. Puree in a blender until smooth.
For light-colored fruits (apples, peaches), add 1 tablespoon of lemon juice per 2 cups of puree to slow browning.
Optionally sweeten lightly with honey or sugar-most ripe fruit won’t need much.
Thickening runny purees: If the blend is too watery (common with watermelon or very ripe strawberries), simmer on the stove for 5–10 minutes to cook off excess moisture, or stir in small amounts of applesauce or ground flax until the consistency is pourable but not thin.
Spreading and drying:
Pour puree onto solid food-safe plastic or silicone sheets placed over your drying trays. Spread to about 1/8 inch thick with a spatula, leaving a small border around edges. Thicker layers can double drying time.
Dry in your solar dehydrator or on an open rack in full sun for 8–12 hours.
How to tell it’s done: The top surface becomes non-sticky, the sheet peels cleanly from the liner, and no wet spots appear when you hold it up to the light.
Cutting and storage: Slice into strips or squares using kitchen scissors. Roll each piece in parchment or plastic wrap, then store in airtight jars or freezer bags. In a cool, dark cupboard, fruit leathers keep for several months, and following best practices on how long fruit leathers last helps you maximize freshness. Freezing extends shelf life further.
Try these combinations: Strawberry-banana (equal parts) with a pinch of vanilla, or apple-cinnamon with a half teaspoon of ground cinnamon per 2 cups of puree—then compare your results with a dedicated apple fruit leather dehydrator recipe for more flavor ideas.
Drying Herbs, Vegetables, and Meat Safely in the Sun
Each food category has its own rules. Here’s what matters.
Herbs:
Popular choices: basil, thyme, rosemary, mint, oregano. They dry quickly-often in 3–6 hours on a warm day.
Herbs should be kept out of intense direct sunlight to preserve flavor and color. Place them on lower trays inside a solar dehydrator or under a light shade cloth on open racks.
When drying herbs, avoid overcrowding to facilitate proper air circulation. Spread leaves in a loose single layer rather than piling them.
Shelf life: 6–12 months in airtight jars stored away from light.
Vegetables:
Carrots, peppers, tomatoes, onions, and leafy greens each have different textures when finished. Peppers stay slightly flexible; carrots and peas should snap.
Blanch dense or starchy vegetables before drying: carrots for about 3 minutes in steam, peas for 2 minutes, then plunge into cold water. South Dakota State Extension notes that vegetables in a solar dryer typically dry in 3–5 days under good conditions, or faster in enclosed units.
Shelf life: 6–12 months when stored properly.
Meat (jerky):
Meat drying is higher risk than plant foods. Slice no thicker than about 1/4 inch.
Marinate strips in a salt and acid-based brine (soy sauce, vinegar, spices) for 8–24 hours before drying.
For safety, USDA guidelines recommend preheating strips to safe internal temperatures-160°F for beef, 165°F for poultry-in an oven before finishing in the solar dehydrator. High temperatures in the drying chamber alone may not reliably reach pathogen-kill levels.
Use separate trays for meat. Never dry raw meat above trays of fruits or vegetables in the same drying chamber. Wash and sanitize all surfaces afterward with dilute vinegar or food-safe sanitizer.
Shelf life: properly dried and packaged jerky lasts 1–2 months at room temperature, longer if refrigerated or vacuum-sealed; understanding beef jerky shelf life and expiration helps you spot when it’s no longer safe.
Storing and Using Dried Foods from Your Solar Dehydrator
Good drying is wasted if storage is sloppy. Here’s how to keep your food safe and flavorful.
Containers. Containers for dried foods should be airtight and stored in a cool, dark place. Glass jars with tight-fitting lids, food-grade plastic buckets with gasketed lids, and vacuum-sealed bags all work. Label each container with the food type and drying date (e.g., “Roma tomatoes, August 2026”).
Conditioning. After drying, place loosely packed pieces in glass jars for 7–10 days. Shake daily to redistribute any residual moisture. If you see condensation on the inside of the jar, return the food to the drying rack for more time.
Storage conditions. Keep containers below 70°F (21°C) in dark cupboards, boxes, or a pantry. Heat and light accelerate color loss and vitamin degradation.
Shelf life. Dried foods can keep a minimum of six months in storage. Properly dried food can last up to five years when stored correctly in optimal conditions, and guides on how long dehydrated food lasts emphasize the role of temperature, light, and humidity. Solar drying racks can preserve food for up to five years. For maximum longevity, consider freezing dried items in airtight containers to slow oxidation and insect activity.
Using dried foods. Add dried vegetables to soups and stews. Stir dried fruit into oatmeal or yogurt. Grind dried peppers into chili flakes. Blend dried greens into smoothies or seasoning mixes. Baking with dried fruit-think apple-cinnamon muffins-is another easy option.
Rehydration. A rough starting ratio: 1 cup dried tomatoes to 1–1.5 cups warm water, soaked for 15–30 minutes. For cooking, simply simmer dried vegetables directly in soups or stews and they’ll rehydrate as the dish cooks.
Cleaning, Maintenance, and Seasonal Care of Drying Racks
A few minutes of care after each batch keeps your equipment safe and functional for years.
After each batch:
Brush crumbs and stuck bits off trays.
Wash drying trays and rack surfaces with warm soapy water. Rinse well.
Air-dry completely before storing or reloading. Residual moisture invites mold.
End of drying season:
Inspect wood for cracks or warping. Tighten loose screws on the frame.
Check nylon or polyester mesh for tears and replace damaged screen panels.
If racks were used for meat or fish, sanitize with a dilute vinegar solution or a food-safe sanitizer. Avoid harsh chemicals that could linger on porous surfaces.
Seasonal storage:
Fold collapsible racks flat. Store cabinet-style solar dehydrators in a dry shed or garage over winter.
Cover units with breathable fabric covers to keep out dust, mice, and rodents.
Spring start-up checklist:
Confirm vent covers move freely and aren’t blocked.
Verify glazing is intact and clean-dirty glass or plastic reduces heat gain.
Check inside the drying chamber for insect nests or spider webs and clear them out before your first batch.
DIY Sun Food Drying Rack and Solar Dehydrator Ideas
Many home gardeners build their own racks rather than purchase commercial units. A simple solar dryer can be built from scrap materials, and homemade solar dryers can be built from scrap materials you may already have on hand-or from inexpensive lumber and screen from your local hardware store.
Simple flat rack project:
Build a 24×36-inch frame from pine or cedar boards (1×3 or 1×4 lumber, cut with a circular saw).
Stretch food-grade plastic or stainless steel mesh across the frame and secure it with a staple gun.
Raise the rack on bricks or sawhorses so air circulates above and below.
Estimated cost: under $40 in materials from any hardware store.
Cabinet-style solar dehydrator concept:
Build a sloped collector box from exterior plywood. Paint the interior absorber surface-often the back wall and floor-painted black to maximize heat absorption.
Top the collector with clear polycarbonate, fiberglass, or greenhouse plastic glazing.
Attach a vertical drying chamber with slots for multiple sliding drying trays.
Add screened intake vents at the bottom (where cool air enters) and exhaust vents at the top. The front legs can be shorter than the rear to create the slope for the collector.
Adjust the collector angle to your latitude-steeper for higher latitudes (around 45° for the northern U.S. or central Europe), shallower closer to the equator.
Rough cost for a mid-size unit built from new materials: approximately $250–$350 in 2025–2026 pricing.
Climate adaptations: In humid regions, use larger vents and consider adding a small solar-powered fan to force air flow through the chamber. In the world of DIY solar dryers, even modest improvements to ventilation can cut drying time dramatically.
Troubleshooting Common Sun Drying Problems
Even experienced users hit snags. Here are the most common issues and how to fix them.
Mold growth. Discard any affected food-don’t try to salvage it. The cause is almost always insufficient moisture removal: slices too thick, trays overloaded, or humidity too high. Next time, cut thinner, load lighter, and ensure faster air flow. Bring trays indoors overnight in humid areas to prevent re-absorption.
Case hardening. The outside feels dry but the inside is still moist. This happens when heat is too intense relative to air flow. Reduce direct exposure by moving racks to partial shade or increasing ventilation. Cut pieces in half mid-process to check. Reduce slice thickness on the next batch.
Uneven drying between trays. Rotate and swap drying trays top-to-bottom and front-to-back throughout the day. Stir or flip chopped foods once or twice. Avoid overloading any single tray-the same loading density guidelines apply whether you have two trays or twelve.
Insect contamination. Use enclosed drying chambers with screens, mesh covers, or zippable hanging racks. Position racks away from where vehicles stir up dust or where compost bins attract flies.
Off-flavors. Smoke, exhaust fumes, or proximity to paint and solvents can taint drying food. Move racks well away from any chemical sources. Also check that the wood or paint used in a DIY solar dehydrator is food-safe.
Weather interruptions. If rain moves in and food is nearly dry, finish the batch in a low-temperature oven (around 140°F). For food that’s only partially dry, move racks under a clear porch roof or use a greenhouse-style plastic cover to shed rain while still capturing heat and light. Resume in the sun once skies clear.
Conclusion: Building a Reliable Solar Food Preservation Habit
A well-chosen sun food drying rack or solar food dehydrator can turn seasonal gluts of garden produce into year-round pantry staples-no grid power, no expensive equipment, no complicated techniques. Using a solar food drying rack extends the shelf life of seasonal produce after harvest, keeps your food preservation costs near zero, and lets you eat what you grew long after the growing season ends.
Start small. Try one tray of apple slices or a single batch of herbs on your next stretch of sunny days. Once you see how simple the process is-and how satisfying it is to open a jar of home-dried tomatoes in January-you’ll naturally scale up to fruit leathers, full trays of peppers, and maybe even jerky.
Consider keeping a simple drying journal. Note the date, weather conditions, food type, slice thickness, and results. Over a season or two, you’ll dial in the exact timing for your climate, your rack, and your favorite foods. That’s the real value of sun drying: a skill that improves every year and costs almost nothing to practice.
DannyContent Writer
Hey there, since 2016, my mission has been to provide you with the information and guides you need to make food dehydrating simple and fun. Whether you're a newbie or a seasoned pro, my site offers helpful guides, reviews, and recipes to enhance your dehydrating experience. I take pride in only recommending products I believe in, ensuring my readers' trust. As an affiliate of various programs, including Amazon Associates, your support helps me continue providing quality content. Thanks for stopping by, and happy dehydrating!