We earn a commission if you make a purchase, at no additional cost to you.
🍊 Dehydrated Food Info Finder — Temperatures & Drying Times
Choose a category, then pick a food to see its drying temperature and time.
⚠️ Safety Disclaimer: Drying times are estimates and vary based on slice thickness, food moisture content, humidity, and your dehydrator model. Always check for doneness before storing — food should feel dry, leathery, or brittle with no moist spots. Improperly dried food can harbour mould and bacteria. For meat and poultry, follow USDA safe internal temperature guidelines: beef and pork to 160°F (71°C), poultry to 165°F (74°C). Use a food thermometer when in doubt. Store all dehydrated foods in airtight containers in a cool, dark place and discard anything showing moisture, mould, or off odours.
Hey there, garlic gourmets! If you’re searching for how to dehydrate garlic in a dehydrator, you’re in the right place. This guide is perfect for home cooks, gardeners, and anyone interested in food preservation. Dehydrating garlic is a great way to preserve its flavor and extend its shelf life. This guide will take you on an aromatic journey, teaching you the ins and outs of dehydrating garlic. With this skill, you can add a new layer of depth and flavor to your culinary creations. So, grab your dehydrator as we dive into this hot and tasteful adventure!
Garlic Dehydration Recipe Table
Step
Action
Details
Tips
1
Select Garlic
Choose fresh, firm garlic bulbs without green shoots or mold.
Larger cloves are easier to peel and have stronger flavor after dehydration.
2
Prepare Garlic
Peel garlic cloves, trim root ends, and slice or mince into uniform pieces.
Avoid garlic press to retain flavor and juice.
3
Arrange on Trays
Spread garlic in a single, even layer on dehydrator trays ensuring pieces do not touch.
Use multiple trays if needed; do not overcrowd for even drying.
4
Set Temperature and Time
Set dehydrator to 100-125°F (40-52°C), dry for 6-12 hours depending on thickness and humidity.
Check periodically; garlic is ready when brittle and snaps easily when bent.
5
Cool Garlic
Allow dehydrated garlic to cool completely before storage.
If you’re a huge garlic fan or simply looking for a way to make the most of your fresh garlic harvest, dehydrating garlic is a game-changer. By removing excess moisture from garlic cloves, you can lock in that bold, savory flavor and enjoy it in your favorite soups, sauces, and dishes all year long. Dehydrated garlic is not only a fantastic way to preserve the taste and aroma of fresh garlic, but it also makes meal prep a breeze—no more peeling and chopping every time you cook! Whether you’re working with a bumper crop or just want to keep your pantry stocked with this essential ingredient, dehydrating garlic is a simple, effective method that keeps your cloves ready for action whenever inspiration strikes. Plus, with properly dried garlic, you can say goodbye to spoilage and hello to long-lasting, concentrated flavor in every bite.
Choosing the Perfect Garlic
Oh, the humble garlic! Perhaps you’ve always just grabbed the first bulb you see in the grocery store and called it a day. But, did you know there’s an art to choosing the perfect one for dehydration? That’s right, the quality of the bulb you start with will significantly influence the end result.
So, what should you look out for? First and foremost, make sure to pick fresh, firm bulbs. The skin should feel tight and dry, giving a little crackle when you squeeze it. Avoid bulbs with green shoots, as it signifies the garlic is already past its prime. If you see black spots or other visible signs of mold, give that one a pass as well. While peeled garlic cloves are convenient, peeling fresh cloves yourself yields better flavor for dehydration.
Color and shape: Go for the white or off-white bulbs that are round in shape. But hey, don’t sweat it if the exterior has a bit of purple streaking – that’s normal and won’t affect the taste or quality.
When preparing your garlic, trim the root end of each clove to make peeling easier and to get the cloves ready for slicing or mincing.
Of course, as is often the case, the best garlic comes hand-in-hand with the seasons. Did you know that garlic harvested in summer usually boasts a stronger flavor than those grown in cooler parts of the year? Surprising, right?
To ensure you’re getting the utmost quality, consider buying organic or perhaps grow your own. Nothing beats the thrill of harvesting your own bulbs and using them to create delectable, dehydrated garlic. Who knew choosing the perfect ingredient could be so exciting?
Equipment Needed
Before you embark on your journey to dehydrate garlic and create your own garlic powder, it’s important to gather the right tools for the job. Having the proper equipment not only makes the process smoother but also ensures you get the best flavor and texture from your dried garlic. Here’s what you’ll need to turn those fresh garlic cloves into a delicious pantry staple:
Food Dehydrator: The star of the show! A food dehydrator is the most efficient way to dry garlic evenly, locking in that robust flavor and aroma. Most models come with adjustable temperature settings and multiple trays, making it easy to dehydrate large batches of garlic slices or minced garlic at once. If you’re choosing a new machine, guides to the best food dehydrator for herbs can also help you understand key features like temperature control and capacity.
Oven (as an alternative): If you don’t have a dehydrator, your oven can step in. Set it to the lowest heat possible and use parchment paper on a baking tray to prevent sticking. While it may take a bit longer and require more attention, it’s a handy backup for drying garlic. Garlic can also be dehydrated using an oven set at 150-200˚F for 1-2 hours.
Sharp Knife or Food Processor: Slicing or mincing your garlic cloves into uniform pieces is key for even drying. A sharp knife gives you control over the thickness of your garlic slices, while a food processor can save time if you’re working with a lot of garlic bulbs. A chef’s knife is ideal for smashing or chopping garlic cloves before slicing, ensuring even pieces for dehydration.
Coffee Grinder, Mortar and Pestle, or Blender: Once your garlic is completely dry, you’ll need something to grind it into powder. A coffee grinder or high-powered blender works wonders for making garlic powder, while a mortar and pestle is perfect for those who enjoy a hands-on approach and a bit of rustic texture. A spice grinder is especially effective for turning dried garlic into a fine powder, giving you fresh homemade garlic powder whenever you need it.
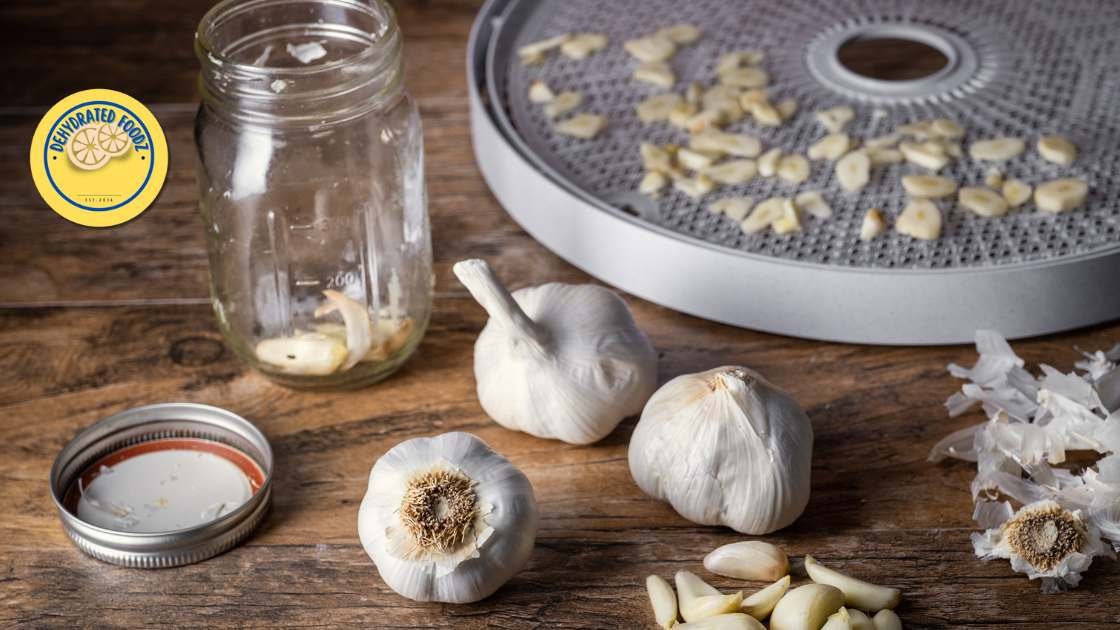
Airtight Containers (like mason jars): To keep your dehydrated garlic, garlic powder, or dried garlic chips fresh and full of flavor, store them in airtight containers. Mason jars are a classic choice, but any jar with a tight seal will do the trick, helping to extend the shelf life of your homemade garlic creations. For long-term storage, mylar bags with oxygen absorbers are an excellent option to maintain freshness and prevent spoilage.
Parchment Paper and Trays: If you’re using an oven, parchment paper prevents sticking and makes cleanup a breeze. Trays are also useful for air drying small batches of garlic if you prefer a more traditional method.
Keep in mind that investing in quality equipment may involve some additional cost, but it ensures the best results and longevity of your homemade garlic products.
With these essential tools at your fingertips, you’ll find that dehydrating garlic and making your own garlic or ginger powder is not only simple but also incredibly rewarding. Stock your pantry with this delicious, homemade seasoning and enjoy the bold taste of garlic in your favorite recipes all year round!
Preparing the Garlic for Dehydration
Note: Choose fresh, firm garlic bulbs, peel the papery skins, cut off the root end for easier peeling, and slice the cloves into uniform pieces for even drying. Avoid using a garlic press, as it loses too much juice.
So, you’ve chosen your perfect garlic and you’re eager to start the process. But where do you start? Understanding the preparation process is key to getting it right. Here’s your simple guide to preparing garlic for dehydration:
Peeling the Garlic
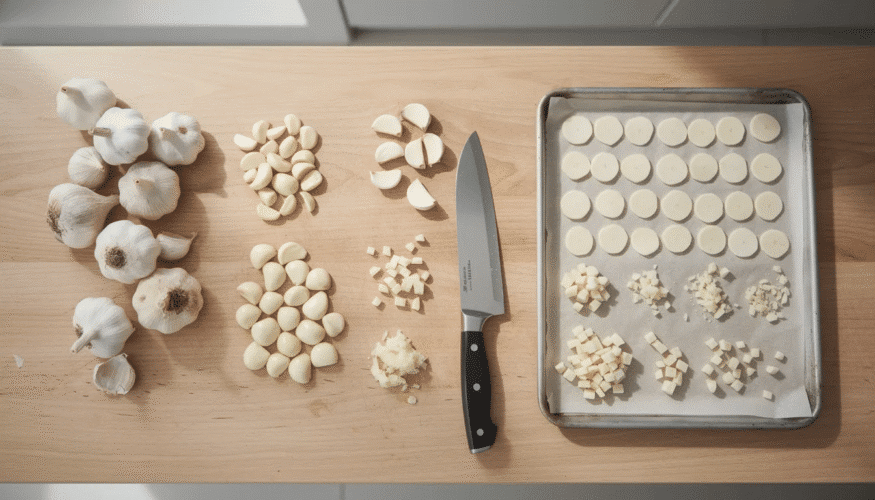
Begin by separating the garlic bulbs into individual cloves. Next, peel each clove. Chopping the garlic can make peeling and mincing easier, and uniform chopping is important for even drying. You can slice, dice, crush, or chop the garlic cloves into smaller pieces to facilitate even dehydration. Slicing the cloves into uniform pieces—creating sliced cloves or sliced garlic—ensures they dry evenly and develop better flavor. Chopped garlic is another form you can prepare for dehydration, offering a convenient option for seasoning and quick recipe use.
Dehydrating whole cloves is generally not recommended, as they may not dry thoroughly inside, which can lead to spoilage. It is better to slice or chop the cloves for more reliable results.
Washing and Drying
After washing, pat the garlic dry thoroughly to remove excess moisture before dehydrating.
Slicing or Chopping
Depending on how you’ll be using your dehydrated garlic, you may want to slice, chop, dice, or crush your cloves. Chopping the garlic cloves into smaller pieces can make peeling and mincing easier, and is especially helpful if you plan to make minced or chopped garlic for seasoning. Each method gives the garlic a different texture and dehydrates slightly differently, so it’s important to choose wisely. Sliced cloves, especially when cut uniformly, are ideal for making sliced garlic that dries evenly and develops great flavor. Chopped garlic is another form you can prepare for dehydration—it’s convenient for seasoning and quick recipe use. We’ll delve into the specifics of each method later, but for now, let’s focus on our shared goal: getting the garlic ready for the dehydrator.
No matter how you’ll be breaking down your cloves, whether you’re chopping or slicing, be sure to aim for pieces that are evenly sized. This helps to ensure that the garlic dries evenly and prevents some pieces from burning while others remain moist.
Arranging on Trays
With your garlic prepared, let’s move on to arranging it for optimal drying.
Layering Techniques for Optimal Drying
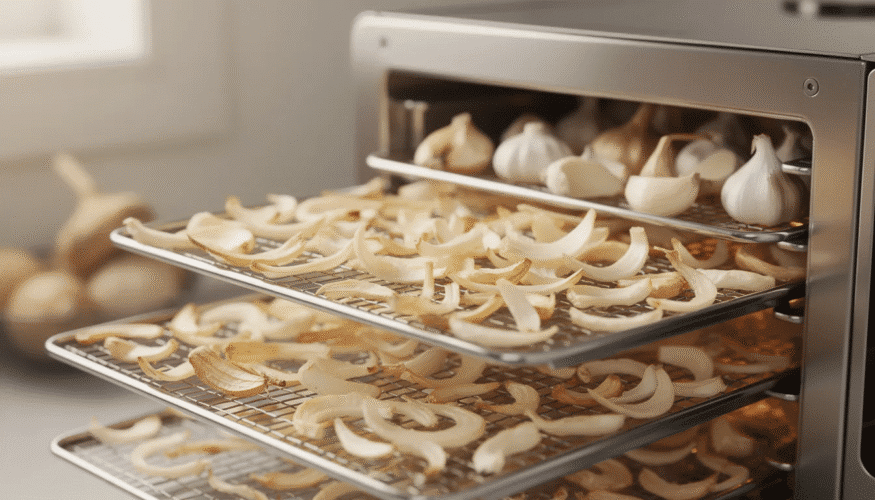
Now that your garlic is prepped and ready, it’s time to move on to the mission-critical phase: arranging it in the dehydrator. For best results, spread the garlic in an even layer on the trays—this ensures consistent airflow and even drying, which is crucial for quality dried garlic slices. Dried garlic slices are a versatile form of preserved garlic that can be used in a variety of dishes. You can’t just toss the pieces in randomly and hope for the best outcome; the arrangement has a significant impact on the drying effectiveness and time. Let’s explore some key layering techniques for optimal drying. The same careful layering techniques apply when you dry peppers in a dehydrator so they dehydrate evenly and retain great flavor.
Spread Out Evenly
Start by placing the garlic pieces evenly on the dehydrator tray. You want plenty of air to circulate between each piece, so ensure they’re not touching each other or stacked. This aids in even dehydration and prevents the garlic from sticking together or over-drying in certain areas.
Don’t Overcrowd
Resist the urge to overcrowd. The more space you provide for each piece, the more efficiently your garlic will dehydrate. Remember, it’s not a race. Try not to become too eager and cram in as much garlic as possible. Yielding to this temptation can lead to an unevenly dried, frustrating product.
Use Multiple Trays
If you have large quantities of garlic to dehydrate, don’t worry. Most dehydrators come with multiple trays. You can layer the slices on different layers, adhering to the ‘don’t overcrowd’ rule, of course. It’s perfectly fine to run the dehydrator with only a few filled trays. It won’t affect the overall drying process.
Slice Thickness Matters
Another key point to remember is that the thickness of your slices impacts dehydration time. If your slices vary greatly in thickness, they won’t dry at the same rate, leading to some being overly dry while others may still hold moisture. So, strive to keep your slices uniformly thin for an evenly dehydrated batch.
Following these layering techniques, you will be on your route to having garlic pieces dried to crispy perfection. The aroma wafting from your dehydrator will tantalize your senses and fill your space with a delicious scent, reminding you of the mouthwatering end product you are about to savour.
Step-by-Step Checklist: How to Dehydrate Garlic in a Dehydrator
Slice or mince garlic for even drying: Slice the garlic cloves into uniform pieces or mince them to ensure all pieces dry at the same rate.
Spread in a single layer: Arrange the prepared garlic in a single, even layer on dehydrator trays, making sure pieces do not overlap.
Set dehydrator to 100-125°F for 6-12 hours: Adjust your dehydrator to a temperature between 100-125°F and dry for 6-12 hours, depending on thickness and humidity.
Check for doneness: Garlic is ready when it is brittle and breaks easily when bent.
Allow to cool completely before storage: Let the dehydrated garlic cool to room temperature before transferring to storage containers to prevent condensation.
Condition in a glass jar for 24 hours to check for moisture: Place the cooled garlic in a glass jar for 24 hours, shaking occasionally to redistribute pieces and check for any signs of moisture.
If condensation appears, re-dry: If you see condensation or clumping, return the garlic to the dehydrator for additional drying.
Store in airtight container in cool, dark place for up to 1-2 years: Once fully dry and conditioned, store garlic in an airtight container (preferably glass) in a cool, dark place for up to 1-2 years.
For garlic powder, grind and sift: To make garlic powder, grind the dehydrated garlic in a blender or spice grinder, then sift through a fine mesh strainer for a uniform texture.
Picking the right temperature plays a crucial role in preserving its natural flavor and health benefits. Always use low heat to prevent the garlic from turning brown, which can cause bitterness and alter the flavor. Dehydrating garlic at low temperatures helps maintain its flavor and prevents burning. If your appliance has a dehydrate setting, be sure to use it for best results. If the temperature is too high, the garlic can lose its raw, potent garlic essence in the process. If you notice the garlic starting to brown during dehydration, it may be a sign of excessive heat and can result in a bitter flavor.
On the flip side, if the temperature is too low, it might not dry the garlic properly, making it susceptible to mold and impurities. Garlic is a bit delicate, you see. It loves the sweet spot of 95 degrees Fahrenheit, but a food dehydrator should ideally be set to 100-110˚F for drying garlic. Dehydrating at this ideal temperature will ensure that your garlic retains most of its natural flavor during the process.
Dehydration Time
But what about the drying time? Garlic can be a tad tricky – some cloves might dry faster than others due to their sizes. If you’re using a reliable dehydrator with an adjustable timer, set it for around 8 to 15 hours, though the drying time for garlic can range from 6 to 12 hours, depending on thickness and humidity. For comparison, when you dehydrate jalapenos they usually take about 6–8 hours depending on slice thickness and moisture.
Yet, remember: each garlic batch is unique. So, you’ll want to check your garlic every couple of hours to ensure the dehydration process is on track. You will know it’s ready when it’s crisp to the touch and snaps easily when bent instead of bending. The garlic should be sufficiently dried—brittle and free of moisture—to ensure proper preservation.
These are your golden rules: a temperature of 95ºF coupled with a dehydration timeframe of about 8-15 hours. Stick to these guidelines, and you’ll master the art of garlic dehydration in no time!
Once you’ve set the temperature and time, here are some tips to ensure perfect results.
Tips for Dehydrating Garlic
Start with the freshest garlic cloves you can find—quality matters for the best flavor.
After peeling, chop or slice garlic into uniform pieces for even drying and to prevent some pieces from drying out too quickly while others remain soft.
Arrange garlic pieces on dehydrator trays in a single layer, ensuring plenty of air flow between each piece to avoid clumping.
Set your dehydrator to the lowest temperature setting, usually around 100-110°F, and let it work for 6-12 hours.
Garlic is ready when the pieces are brittle and snap easily.
Whether you prefer minced or sliced garlic, following these tips will help you capture that signature flavor in every batch.
Conditioning Dehydrated Garlic
Once your garlic is dried to perfection, there’s one more important step before you stash it away: conditioning. This process helps ensure that any remaining excess moisture is evenly distributed, preventing spoilage down the road. Simply place your dried garlic pieces in an airtight container, like a glass jar or mylar bag, and let them sit for about 24 hours. Give the jar a gentle shake every so often to help move the garlic pieces around and check for any signs of moisture. If you notice condensation or the garlic starts to clump, pop it back in the dehydrator for another hour or two to finish drying. Conditioning your dried garlic is a quick and easy way to keep your homemade stash fresh, flavorful, and ready to use whenever you need it.
Troubleshooting Common Issues
Even the most seasoned home cooks can run into a few hiccups when dehydrating garlic. One of the most common issues is excess moisture, which can lead to clumping or a less-than-ideal flavor. To avoid this, always make sure your garlic is thoroughly dried and properly conditioned before storing. If you find that the smell of garlic is taking over your kitchen—or your whole house—try running your dehydrator outdoors or in a well-ventilated area, or look for a model with an odor-absorbing filter. And if your finished garlic doesn’t pack the punch you were hoping for, consider adjusting your dehydrator’s temperature or extending the drying time to really concentrate that signature flavor. With a little attention to detail, you’ll be able to dehydrate garlic that’s bursting with taste and ready for any recipe.
How is Garlic Powder Made?
Definition Box: Dehydrated garlic is garlic that has been sliced or minced and dried until brittle. Garlic powder is made by grinding dehydrated garlic into a fine powder. Note: Dehydrated garlic and garlic powder are not the same and cannot be used interchangeably in recipes. Garlic powder lasts about 2 to 6 months before losing potency; for best results, grind only what you need in small batches.
Let’s dive into the delectable world of garlic powder with this simple dehydrated garlic recipe. Once you’ve dehydrated those magnificent cloves, the journey to creating the powder commences. This recipe is incredibly straightforward and easy to do at home, plus it’s delightfully satisfying too. By following this method, you’ll be able to create the best garlic powder for your cooking needs. If you enjoy sweet-spicy flavors, you can also try making candied ginger at home as another fun preservation project.
To make homemade garlic salt, simply combine your homemade garlic powder with coarse salt in a 1:3 ratio and mix well. This creates a flavorful seasoning you can use in place of store-bought options.
When storing your homemade garlic powder, keep it in a cool, dark, airtight container. This is the same guideline recommended for store bought garlic powder to maintain freshness and flavor over time.
Grinding Process
It’s time to take all those dried out cloves and crush them into a fine sand-like texture. Using a powerful blender, coffee grinder, or spice mill, blitz your dehydrated garlic until it reaches the consistency you prefer. This could range from a coarse grind to a super-fine powder: the choice is yours!
Sifting the Powder
Once you’ve ground it, sifting is next on the list. A fine mesh strainer or flour sifter works wonders here. This step is important to achieve a consistent grain size, leaving you with a smooth and uniform garlic powder. The powdery flakes that don’t pass through the sieve can be re-ground until they do.
Quality Check
Finally, you’re going to do a quality check. This step may sound formal, but it’s as simple as giving your freshly made garlic powder a quick visual examination and a sniff test. You’re looking for a vibrant and uniform light beige color, with a potent, unmistakably garlicky aroma. If all checks out, you’ve successfully made your own garlic powder!
Storing Your Garlic Powder
The fruit, or more accurately, the ‘powder’ of your labor should be stored properly to maintain its integrity. Keep your homemade garlic powder in an airtight glass container, stowed away out of direct sunlight and heat. For best results, store the container in a cool dry place to maximize shelf life and preserve flavor. Adding rice to a container of garlic powder can help prevent clumping by absorbing moisture. If you’ve followed along, you’re now equipped with the know-how to craft your own, flavorful garlic powder right in your kitchen!
Garlic Variations: Black Garlic and Roasted Garlic
As you journey into the world of garlic dehydration, remember that not all garlic is created equal. Two adored variations in the culinary world are black garlic and roasted garlic. Their unique flavors add a twist to dishes and their preparation methods might tickle your culinary curiosity.
Black Garlic
Originating from Asian cuisine, black garlic is fermented and aged, resulting in a sweeter, more mellow garlic flavor with a striking dark hue. It’s not dehydrated garlic per se, but it’s a delicious variant that deserves mention. Its robust, complex, and caramel-like flavor sets it apart.
Creating black garlic at home is a fun project! You can use a slow cooker or a specially designed black garlic fermenter. The process typically takes 2-3 weeks as you ferment raw garlic under controlled humidity and heat.
Roasted Garlic
As for roasted garlic, it’s another exciting twist on our beloved bulb. When you roast garlic, the high heat brings out its natural sugars, resulting in a rich, sweet, and slightly caramelized flavor. For many, it’s a succulent treat as a spread on bread or as a unique addition to sauces and other dishes.
You can prepare roasted garlic in the oven or even in a garlic roaster. Remember, though, roasting is a different process than dehydration; it’s all about that intense heat and transformation of flavors.
While these variants might not lend themselves to the dehydration process directly, they do open up fascinating possibilities of flavor combinations when used alongside your homemade dehydrated garlic. And if you like experimenting with flavors, you can also dehydrate citrus for bright, tangy slices that pair beautifully with garlic in marinades and garnishes.
Comparison to Fresh Garlic
Dehydrated garlic offers several advantages over fresh garlic, making it a smart addition to any kitchen. For starters, its impressive shelf life means you can keep homemade garlic powder, garlic salt, or dried garlic flakes on hand for months—perfect for long term storage and quick meal prep. Dehydrated garlic is also incredibly convenient: it can be ground into a fine powder for seasoning blends, rehydrated for use in soups and sauces, or sprinkled directly into recipes for a burst of flavor. Because the dehydration process removes moisture and concentrates the natural oils, the resulting powder or flakes are often more potent than fresh garlic, delivering a robust punch in every pinch. Of course, some cooks still love the nuanced, complex flavor of fresh garlic, especially in dishes where texture matters. Ultimately, whether you’re making your own garlic powder or looking for a way to preserve your harvest, dehydrated garlic is a versatile, flavorful option that complements both everyday cooking and gourmet creations.
Storage and Shelf Life of Dehydrated Garlic
Alright, my garlic-loving friend, you’ve worked hard to dehydrate those luscious bits of nature’s candy. Now it’s time to discuss: how do we properly store garlic for long term storage to ensure it stays fresh and full of flavor? For best results, store garlic in an airtight container such as a mason jar. Using a mason jar provides an airtight seal ideal for long term storage.
First off, let’s start with the basics: moisture, heat, and light are the three main culprits you should guard against. Make sure your garlic is completely dry before storing it to avoid any moisture-caused mold and spoilage. Store dehydrated garlic in a cool, dark cupboard away from sunlight to preserve its quality and prevent light degradation. For even longer preservation, you can store chopped garlic in the freezer. And remember: dehydrated garlic likes to be stored in dark, cool places, not on your kitchen countertop!
Occasionally, check your garlic for any signs of moisture. If you feel it seems moist or notice any color change, it’s time to toss it in the dehydrator for another drying session.
In summary, correct storage is essential to maintaining the longevity and quality of your homemade dehydrated garlic. When properly stored in an airtight container, dehydrated garlic can last for at least 12 months. So, follow these tips and enjoy the taste of your hard work for months to come. Once you’re comfortable with garlic, you might also want to dehydrate cilantro and other herbs to build a complete homemade seasoning pantry.
Creative Ways to Use Dehydrated Garlic
Most of us are well-acquainted with the usual uses of garlic: those aromatic undertones in pasta sauces, the spicy kick in our favorite stews, and the crispy crunch in our salads. But did you know that dried minced garlic and chopped garlic are versatile ingredients perfect for seasoning mixes, salad dressings, and soups? Dried garlic dissolves in liquid, making it ideal for salad dressings, marinades, and brines. If you enjoy experimenting with pantry staples, you might also love exploring what fruit you can dehydrate for healthy snacks and baking. The gastronomic potential of garlic doesn’t stop there, especially when it’s dehydrated.
So, let’s talk about all the creative and innovative ways you can use your newly dehydrated garlic. You can easily add it to homemade seasoning mixes for convenience and long shelf life, or dissolve dried minced garlic in salad dressings and soups for a quick flavor boost. Ready to discover a whole new world of flavor and maybe even create your own recipe using dehydrated garlic?
Infuse Your Oils
One of the most delightful ways to use dehydrated garlic is by making your very own, homemade garlic-infused oils. Whether it’s olive, grapeseed, or sesame oil, adding dehydrated garlic delivers an intense flavor that will transform any dish you cook. Imagine, the warm aroma of garlic-infused oils wafting from your kitchen, tantalizing everyone’s taste buds.
Spicy, Zesty Garlic Salt
Forget about buying pre-made garlic salt from the store! With dehydrated garlic, you can create your own. Simply grind some dried garlic with kosher or sea salt and relish the robust, savory delight. Garlic powder is more concentrated in flavor than fresh garlic, making it an excellent addition to various dishes. It’s perfect for adding an extra zing to your grilled meats, popping popcorn, or seasoning your Friday night margaritas.
Crunchy Garlic Topping
Yearning for a crispy topping with a difference? Create your own bread crumbs or granola clusters with chunks of dried garlic. You’ll make your breakfast parfait or spaghetti Bolognese taste even more incredible. Trust me, once you taste the playful combination of flavors, you won’t look back.
Delicious, Homemade Garlic Butter
Take unsalted butter out of the fridge to soften, and mix with a generous amount of ground dehydrated garlic. Slather it on your warm bread, use it for cooking succulent garlic shrimp, or spread it on steaks for grilling. It’s a simple addition to your meal prep, but boy does it enhance your dishes!
Health Benefits of Dehydrated Garlic
You may be thinking: why go through the fuss of dehydrating garlic? Well, besides the tantalizing aroma and gourmet touch, it adds to meals, there’s something more: remarkable health benefits. Dehydrated garlic retains an impressive array of healthful properties that make it more than just a kitchen staple.
Antioxidant Powerhouse: Like fresh garlic, its dehydrated counterpart is packed with antioxidants. These compounds battle free radicals in your body, protecting you from numerous diseases and slowing the effects of aging.
Heart Health: Regular consumption of dehydrated garlic aids in maintaining a healthy heart. It’s known to reduce cholesterol levels, regulate blood pressure, and even help prevent heart disease.
Immunity Booster: Ever heard of the saying “a clove of garlic a day keeps the doctor away”? There might be some truth to it. The allicin in garlic, which remains in the dehydrated version, is known to bolster your immune system, helping you fend off common illnesses like colds and flu.
Digestive Health: Dehydrated garlic is known to help with a variety of digestive system ailments. It aids with digestion and helps combat bloating, gas, and constipation.
Also, if you’re on any medication or have a health condition, it’s wise to consult with your doctor before adding dehydrated garlic to your diet. After all, being in tune with your body and its specific needs is equally important when it comes to health and wellness.
Conclusion
In conclusion, mastering how to dehydrate garlic in dehydrator can become an exciting culinary pursuit that not only enriches your kitchen but also enhances your meals. With patience, good garlic, and a reliable dehydrator, you’re on your way to homemade garlic powder, seasoning, or even a garnish that can profoundly transform your dishes.
Note: Don’t be afraid of [experimenting with the dehydration process](https://dehydratedfoodz.com/how-to-dehydrate-meat/). You might discover a process or a flavor that is unique and brings more diversity and authenticity to your cooking. If you’re curious about protein-rich snacks, check out how to dehydrate meat safely at home and learn whether a dehydrator actually cooks meat or simply preserves it.
Quick Recap: Step-by-Step Instructions
Select fresh and good quality garlic.
Peel the papery skins and cut off the root end for easier peeling.
Slice or mince garlic into uniform pieces for even drying.
Spread garlic in a single, even layer on the dehydrator tray.
Set your dehydrator to the correct temperature (100-125°F) and dry for 6-12 hours, checking periodically.
Garlic is ready when it is brittle and breaks easily when bent.
Allow the garlic to cool completely before transferring to storage containers.
Condition the dried garlic in a glass jar for 24 hours to check for moisture; if condensation appears, re-dry.
Store in an airtight container in a cool, dark place for up to 1-2 years.
For garlic powder, grind the dehydrated garlic and sift for a fine, uniform texture.
Hey there, since 2016, my mission has been to provide you with the information and guides you need to make food dehydrating simple and fun. Whether you're a newbie or a seasoned pro, my site offers helpful guides, reviews, and recipes to enhance your dehydrating experience. I take pride in only recommending products I believe in, ensuring my readers' trust. As an affiliate of various programs, including Amazon Associates, your support helps me continue providing quality content. Thanks for stopping by, and happy dehydrating!