We earn a commission if you make a purchase, at no additional cost to you.
09/22/2026 04:39 pm GMT
🍊 Dehydrated Food Info Finder — Temperatures & Drying Times
Choose a category, then pick a food to see its drying temperature and time.
⚠️ Safety Disclaimer: Drying times are estimates and vary based on slice thickness, food moisture content, humidity, and your dehydrator model. Always check for doneness before storing — food should feel dry, leathery, or brittle with no moist spots. Improperly dried food can harbour mould and bacteria. For meat and poultry, follow USDA safe internal temperature guidelines: beef and pork to 160°F (71°C), poultry to 165°F (74°C). Use a food thermometer when in doubt. Store all dehydrated foods in airtight containers in a cool, dark place and discard anything showing moisture, mould, or off odours.
Savor Flavors: Top Oster Food Dehydrator Recipes & Tips
The Oster has opened up a whole new world of possibilities in the kitchen, and we’re excited to share delicious recipes and tips with you. Whether you’re an old pro or just starting out, the world of Oster recipes is endless and fun and will give you tasty results and a crash course in preserving and enhancing natural flavors.
Oster Dehydrator Recipes: My Oster Food Dehydrator
I started my Oster food dehydrator journey one summer afternoon when I had a bunch of ripe strawberries and didn’t want to let them go to waste. That first batch led me to a collection of Oster dehydrator recipes I still use regularly—fruit leathers, jerky, dried herbs and teas, and crisp vegetable chips—because they turn extra produce and pantry basics into healthy, long-lasting snacks.
What began as a simple way to save ripe fruit quickly became a staple kitchen habit, and this guide is built for home cooks and food preservation enthusiasts who own an Oster dehydrator or are thinking about using one more often, especially if you want a broader understanding of dehydrating foods with an Oster food dehydrator. Along with the recipes, I’ll share the tips and tricks that made the biggest difference for me, from drying different foods successfully to using and maintaining the Oster food dehydrator so it keeps producing flavorful, homemade staples with less waste.
Making Fruit Leathers
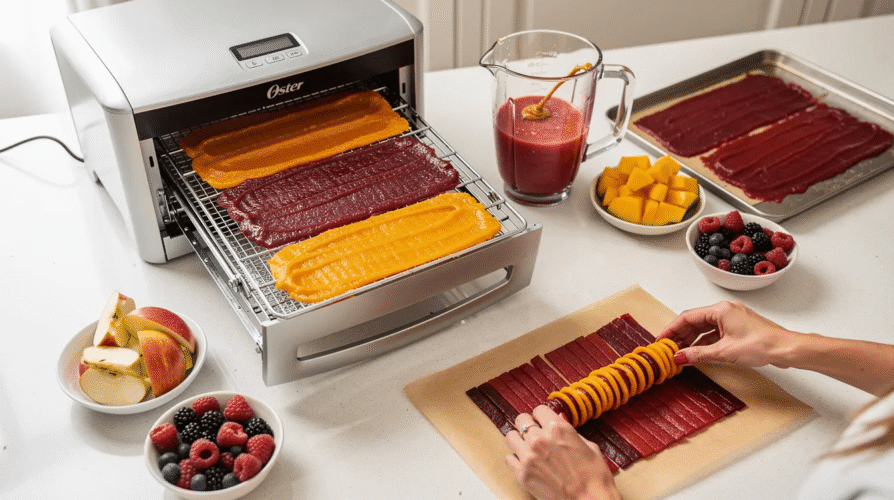
Fruit leathers are a great place to start if you’re new to dehydration, they’re easy and delicious, and they build on the same basics you’ll use when dehydrating fruit with a food dehydrator. Use your favorite fruit—apples, mangoes, and berries are all good choices. Puree the fruit until smooth, and add a drizzle of honey if you want to sweeten it. Spread the mixture thinly and evenly on your dehydrator trays and set your Oster food dehydrator to 135°F. Dehydrate for 6-8 hours, and check every so often until the leather is no longer sticky to the touch. Once done, cut into strips and roll up for an easy, portable snack to grab and go.
Making Beef Jerky
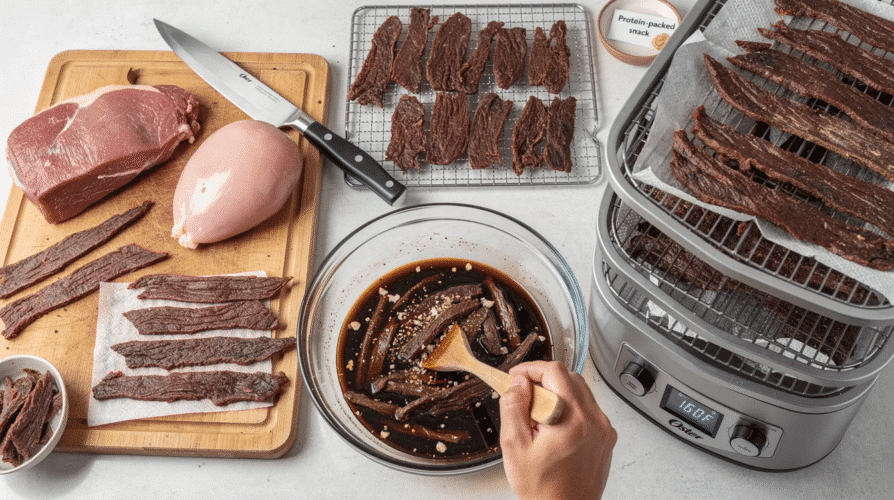
For those who prefer something savory, jerky made with an Oster food dehydrator is a must-try. Use a 2lb lean cut of beef or turkey, with the goal of keeping fat low. Cut the meat into thin, sliced strips against the grain for easier chewing, then mix the marinade ingredients thoroughly before marinating overnight in your favorite combination of soy sauce, Worcestershire sauce, garlic, and spices. Once marinated remove excess moisture with paper towels and place the strips on the dehydrator trays. Partially chilling the meat in the freezer first can make it easier to slice evenly. Set your Oster food dehydrator to 160°F and let it run; jerky usually takes around 4-5 hours, though drying times can vary based on humidity and strip thickness. It is done when it bends but does not break, so avoid overdrying past that point. Let the jerky cool completely before sealing or storing it. The result is a savory, protein-packed snack for camping, road trips, or sharing with friends.
Herbal Delights: Dried Herbs and Teas
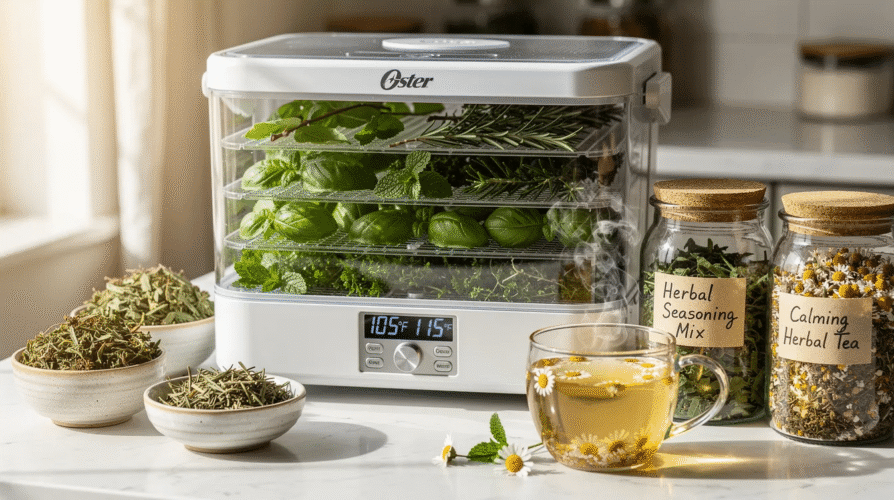
Turn fresh herbs into pantry staples with ease. Whether it’s basil, rosemary, or mint, drying herbs in an Oster dehydrator preserves the flavor and aroma. Place the herbs in single layers on the trays and set your dehydrator to 105°F–115°F until brittle for homemade seasoning mixes. The dehydrator uses low heat to remove moisture while preserving flavor. In a few hours, you’ll have beautifully dried herbs for a homemade seasoning mix or your favorite recipes.
For a bonus, try making your own herbal teas. Combine dried mint, lemon balm, and chamomile for a calming brew. Store your custom tea blends in airtight containers and have a cup of calm whenever you want. Some folks love keeping tea blends or dried herbs in sealed containers before they eat or brew them.
New Snack Ideas: Vegetable Chips
Dehydrated vegetable chips are a healthy alternative to traditional snacks. Kale, sweet potatoes, zucchini, and beet chips are great choices, with beet chips serving as a healthier alternative to potato chips. Blanching some vegetables before dehydrating can lock in color and improve rehydration. Slice your veggies thinly, add a pinch of salt and a drizzle of olive oil, and place in the dehydrator at 125°F. Greens can also be fully dried and blended into a powder. After 10-12 hours you’ll have crispy, flavorful chips that are not only healthy but also addictive. You can throw homemade vegetable powders into soups or sauces to boost nutrition.
Tips and Tricks for Dehydrating with a Food Dehydrator
Uniform Slicing: Dehydrate evenly by slicing fruits and meats uniformly. This ensures all pieces dry at the same rate so none become overcooked while others are undercooked.
Drying Basics: Dehydrators use low heat and a fan to remove moisture, which helps create perfect results without cooking the food.
Pre-Treatment: Some fruits like apples and bananas need pre-treatment with lemon juice or ascorbic acid to prevent browning and preserve color. As an extra step, remember not to crowd trays and leave space between pieces for airflow.
Airtight Storage: Once dehydrated, store your creations in airtight containers to keep fresh and extend shelf life; properly stored dehydrated food can last up to a year, and vacuum-sealed food can last for many years.
Get Creative: Don’t be afraid to try new things. Add a sprinkle of cinnamon to your fruit leathers or cayenne pepper to your jerky. Use plenty of seasoning, but not so much that it slows drying too long.
Maintenance: Keep your Oster food dehydrator clean and in good working order to get consistent results. Check the trays and remove any stuck-on food. A good dehydrator can last for years with proper use.
Temperature Control: Oster units typically run between 140°F and 185°F, so look for models with adjustable temperature settings to handle different foods.
Choosing the Right Unit: Choose a dehydrator with adequate airflow for even drying, and consider the size of the unit based on your needs.
Get Inspired and Get Confident
The Oster food dehydrator is more than just a kitchen appliance; it’s an excuse to try new things and experiment with all the recipes that suit your taste and preferences. Sweet or savory the possibilities are endless as your imagination. With these recipes and tips, you’re ready to start your dehydrating journey and turn ordinary into extraordinary.
Be enthusiastic and curious and let your Oster food dehydrator be your guide to culinary adventure. Whether you’re making snacks for the road, apple chips are a perfect healthy snack on the go, creating homemade gifts, or enjoying a new hobby, the art of dehydrating is a fun journey that makes sharing homemade snacks with others part of the fun. As you try each recipe, think about what size dehydrator best fits your needs. Visit our page for more ideas you can compare with an oven method, and sign up if you want future tips and updates.
DannyContent Writer
Hey there, since 2016, my mission has been to provide you with the information and guides you need to make food dehydrating simple and fun. Whether you're a newbie or a seasoned pro, my site offers helpful guides, reviews, and recipes to enhance your dehydrating experience. I take pride in only recommending products I believe in, ensuring my readers' trust. As an affiliate of various programs, including Amazon Associates, your support helps me continue providing quality content. Thanks for stopping by, and happy dehydrating!