Ever gazed at a head of broccoli and wondered how you could keep it fresh for longer? The answer is as intriguing as the vegetable itself – dehydrating. How to dehydrate broccoli, you ask?
You’re in luck! Because today, we’re peeling back the layers on this green goodness.
We’ll walk through selecting prime specimens, prepping them for their dry voyage, and finding that sweet spot in your food dehydrator. But we won’t stop there!
The art of storing these crunchy morsels properly also awaits discovery along with secrets to bringing them back to life when needed. Intrigued yet?
Your journey into prolonging broccoli’s lifespan begins here. Stick around – trust me; it’s going to be a veggie revelation!
Selecting the Right Broccoli for Dehydrating
When selecting broccoli for dehydration, the quality of the florets is essential. For optimal results, selecting the right broccoli is essential.
Freshness is key when choosing broccoli for dehydration. You want to go with heads that are firm and tight – think less ’80s hair band and more military buzz cut. The Fruit & Veggies More Matters guide gives you great tips on how to spot fresh veggies at your local grocery store or farmer’s market.
The Importance of Size
Picking out the perfect size is just as important as freshness. Avoid large, bulky stalks because they tend to take longer to dry thoroughly, which could lead to uneven results. Instead, opt for medium-sized stalks – these guys strike an ideal balance between yield and drying time.
Bright Green is Best
Last but certainly not least, let’s talk color. Your goal here should be bright green; if it looks like Kermit the Frog, then you’re onto a winner. Steer clear from yellowish or brown spots since those indicate age or damage – basically signs saying “Pick someone else.” If you need help spotting prime produce, check out this helpful link by Harvest To Table.
| Selection Criteria |
Tips |
| Freshness |
Pick firm, tight heads. |
| Size |
Select medium-sized stalks. |
| Color |
Look for bright green florets. Avoid yellow or brown spots. |
Drawing from my years of hands-on experience in the food industry…
Preparing Broccoli for Dehydration
The journey to dehydrating broccoli begins with the proper prep work. You’ll be astonished at the tremendous impact a few basic steps can have on the finished item.
Picking Fresh Broccoli
To start, always choose fresh and firm broccoli. Remember, the tastier and more nutritious it is when you dehydrate it if its freshness is maintained. The color should be vibrant green; if there’s any yellowing or browning, give that one a pass.
Cleaning Your Broccoli
Next up: cleaning your chosen veggies. Run cold water over each head of broccoli to remove any dirt or pests hiding in those tight clusters of buds – we want nothing but pure goodness here. For more stubborn residue, use FDA-approved methods for washing fruits and vegetables.
Cutting into Small Pieces
Slicing your broccoli properly plays an essential role too. Cut them into small uniform pieces about 1 inch across so they dry evenly without burning on one side while still being damp on the other – nobody likes inconsistent bites.
Blanching: An Optional Step?
You might have heard some debate around whether blanching is necessary before drying out your greens like broccoli—here’s our take based on years of experience with food dehydration:
- If you plan to consume your dried goodies within months then no need for blanching—it preserves color beautifully as well as nutrients but isn’t crucial short-term.
- For long-term storage or if you’re really into keeping that bright green color, blanching your broccoli is a good move. Feel free to use steam or boiling water—take a look at these tips from the National Center for Home Food Preservation to get started.
Setting Up a Food Dehydrator
Getting your food dehydrator ready for action isn’t as complex as it may seem. With the right steps, you’ll be well on your way to enjoying tasty and nutritious dried foods.
Pick Your Spot
To start, choose a flat surface in an airy space where the heat and noise won’t bother you. Make sure this spot is near an outlet, but keep the dehydrator away from walls or other appliances that could block its vents.
Clean Before Use
Next up: cleanliness. Wipe down all tray parts of your new appliance with warm soapy water before use to remove any manufacturing residues for safety’s sake. Also, make sure to dry the trays once washed.
Awareness of Trays & Sheets
Your dehydrator comes with trays or sheets; these are vital tools in the drying process. Be aware – different foods need different types of trays. For example, solid plastic ones are best for making fruit leathers while mesh ones work great for small items like herbs or diced vegetables.
The Temperature Setting Matters.
This might surprise you, but not all foods dry at the same temperature settings. That’s why adjusting the thermostat according to what’s being dried is crucial. The Penn State Extension guide on home food preservation methods offers detailed guidelines about ideal temperatures for various produce types. For instance, broccoli dries best between 125-135°F (52-57°C).
Time to Load Up
Time to fill your dehydrator. But remember, do not overcrowd the trays as this can slow down the drying process and result in unevenly dried food.
The Waiting Game Begins.
Fire up the appliance and let it rip. Now comes the waiting game. The drying time depends on what you’re dehydrating, so make sure to check in now and then.
Key Takeaway:
Getting a food dehydrator going is easier than you might think. First, choose a well-ventilated area and give the machine a good clean. Get to know what each tray does too. It’s important to tweak the heat based on what you’re drying – like broccoli, which loves being dried at 125-135°F (52-57°C). Pack your items in without cramming them together, then sit back and let it do its thing.
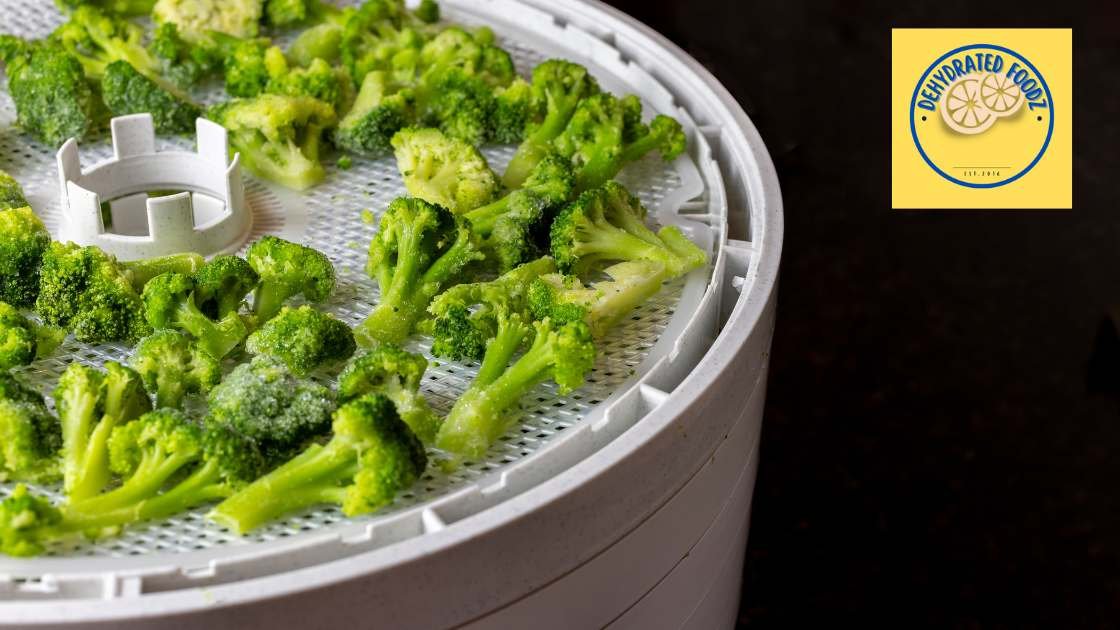
Drying Broccoli in a Food Dehydrator
When it comes to preserving the vibrant green color and nutritional value of broccoli, using a food dehydrator is your best bet. It’s a straightforward task that requires minimal effort but needs to be monitored closely.
Temperature Settings for Drying Broccoli
The ideal temperature setting for drying broccoli in a food dehydrator varies between 125°F and 135°F (52°C -57°C). The lower end helps preserve nutrients while the higher speed up dehydration. Your choice should balance nutrient preservation with speed.
You can also refer to your dehydrator’s guide. It often has specific recommendations based on the model you’re using.
How Long Does It Take?
A question we get asked frequently at Dehydrate Foodz is: “How long do I need to dry my broccoli?” Well, there isn’t one size fits all answer because each batch can vary slightly depending on moisture content, thickness of cut, and ambient humidity levels where you live. But generally speaking, expect it to take around six to eight hours.
To be sure they’re fully dried out—crisp not spongy—you may want to check after five hours then every half hour or so thereafter until done. If any pieces still feel soft when squeezed gently let them continue drying; better safe than sorry.
Tips & Tricks When Drying Broccoli
- Cut into uniform sizes: This ensures even drying throughout all pieces.
- Blanch before dehydrating: This helps maintain color and nutrient value.
- Don’t overcrowd the trays: Broccoli needs space for air to circulate properly.
Check out our comprehensive dehydrating tips guide for more insights.
Maintaining Your Dehydrator’s Efficiency
A well-maintained dehydrator works more efficiently. Make sure to clean your machine after each use, especially when dealing with something like broccoli that has lots of little nooks where bits can get stuck.
Our advice? Go for a soft brush or cloth, paired with a gentle cleaning solution.
Key Takeaway:
Keeping broccoli’s color and nutrients intact is a breeze with dehydration. Aim for drying temps between 125°F and 135°F—lower if you’re all about nutrient-keeping, higher for quickness. It’ll take roughly six to eight hours, but start checking at the five-hour mark to make sure it’s fully dry. Don’t forget: even cuts matter, and blanching before dehydrating is key.
Storing Dehydrated Broccoli Chips
Once you’ve dehydrated your broccoli, it’s time to keep it in a dry and cool place away from sunlight using airtight containers. But remember, the key is keeping it in a dry and cool place away from sunlight.
Airtight Containers: Your New Best Friend
The first step towards long-lasting dehydrated broccoli chips is using airtight containers. These containers are not hard to acquire and come at a reasonable price. A good set of containers can be an investment that pays off by helping preserve the flavor and nutritional value of your dried goods.
Pack the dehydrated broccoli into these containers as tightly as possible without crushing them. Make sure there’s no room for air because oxygen can cause deterioration over time.
Vacuum-Sealed Bags: The Upgrade You Need
If you’re planning on storing large amounts or want extra assurance, consider vacuum-sealing bags. Vacuum sealers remove all the air surrounding food before sealing the bag tight — they’re like superheroes fighting against moisture.
You can get yourself a handy vacuum sealer machine online. And trust me; this tool isn’t just for kitchen enthusiasts – even if you don’t cook much, its utility extends beyond just preserving food.
Sometimes we need more than just a container or bag. For that, there are oxygen absorbers. These little packets suck up any leftover oxygen in your storage containers, ensuring an even longer shelf life for your dehydrated broccoli.
Don’t be alarmed by the name – you can easily buy these online. Remember to use one per container.
Rehydrating Dehydrated Broccoli
If you possess a cache of dried broccoli, then you have the potential to make speedy and uncomplicated meals. But before diving into your culinary adventure, let’s learn how to bring those dried green jewels back to life.
The Boiling Method
You might be wondering, “How do I rehydrate my dried broccoli?” The boiling method is the quickest way. First off, grab a pot and fill it with water—just enough to submerge your broccoli bits. Heat the water until it starts bubbling then toss in your dried florets. Boil for about 10 minutes, or until they reach your desired tenderness.
This method works wonders when time is tight because the hot water speeds up the hydration process. Just remember: too much heat can leach out some nutrients from our beloved veggie—a minor trade-off for speediness.
The Soaking Technique
If preserving nutrients is a top priority but there’s no rush, soaking should be right up your alley. Fill a bowl with cold water and add in your dried goodies. Let them sit overnight in a refrigerator, depending on their thickness.
I’ve personally found this low-and-slow approach retains more flavor compared to its heated counterpart—but don’t take my word as gospel; give both methods a try and decide which one suits you best.
Tips for Perfect Rehydration
Whether you choose boiling or soaking, here are a few tips to ensure your dehydrated broccoli springs back to life perfectly. First, always make sure the water covers all of the dried pieces; this ensures even rehydration. Secondly, stir occasionally so every piece gets equal love from the water.
And lastly—patience. Just like when we dehydrate food, it’s not an instant process but trust me—it’s worth the wait.
Cooking with Rehydrated Broccoli
And let’s not forget, the greatest thing about getting rehydrated is
Cooking with Rehydrated Broccoli
Rehydration is a fantastic way to bring your dehydrated broccoli back to life. The process of rehydration restores the texture and taste, making it perfect for adding into various dishes. Not only does this method allow you to enjoy out-of-season vegetables at any time, but it also ensures that all the essential nutrients are preserved.
The Art of Rehydrating Broccoli
To begin with, place your dehydrated broccoli in a bowl and cover it completely with warm water. Let them soak for about 20-30 minutes or until they regain their original size and texture. Once done, drain off the excess water using a colander. It’s important not to rush this step as proper rehydration can make or break your dish.
Incorporating Rehydrated Broccoli Into Your Meals
Once you have successfully rehydrated your broccoli, there are countless ways in which you can incorporate these green gems into your meals. They work great in stir-fries due to their firm yet tender texture post-rehydration – just toss them right into the pan! You could also use them in salads for an added crunch or mix them up with pasta sauces for extra flavor and nutrition.
- Stir-fry: Add some olive oil on medium heat then add garlic followed by other veggies like bell peppers along with our star ingredient – rehydrated broccoli!
- Pasta Sauce: Blend together tomatoes, onions, garlic cloves, and seasonings of choice along with our beautifully rehydrated broccoli pieces creating a nutrient-packed sauce ready for coating freshly cooked pasta!
Maintaining Nutritional Value
One of the best things about dehydrating and rehydrating broccoli is that it preserves most of its nutritional value. Broccoli is rich in vitamins A, C, and K as well as dietary fiber – all essential for a balanced diet. So rest assured knowing you’re not only enjoying delicious meals but also nourishing your body with every bite.
In essence, cooking with rehydrated broccoli can be an exciting culinary adventure filled with flavors and health benefits. So why wait? Grab your food dehydrator, and start drying some fresh broccolis today!
Key Takeaway:
Got dehydrated broccoli? Bring it back to life with two methods: the quick boiling technique, perfect when you’re short on time but might sacrifice some nutrients. Or, try the soaking method for nutrient preservation and more flavor. Just remember – cover all pieces with water, stir occasionally, and be patient.
FAQs in Relation to How to Dehydrate Broccoli
Can I dehydrate raw broccoli?
You can, but blanching before drying helps preserve color and nutrients. So it’s best to briefly boil your broccoli first.
Can I dehydrate broccoli without blanching?
While possible, skipping the blanch step may lead to a dull green snack that’s less nutrient-dense. It also might not rehydrate well.
How do you dehydrate fresh broccoli?
Clean and cut your fresh florets, give them a quick dip in boiling water (blanch), then dry in a food dehydrator until crisp.
How to make dehydrated broccoli powder?
Dry out your small-cut or grated pieces of pre-blanced broc thoroughly till they’re crunchy. Then grind ’em up into powder using a blender or spice grinder.
Conclusion
Dehydrating broccoli, who knew it was this simple? The journey starts with picking the right broccoli – fresh, green, and firm. Prepping comes next: washing and chopping to perfection.
Your food dehydrator takes center stage after that; setting it up correctly is crucial. Then onto drying your prepped broccoli – patience will be key here.
The final act in how to dehydrate broccoli lies in storage – remember airtight containers or vacuum-sealed bags are your friends. But we don’t forget about rehydration either! Boiling or soaking brings back their life when needed.
And there you have it – from selection to snackable morsels, all at home! A veggie revelation indeed!
Hey there, since 2016, my mission has been to provide you with the information and guides you need to make food dehydrating simple and fun. Whether you're a newbie or a seasoned pro, my site offers helpful guides, reviews, and recipes to enhance your dehydrating experience. I take pride in only recommending products I believe in, ensuring my readers' trust. As an affiliate of various programs, including Amazon Associates, your support helps me continue providing quality content. Thanks for stopping by, and happy dehydrating!