We earn a commission if you make a purchase, at no additional cost to you.
09/22/2026 04:39 pm GMT
🍊 Dehydrated Food Info Finder — Temperatures & Drying Times
Choose a category, then pick a food to see its drying temperature and time.
⚠️ Safety Disclaimer: Drying times are estimates and vary based on slice thickness, food moisture content, humidity, and your dehydrator model. Always check for doneness before storing — food should feel dry, leathery, or brittle with no moist spots. Improperly dried food can harbour mould and bacteria. For meat and poultry, follow USDA safe internal temperature guidelines: beef and pork to 160°F (71°C), poultry to 165°F (74°C). Use a food thermometer when in doubt. Store all dehydrated foods in airtight containers in a cool, dark place and discard anything showing moisture, mould, or off odours.
To dehydrate beans, sort and rinse them, soak and cook them thoroughly on the stove or in a pressure cooker, then drain, season if you like, spread them in a single layer on dehydrator trays, and dry them at 135°F for 8 to 10 hours until fully dry. For home cooks, food preservation enthusiasts, and anyone looking for healthy, convenient meals, dehydrated beans turn a basic pantry staple into a shelf-stable, space-saving plant-based protein you can use at home, pack for camping and hiking, or keep on hand for quick meals and emergency supplies.
These beans offer plenty of delicious possibilities. It matters little where your roots are from; there’s a type of bean to fit every culinary style. From Mexican to Italian to Middle Eastern to Indian cuisine, these incredible little legumes fit into nearly any recipe. You’ll also see which beans work best, whether dried or canned beans make more sense for dehydrating, how to dry and store them safely, how to rehydrate them, what problems to watch for, and easy ways to use them in meals.
Are you feeling prepared but unsure of your next move? We have everything you need to create tasty meals with dehydrated beans while cutting waste and building a more useful pantry. Lightweight packets served as groceries during a camping trip? Protein for picnics in the park? Wholesome sustenance for long hikes in the wilderness? These are exactly the kind of dehydrated backpacking meals that make outdoor cooking easy. You name it; Dehydrated Foodz have you covered! Get ready to dehydrate beans for delicious flavor on those adventurous outings.
Step
Description
Tips
1. Sort and Rinse
Sort beans to remove debris and rinse thoroughly under cold water.
Use cold water to avoid premature cooking.
2. Soak Beans
Soak dried beans in water (about 5 times the volume) for 5 to 8 hours or overnight.
Add a splash of vinegar to soaking water to reduce phytic acid if desired.
3. Cook Beans
Cook soaked beans on stove, pressure cooker, or slow cooker until tender but firm.
Pressure cook for 10 minutes or slow cook for 3 to 6 hours for best results.
4. Drain and Season
Drain beans and optionally season with salt, pepper, or chicken broth for flavor.
Use low-sodium chicken broth to add savory taste without excess salt.
5. Arrange on Trays
Spread beans in a single layer on mesh dehydrator trays covered with nonstick sheets if needed.
Use mesh trays covered to catch skins and prevent beans from falling through.
6. Dehydrate
Set dehydrator temperature to 125°F (52°C) and dry beans for approximately six to eight hours.
Check beans after five hours; beans should be hard and brittle with no soft centers.
7. Condition
Place dried beans in airtight jar, shake daily for 5 to 7 days to equalize moisture.
If moisture appears, return beans to dehydrator to dry longer.
8. Store
Store dehydrated beans in airtight containers or vacuum seal bags in a cool, dry place.
Use freezer storage for longer shelf life up to two years.
Discover the Convenience: Why Dehydrated Canned Beans Are a Must-Try
Want to reduce pantry space or build a pantry for someone in need? Serve emergency meals or plan quick pantry meals? Impress newlyweds with housewarming gifts or prepare for hiking, backpacking, or camping meals. Then, dehydrated, canned beans might be your best bet!
True, dehydrating canned beans requires extra steps. It takes some planning and preparation to ensure the right dry foods are on the shelf. However, it is hard to return once you taste the convenience and speed of cooking with homemade dehydrated beans!
Dehydrated foods are essential components of popular comfort convenience meals. Dry pasta, boxed mashed potatoes, and cup o’ noodles all rely on dehydrated ingredients. So, why not give it a try with beans now? Another convenient option for quick meals, especially for outdoor activities, is frozen beans. They can be quickly rehydrated and cooked, making them practical for backpacking.
You can whip up fast and delicious meals with dehydrated beans within hours. Ready to learn how? Let us guide you through the process and unlock the convenience of dry, canned beans!
What Kind Of Beans Can Be Dehydrated?
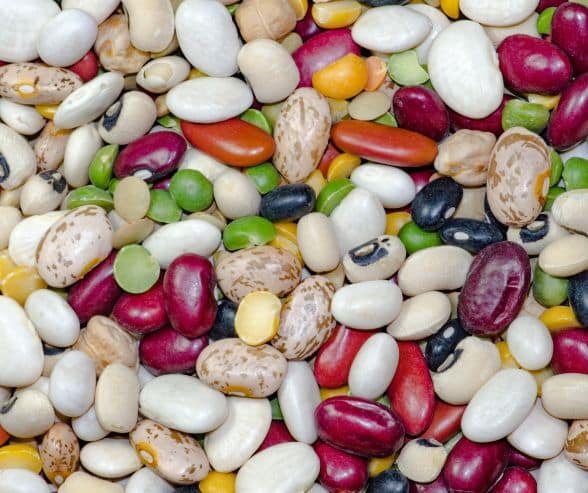
Beans can be dehydrated: black, red, pinto beans, white garbanzo, butter beans, lima beans, dehydrated black beans, garbanzo beans, and great northern beans. Almost everything works. Store-bought canned beans are easiest to prepare because they come in a can and are ready to use, much like other pantry staples such as canned corn you can dehydrate easily.
Dehydrating Dried Beans vs. Canned Beans
When it comes to dehydrating beans, you have two primary options: dried beans and canned beans. A food dehydrator also gives you more consistent airflow and temperature than improvised drying methods, and it opens the door to dehydrating many other foods for snacks and meals. Each method has its own set of advantages and disadvantages, so let’s break them down.
Dehydrating Dried Beans:
Advantages:– Cost-effective: Dehydrating dried beans can save you money in the long run. Buying dried beans in bulk and dehydrating them at home is a budget-friendly option.
Space-saving: Dehydrated beans take up significantly less space than their canned counterparts, making them perfect for backpacking meals or small kitchen storage.
Customizable: You have the freedom to dehydrate a variety of beans, including pinto beans, kidney beans, black beans, and navy beans, allowing you to create your own custom blends.
Disadvantages:– Time-consuming: This method requires planning and preparation. You’ll need to soak and cook the beans before dehydrating them, which can be a bit time-consuming.
Equipment required: To dehydrate dried beans, you’ll need a dehydrator or a food processor, which might be an additional investment if you don’t already own one.
Dehydrating Canned Beans:
Advantages:– Convenient: Canned beans are already cooked, so they can be dehydrated quickly. This makes them a great option for busy households looking for fast cooking beans.
Easy to find: Canned beans are widely available in most supermarkets, making them easy to purchase whenever you need them.
Disadvantages:– Less cost-effective: Dehydrating canned beans can be more expensive than dehydrating dried beans, as you need to buy the canned beans first and then dehydrate them.
Limited options: You might be limited to the types of beans available in canned form, which may not include all the varieties you want to dehydrate.
Appearance changes: Canned beans often split open during dehydration, which affects how they look more than how well they work after rehydrating.
By understanding the pros and cons of each method, you can choose the one that best fits your needs and lifestyle.
How to Dehydrate Canned Beans
Preparing Your Beans
Beans require minimal preparation, making them a fantastic choice. Unlike dehydrating potatoes, which need much prep work, drying beans are a more straightforward option for convenient food.
To clarify, the process involves sorting your vegetable thoroughly and checking for any debris that may be present. It’s crucial to clear any dirt. Nobody wants to discover unwanted bits in their meal, especially when dehydrating food for long-term storage and convenience.
After sorting the beans, make sure to rinse them. If you plan to cook them on the stove, transfer the vegetable to a bowl, cover them with water, and let them soak overnight. For a hassle-free bean cooking experience, consider the Crock Pot Express (similar to an Instant Pot). Unlike traditional methods, there’s no need to soak the beans beforehand, and many home cooks also explore using an Instant Pot for food dehydration as part of their preservation routine. However, it’s still essential to sort them out before cooking.
Instructions for cooking 1-2 pounds of dry beans on the stove: After draining your soaked beans, put them in a pot and pour cold water until it’s 2 inches above the beans. You can season them to your family’s taste or use salt and pepper for seasoning. Bring it to a boil and simmer on low flame for 2-4 hours.
To make 2lb of beans in the Crock Pot Express, first sort and rinse the beans. Then, add them to the machine’s bowl liner with 4 quarts of water (don’t exceed the fill line), 1 Tbsp oil, 1 tsp salt, and any desired seasonings. Lock the lid and cook on the “beans/chili” setting at high pressure for 40 minutes. Let the pressure release naturally.
The Process of Dehydrating Beans
If you want to save time cooking later, I suggest thoroughly cooking your beans before dehydration. This is the most efficient way to do it and works better than par-cooking, then dehydrating and cooking the rest of the way. Here’s my method:
Start by draining your beans and saving any aquafaba to use in other recipes.
For enhanced flavor, consider adding a small amount of olive oil to the beans before dehydrating them.
Afterward, you can begin loading your dehydrator trays with beans in a single layer; if you have them, use mesh trays to catch any loose skins, and use nonstick sheets when needed.
Set the temperature between 125°F and 135°F and let cooked beans dry until they are hard, brittle, and have no soft centers. Drying usually takes 6-12 hours depending on the bean variety and humidity, so I recommend doing this overnight and checking them after about eight hours.
Discover If Your Dried Beans Have Gone Bad
Don’t let moldy, bug-infested, or rancid beans ruin your meal. Toss them out and get a fresh bag. These signs indicate moisture has infiltrated the package, causing the other beans inside it to go bad. Keep storage airtight and away from light to extend their shelf life.
If your dried beans are only slightly faded, don’t worry. This is a common occurrence and doesn’t mean they’re spoiled. Dried beans retain their nutritional value unless opened or visibly ruined.
Store them in a dry, cool, dark place in a sealed container to ensure longevity. Condition dehydrated beans in a jar first so moisture can equalize before long-term storage. Properly stored dehydrated beans can last for over two years, just like other dehydrated foods kept for long-term storage. This is especially helpful if storing different types of beans to avoid contaminating the rest. Don’t let spoiled beans ruin your day, and invest in proper storage with airtight containers or a vacuum seal.
Pairing Beans for Complete Proteins
When combined with rice, corn, or pasta, beans form complete proteins that provide all the essential amino acids our bodies need. The combination’s nutritional and gratifying value has made it a staple in diverse cultures worldwide. Dehydrated black beans are a great option to pair with rice for a complete protein. There is no need to compromise on flavor when you can have health and taste in a dish!
How to Rehydrate Beans
Want perfectly rehydrated beans? Skip the soaking and add dehydrated beans straight to your soup or stew, or cover them with hot water and use just enough water to cover the beans so flavor is not diluted. Easy, right?
For red beans, grinding them into a powder before rehydration can speed things up, making them a great addition to backpacking meals.
Knowing how to dehydrate beans is a great way to preserve and make fast meals for your family.
By utilizing this method of dehydration, you can create convenience foods that are sure to please the whole family! So don’t hesitate – try this simple method today, and you’ll be rewarded with delicious and nutritious meals anytime!
Common Issues and Solutions
Dehydrating beans can sometimes come with its own set of challenges. Here are some common issues you might encounter and practical solutions to help you achieve perfect results every time:
Beans not rehydrating properly: This issue can arise from either over-dehydrating or under-dehydrating the beans.
Solution: Ensure you are following the correct dehydration time and temperature. Check your dehydrator settings and adjust as needed to achieve the right consistency.
Beans becoming too brittle: Over-dehydrating can cause beans to become excessively brittle.
Solution: Reduce the dehydration time or lower the temperature slightly to prevent the beans from becoming too brittle.
Beans not storing properly: Improper storage can lead to beans losing their freshness or becoming contaminated.
Solution: Store your dehydrated beans in airtight containers, such as glass jars or Mylar bags, to keep them fresh and free from moisture.
Beans not rehydrating evenly: This can happen if the beans were not rinsed properly before dehydration.
Solution: Rinse the beans thoroughly before dehydrating them to ensure they rehydrate evenly when you’re ready to use them.
Beans having an off-flavor: This issue is often due to not cooking the beans properly before dehydrating them.
By following these tips and solutions, you can overcome common issues and achieve success when dehydrating beans. Whether you’re preparing for backpacking meals or simply looking to save space in your pantry, mastering the art of dehydrating beans will make your culinary adventures even more enjoyable.
FAQ
Are dehydrated beans healthy?
For sure! Dehydrated beans are a power-packed, fuss-free option for peeps who want a healthy diet. Jammed with goodness like protein, fiber, iron, potassium, and magnesium, this vegetable can give overall health some heart! Plus, they have an extended shelf life and get ready instantly, making them perfect for the go-getter or the health freak trying to keep it accurate. Remember to mix it up! New taste sensations every day equal a well-rounded, gosh-darn-nutritious diet.
How to store dehydrated beans
For beans that stay irresistibly fresh, ditch the plastic bags they come in and transfer them into airtight, food-safe containers. For longer storage, vacuum seal them in bags or jars. Oh, and keep these containers cool and dry, away from harsh sun rays.
How do you use dehydrated beans?
Get creative with dehydrated beans! Try combining them with rice (Minute or dehydrated) for a delicious and nutritious meal. Add a scoop to your soup for extra protein, or mix dry chickpeas into Middle Eastern, Mediterranean, or Indian dishes. For a quick variation, stir in a portion of black bean with rice or add it to a simple burrito bowl. After cooking, finish a bean-and-rice bowl with a little cheese for extra flavor. For another easy option, pair dehydrated beans with chicken in a soup or skillet meal. And hey, did you know that you can grind dry chickpeas to make instant hummus or bean dip? Toss some dehydrated beans in your chili for added texture and taste. The possibilities are endless!
Do you cook beans before dehydrating them?
Absolutely! Beans should be fully cooked before dehydrating. If you’re starting with dried beans, cook them in boiling water over enough heat to make them safe and tender before drying; cooking time varies by bean type, and pressure cooking is another option.
DannyContent Writer
Hey there, since 2016, my mission has been to provide you with the information and guides you need to make food dehydrating simple and fun. Whether you're a newbie or a seasoned pro, my site offers helpful guides, reviews, and recipes to enhance your dehydrating experience. I take pride in only recommending products I believe in, ensuring my readers' trust. As an affiliate of various programs, including Amazon Associates, your support helps me continue providing quality content. Thanks for stopping by, and happy dehydrating!