If you’ve ever sliced an apple and watched it turn brown within minutes, you already understand one of the biggest challenges in home fruit dehydration. That unappealing discoloration isn’t just cosmetic—it signals nutrient loss and flavor degradation that can ruin your carefully prepared batch of homemade snacks.
Ascorbic acid, commonly known as vitamin C, offers a straightforward solution to this problem. This guide walks you through everything you need to know about using ascorbic acid when dehydrating fruit at home, from mixing the perfect dip solution to storing your finished product.
Quick Answer: Why Use Ascorbic Acid When Dehydrating Fruit?
Ascorbic acid is one of the safest and most effective pretreatments available for preventing browning and quality loss when drying fruits at home. This water-soluble antioxidant works by interrupting the enzymatic oxidation reactions that cause cut fruit to turn brown within minutes of exposure to air.
When you dip cut fruit into an ascorbic acid solution before placing it on your drying trays, you’re creating a protective barrier that preserves color, flavor, and nutritional value throughout the drying process. This pretreatment is especially valuable for light colored fruits like apples, pears, peaches, and bananas—the varieties most prone to unsightly browning.
Unlike sulfuring or sulfite dips, ascorbic acid pretreatment is completely sulfite-free, making it suitable for individuals with sulfite sensitivities. Pure ascorbic acid crystals and powdered ascorbic acid are widely available at pharmacies, health food stores, and in the canning sections of most grocery stores. You can also use vitamin C tablets as an economical alternative.
Key benefits of ascorbic acid dips:
Prevents enzymatic browning in fresh fruits
Preserves natural color through the drying process
Adds a modest boost of vitamin C to your finished product
Creates no off-flavors or chemical residues
Safe for those with sulfite allergies or sensitivities
Works with any drying method: dehydrator, oven, or sun drying
Basics of Dehydrating Fruit
Food dehydration removes most of the water content from fruits and vegetables, typically reducing moisture levels to around 20% or less. At this low moisture content, bacteria, yeasts, and molds cannot grow, allowing your dried fruit to remain shelf-stable for months without refrigeration.
The drying process concentrates natural sugars and intensifies flavors, transforming ordinary fresh fruits into chewy, sweet snacks perfect for trail mixes, baking projects, lunchboxes, and backpacking trips. Dehydrated food takes up far less space than its fresh counterpart and weighs significantly less—ideal for anyone looking to stock a pantry or pack light with dehydrated foods.
Fruits that dehydrate exceptionally well:
Apples (all varieties)
Pears (Bartlett, Anjou, Bosc)
Peaches and nectarines
Apricots
Bananas
Plums (prunes when dried)
Grapes (raisins when dried)
Cherries
Strawberries and other berries
Pineapples and mangoes
Goals of proper food preservation through drying:
Reduce moisture content to 15-20% for most fruits
Maintain food quality including color, texture, and flavor
Prevent mold growth and potentially harmful bacteria
It’s important to understand that pretreatments like ascorbic acid dips support quality but do not replace proper drying. The actual moisture removal happens through your chosen drying method—whether that’s an electric food dehydrator running at 135-140°F, oven drying at low temperature with the door propped open for adequate air circulation, or sun drying in hot, dry climates where temperatures exceed 85°F with humidity below 60%.
How Ascorbic Acid Works When Dehydrating Fruit
Ascorbic acid is simply another name for vitamin C, a water-soluble antioxidant that occurs naturally in many fruits and vegetables. When sold for food preservation purposes, it typically comes in powdered or tablet form and dissolves readily in cold water.
Here’s what happens at a chemical level: when you slice into an apple or peach, you damage cell walls and release enzymes called polyphenol oxidases. These enzymes react with oxygen in the air to create melanin-like compounds—the brown pigments you see forming on cut surfaces. Ascorbic acid interrupts this process by donating electrons that neutralize the oxidation reaction before browning can occur.
Research published in the Journal of Agricultural and Food Chemistry demonstrated that treating fruits with 0.1% ascorbic acid effectively preserved total phenolics, anthocyanins, and oxygen radical absorbance capacity during dehydration. The study found that dehydration itself actually concentrates these beneficial compounds by removing water, and ascorbic acid pretreatment helps stabilize heat-sensitive antioxidants that might otherwise degrade during drying.
Antioxidant protection: Shields natural pigments and beneficial compounds from oxidative damage
Nutrient preservation: Adds vitamin C that partially compensates for losses during heating
Mild antimicrobial effect: Creates a slightly acidic environment that inhibits some surface microbes
No residual flavors: Unlike some treatments, ascorbic acid doesn’t alter the taste of your finished product
Compared to sulfuring or sulfite dips, ascorbic acid provides shorter-term but adequate protection for home drying projects. Sulfites typically protect color longer during extended storage, but they can trigger reactions in sensitive individuals and require outdoor use due to sulfur fumes penetrate concerns. Ascorbic acid is the clear choice for anyone wanting a natural, sulfite-free approach to prevent fruits from browning.
Types of Ascorbic Acid Pretreatments
Home food preservers have several options for creating an acidic solution to protect their fruit before drying. You can use pure ascorbic acid powder, crushed vitamin C tablets, commercial ascorbic acid mixtures, or even vitamin C-rich fruit juice as alternatives.
Each option has its place depending on your budget, what’s available locally, and your flavor preferences. Pure powdered ascorbic acid delivers the most predictable results with a completely neutral flavor, while juices and commercial blends may add tartness or subtle sweetness to your final product.
Overview of pretreatment options:
Type
Best For
Availability
Cost
Pure ascorbic acid powder
Consistent results, neutral flavor
Health food stores, online, wine making supplies
Moderate
Crushed vitamin C tablets
Budget-friendly substitute
Pharmacies, grocery stores
Low
Commercial mixtures (Fruit-Fresh)
Convenience, clear directions
Grocery canning sections
Higher
Fruit juice dips
Small batches, added flavor
Grocery stores
Varies
One important note: all ascorbic acid solutions have limited effectiveness. The vitamin C gradually gets used up as you dip successive batches of fruit, and the solution loses strength. Plan to refresh your dip after treating one or two batches of cut fruit—typically around 10 quarts of sliced fruit per quart of solution.
Using Pure Ascorbic Acid Powder
Food grade pure ascorbic acid crystals offer the most reliable results for serious home dehydrators. You’ll find this product in canning supply sections, health food stores, pharmacies, and online retailers. Look for packages labeled specifically for food use.
For larger batches, scale up to 2.5 tablespoons (about 34 grams) per quart (1000 ml) of cold water. This stronger solution can treat approximately 10 quarts of prepared fruit before losing effectiveness.
How to use:
Add powdered ascorbic acid to cold water in a non-reactive bowl (glass, plastic, or stainless steel)
Stir until crystals dissolve completely—this takes only 30-60 seconds
Add freshly cut fruit slices, ensuring pieces are fully submerged
Soak for 3-5 minutes, stirring occasionally to coat all surfaces
Lift fruit out with a slotted spoon and drain excess solution back into the bowl
Spread fruit on paper towels and blot lightly—no rinsing needed
Place fruit directly on drying trays
There’s no need to rinse lightly treated fruit before drying. Rinsing would wash away the protective vitamin C layer you just applied. Simply drain well and blot off excess moisture to speed drying time.
Discard the solution after treating two batches of fruit and mix fresh if you have more fruit to process. The vitamin C oxidizes with each use and becomes less effective.
Using Crushed Vitamin C Tablets
When pure ascorbic acid powder isn’t available, plain vitamin C tablets offer an economical alternative. Look for unflavored tablets without sugar coatings or added ingredients—basic ascorbic acid in powdered or tablet form works best.
Conversion formula:
Six 500 mg vitamin C tablets = 3,000 mg (3 grams) = approximately 1 teaspoon powdered ascorbic acid
Dissolve in 2 cups (480 ml) cold water
How to crush tablets:
Place tablets in a small plastic bag or between two sheets of parchment paper
Use a rolling pin, the back of a spoon, or a meat mallet to crush into fine powder
Tap crushed powder into your measuring container
Add to cold water and stir until dissolved (may take slightly longer than pure powder)
Use the same 3-5 minute soaking time as with pure ascorbic acid powder. For thicker fruit pieces or halves, extend soaking time to 8-10 minutes to ensure adequate penetration.
Avoid flavored, chewable, or sugar-coated more ascorbic acid tablets. These additives can affect the taste of your dried fruit and may leave sticky residue in the solution that transfers to your product.
Commercial Ascorbic Acid Mixtures
Products like Fruit-Fresh and similar brands contain a blend of ascorbic acid, citric acid, and sometimes sugar or anti-caking agents. These mixtures are marketed for canning, freezing, and drying applications.
Typical mixing rate:
1 tablespoon commercial mixture per 1 quart (4 cups / 950 ml) cold water
Always check package directions, as formulations vary by brand
Commercial blends offer convenience—clear instructions right on the package—and work well for casual home preservers. The added citric acid contributes extra tartness and provides some additional antimicrobial benefit.
Pros and cons of commercial mixtures:
Advantages
Disadvantages
Easy to find in grocery stores
Higher cost per treatment
Clear package directions
Contains added ingredients
Consistent formulation
May add noticeable tartness
Sulfite-free
Less control over concentration
Soak cut fruit for 3-5 minutes, then drain thoroughly. Rinsing is usually unnecessary unless the flavor seems too tart for your preference. Refresh the solution after treating 2-3 small batches (about 1-2 pounds of fruit).
Fruit Juice and Other Acid Dips
When you don’t have access to pure ascorbic acid or commercial mixtures, vitamin C-rich juices can serve as a backup pretreatment. Lemon juice, orange juice, pineapple juice, and cranberry juice all contain enough juice and vitamin C to provide some protection against browning.
Guidelines for fruit juice dip:
Use 100% juice (not juice drinks or cocktails)
For a milder treatment: mix 1 part lemon juice with 1-3 parts water
Soak sliced fruit for up to 10 minutes
Drain well and blot thoroughly to prevent stickiness
Be aware that juice dips will impart noticeable flavor to your finished product. Pineapple juice on apple slices creates a tropical note; lemon juice adds distinct tartness. Some people enjoy these flavor additions, while others prefer the neutral taste achieved with pure ascorbic acid.
A fruit juice dip works best for small batches, emergency substitutes when other options aren’t available, or when you intentionally want to add complementary flavors. It’s less effective than concentrated ascorbic acid solutions for long-term color protection.
Pure citric acid solutions can also prevent fruit browning, but citric acid is generally less effective than ascorbic acid for color retention and tends to make fruit noticeably more tart without adding vitamin C benefits.
Preparing Fruit for Ascorbic Acid Pretreatment
Careful preparation before dipping ensures even treatment, faster drying, and better texture in your finished dried foods. Taking a few extra minutes to select and prepare fruit properly pays dividends in quality.
Selecting fruit:
Choose fully ripe fruit that’s still firm fruit—ripe enough for good flavor but not soft or mushy
Avoid overripe, bruised, or damaged pieces that may spoil during drying
Look for whole fruits without blemishes, cracks, or insect damage
Peak-season fruit typically produces the best results
Preparation steps:
Wash fruit thoroughly under cool running water to remove dirt, residues, and surface bacteria
Remove stems, caps, cores, and pits as appropriate for each fruit type
Cut away any damaged, bruised, or discolored areas
Peel if desired (optional for most fruits—peeling is common for apples and peaches)
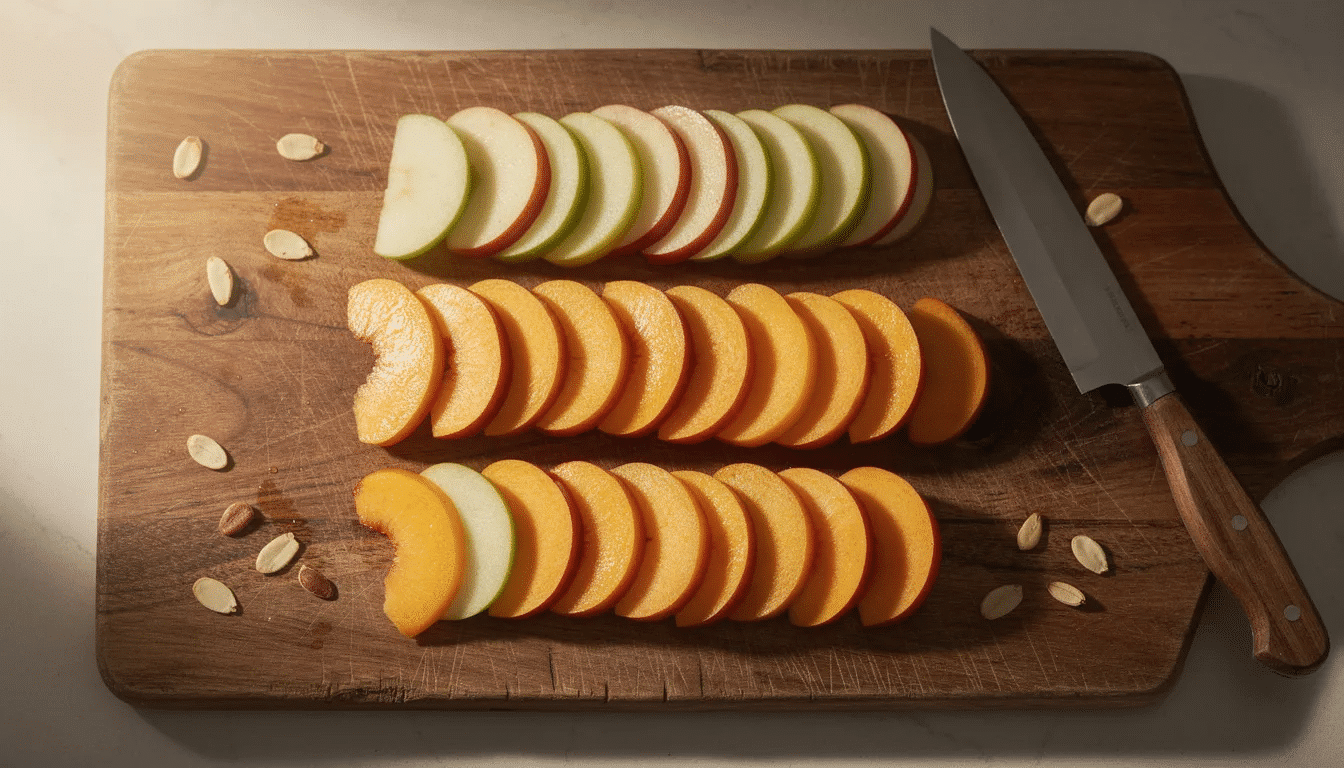
Slice uniformly for even drying
Recommended slice thicknesses:
Fruit Type
Recommended Thickness
Notes
Apples, pears
1/4 inch (6 mm)
Rings or wedges
Peaches, nectarines
1/4-3/8 inch
Wedges or slices
Bananas
1/8-1/4 inch
Rounds
Apricots, plums
Halves
Pit removed
Berries
Whole or halved
Check skins first
For thick-skinned fruits like grapes, cranberries, and blueberries that you want to dry whole, “check” the skins first by dipping briefly in boiling water (15-30 seconds) then immediately plunging into very cold water. This cracks the waxy skin and allows moisture to escape during drying.
Critical timing tip: Place fruit into your ascorbic acid solution immediately after cutting. The moment you slice into fresh fruits, oxidation begins. Having your dip solution ready and waiting minimizes air exposure and early browning.
Step-by-Step: Ascorbic Acid Dipping Before Drying
This practical walkthrough takes you from mixing your solution to placing fruit on drying trays. With practice, you’ll develop a rhythm that makes processing large batches efficient and manageable.
Step 1: Mix the ascorbic acid solution
Prepare your dip before cutting any fruit. Combine 1 teaspoon pure ascorbic acid (or six crushed 500 mg vitamin C tablets) with 2 cups cold water in a non-reactive bowl. Stir until completely dissolved. Use glass containers, food grade plastic, or stainless steel—avoid aluminum which can react with acids.
Step 2: Set up your workspace
Gather cutting board, sharp knife, measuring tools, slotted spoon or strainer, clean paper towels, and your prepared drying trays. Having everything within reach speeds up the process significantly.
Step 3: Prepare fruit in small batches
Work with about 2-3 cups of sliced fruit at a time. Wash, peel if needed, core or pit, and slice evenly. Place fruit directly into the ascorbic acid solution as you cut to minimize browning.
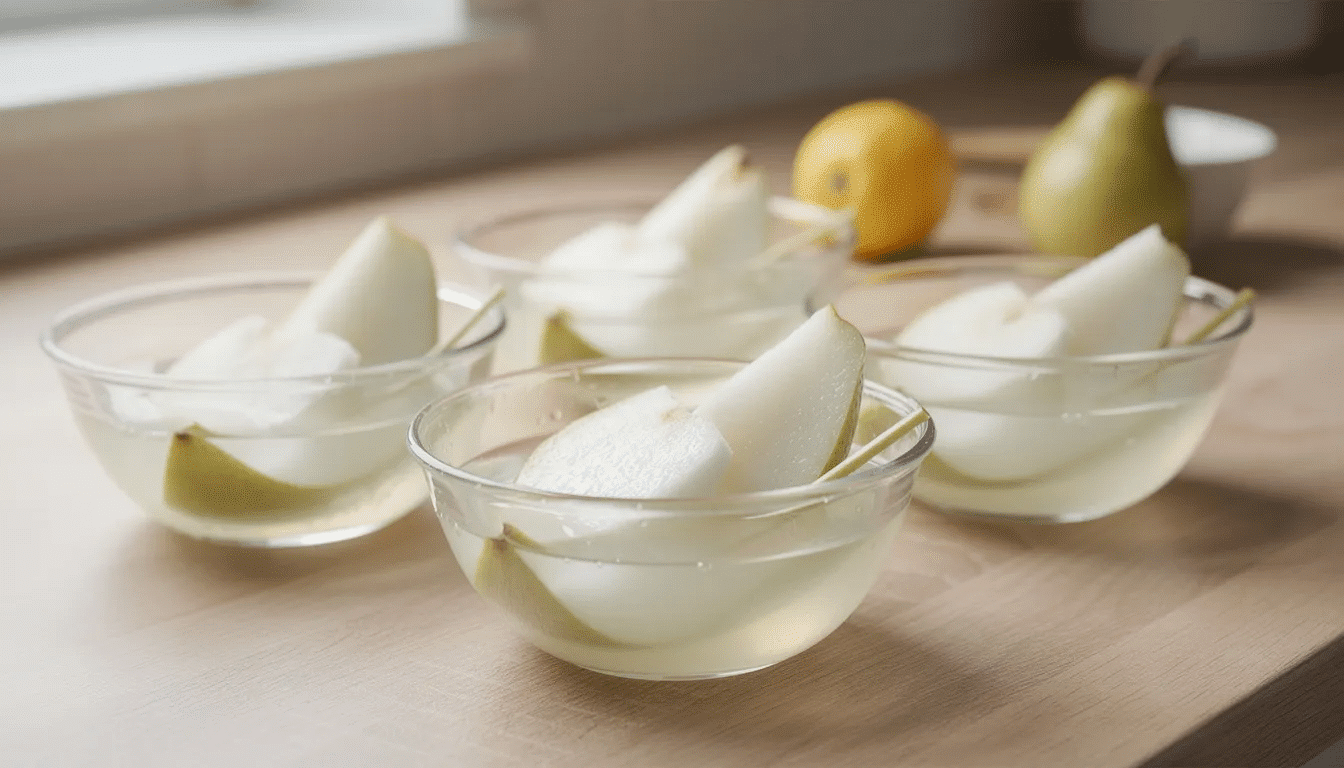
Step 4: Soak the fruit
Ensure all fruit pieces are fully submerged in the solution. Gently stir to coat all surfaces evenly. Soak for 3-5 minutes for standard slices, or up to 10 minutes for thicker pieces and halves.
Avoid soaking too long—excessive soaking can dilute flavors and add excess moisture that extends drying time.
Step 5: Drain and blot
Lift fruit out with a slotted spoon or strainer, allowing excess solution to drain back into the container. Spread fruit briefly on clean paper towels and blot lightly to remove surface moisture. Don’t rinse—you want to retain that protective ascorbic acid coating.
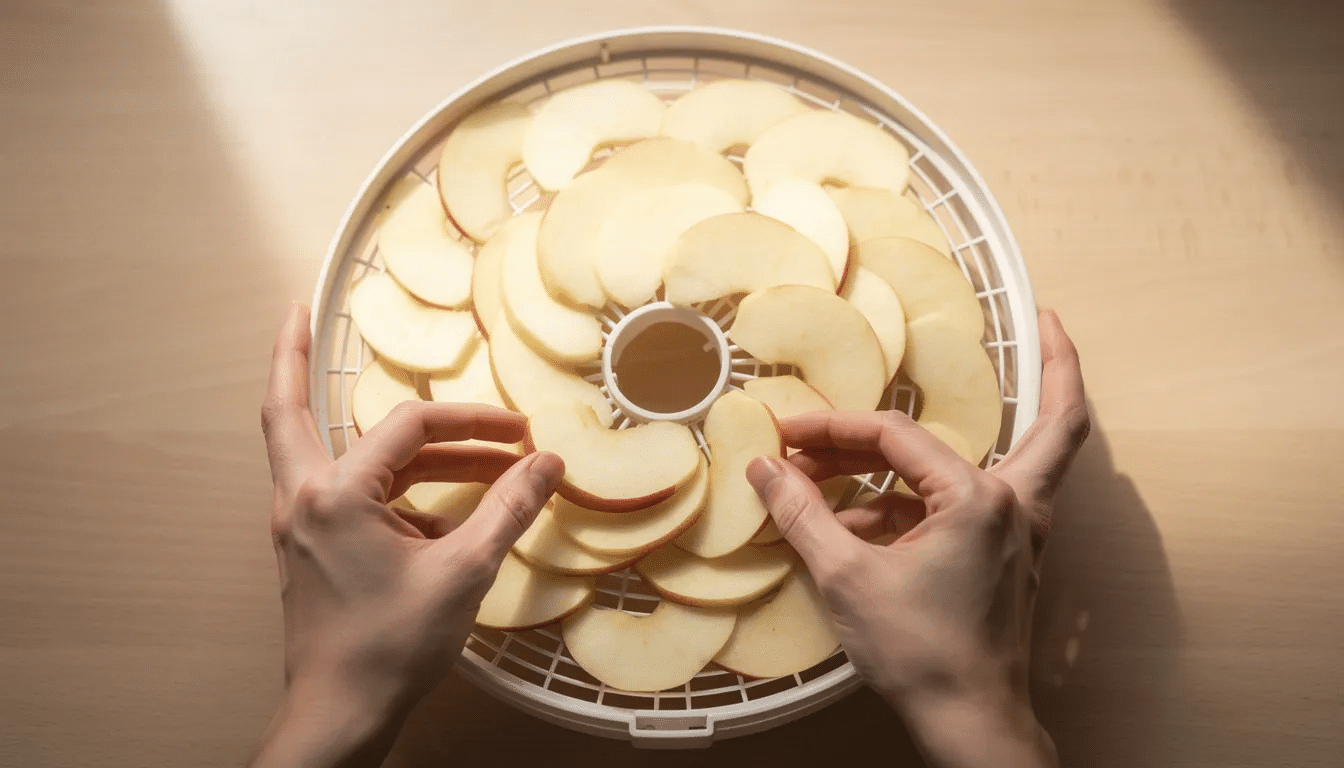
Step 6: Arrange on trays
Place fruit in a single layer on your drying trays, making sure pieces don’t overlap or touch. Air circulation around each slice is essential for even drying. For sticky fruits, apply non stick cooking spray to trays or use dedicated fruit leather sheets.
Step 7: Refresh solution as needed
After completing 1-2 batches with the same solution, discard the dip and mix a fresh batch. The vitamin C degrades with each use, and continuing to use spent solution provides diminishing protection.
Total prep time: Expect approximately 15-30 minutes from cutting to ready-for-dryer for each batch, depending on your speed and the amount of fruit being processed.
Drying Methods After Ascorbic Acid Treatment
Once your fruit has been pretreated with ascorbic acid, proceed with any standard drying method. The pretreatment works equally well whether you’re using an electric dehydrator, your kitchen oven, or taking advantage of sunny weather for sun drying, and pairs perfectly with a step-by-step guide to dehydrating fruit in a food dehydrator.
Electric Food Dehydrator
A food dehydrator provides the most consistent results for home dried foods. Set temperature to 135-140°F (57-60°C) for most fruits. Higher temperatures may cook the exterior while leaving the interior moist, or cause case hardening where the outside seals before moisture can escape.
Arrange dipped fruit in single layers on dehydrator trays
Leave space between pieces for air circulation
Rotate trays every 2-4 hours for even drying
Expect 6-12 hours for thin slices, longer for thicker pieces
Oven Drying
Oven drying works when a dehydrator isn’t available, though it’s less energy-efficient and requires more attention. If you have suitable weather, you can also explore the best fruits for sun-drying as an energy-free alternative.
Set oven to lowest temperature (ideally 140°F or below)
Prop door open 2-6 inches to allow moisture buildup to escape
Position a small fan nearby to maintain adequate air circulation
Place fruit on wire racks set over baking sheets to allow airflow
Rotate and flip fruit every 2 hours
Monitor carefully to prevent scorching
Note: Oven drying with the door ajar poses safety concerns in homes with small children. Exercise caution or choose an alternative drying method.
Sun Drying
Sun dried fruits require specific climate conditions: temperatures above 85°F (29°C), humidity below 60%, and several consecutive sunny days, and they work especially well with a wide range of fruits you can dehydrate.
Use food-safe drying screens or cheesecloth-covered racks
Protect from insects with additional cheesecloth covering
Bring trays indoors at night to prevent remaining moisture from reabsorbing
Turn fruit several times daily
Expect 2-4 days for complete drying
Unlike sulfured fruit, ascorbic acid-treated fruit is odor-neutral and completely safe for indoor drying. There are no sulfur fumes to ventilate, making it ideal for apartment dwellers or anyone without outdoor drying space.
Important note about dipped fruit: Ascorbic acid-treated fruit may be slightly damper on the surface than undipped fruit. If you didn’t blot thoroughly after draining, expect somewhat longer drying times. This is normal and doesn’t indicate a problem—just allow the extra time needed.
Determining When Ascorbic Acid–Treated Fruit Is Dry
Treatment with ascorbic acid doesn’t change basic dryness targets. Properly dried fruit should retain about 15-20% moisture content, resulting in pieces that are pliable and leathery but not sticky or spongy.
How to test for dryness:
Cut and examine: Cool a few sample pieces to room temperature, then cut one in half. Look for any wet, sticky, or shiny areas in the center. Properly dried fruit should be uniformly dry throughout.
Squeeze test: Press a cooled piece between your fingers. It should feel leathery and pliable without releasing moisture or feeling sticky. If juice beads on the surface, continue drying.
Tear test: Tear a cooled piece in half. No visible moisture should appear at the tear. The texture should be chewy, not wet or mushy.
Rattle test (for small fruits): Place cooled berries or small fruit pieces in a glass jar and shake. Properly dried pieces should rattle freely without clumping together.
Critical tip: Always test fruit at room temperature. Warm fruit feels softer and moister than it actually is. If you test straight from the dehydrator, you’ll likely overdry your batch. Remove a few pieces, let them cool for 10-15 minutes, then evaluate.
When in doubt, dry a little longer. Slightly overdried fruit is still usable, while underdried fruit will develop mold growth during storage.
Conditioning and Storing Ascorbic Acid–Treated Dried Fruit
Even when fruit passes all dryness tests, individual pieces within a batch may have slight moisture variations. Conditioning equalizes this remaining moisture before final packaging, preventing mold problems during storage.
Conditioning process:
Cool dried fruit completely to room temperature
Pack loosely into clean plastic or glass jars or food-grade plastic containers
Fill containers about two-thirds full to allow pieces to move freely
Seal containers and store at room temperature for 7-10 days
Shake jars daily to separate pieces and redistribute any moisture
Check inside of containers for condensation each day
If you notice moisture buildup or condensation on the inside of containers, return fruit to the dehydrator or oven for additional drying. This indicates the batch needs more time before it’s safe for long-term storage.
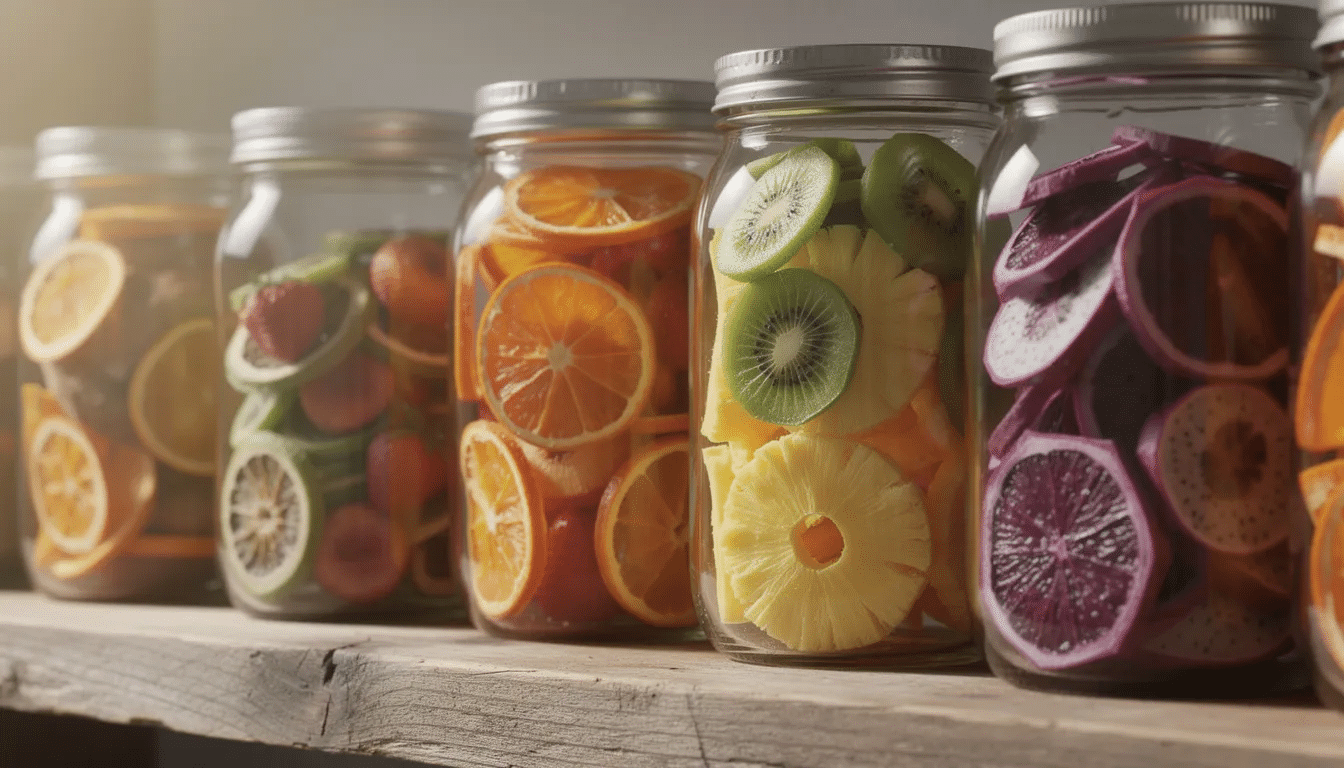
Final packaging for storing dried foods:
After successful conditioning, pack fruit tightly into moisture-proof, insect-proof containers:
Glass jars with tight-fitting lids (Mason jars work excellently)
Heavy-duty freezer bags with air pressed out
Vacuum-sealed pouches for maximum shelf life
Food-grade plastic containers with secure lids
Label containers with contents and date. Store in a cool, dark, dry location—a pantry or cupboard away from heat sources works well. Cooler storage temperatures extend shelf life significantly.
Storage expectations:
Storage Condition
Expected Shelf Life
Cool pantry (60-70°F)
6-12 months
Refrigerator
12-18 months
Freezer
2+ years
Research indicates that well-dried fruit treated with ascorbic acid and stored at low water activity can maintain quality and ORAC (antioxidant capacity) values for up to 12 months. The ascorbic acid pretreatment helps retain bright color and vitamin C content throughout storage, but proper dryness and packaging—ideally using top airtight containers for dried fruits—remain essential.
Food Safety and Nutrition Considerations
While ascorbic acid dips help preserve quality and may modestly reduce surface microbes, safe dehydration fundamentally depends on proper drying temperatures, adequate times, and sanitary handling practices throughout the drying process.
Safety considerations:
Fruits are naturally acidic, making them generally safer to dry than low-acid vegetables or meats
Proper drying to 15-20% moisture content prevents mold growth and bacterial proliferation
Use clean equipment and wash hands before handling food
Work in small batches to minimize time fruit spends at room temperature before drying
Honey dipped fruit and honey dip solutions require careful handling as honey can harbor bacteria
Nutrition notes:
Ascorbic acid pretreatment may actually increase the vitamin C content in your final dried fruit compared with untreated pieces. This partially compensates for vitamin losses that occur during the heating phase of dehydration. Studies show that drying with ascorbic acid pretreatment helps preserve phenolic compounds and antioxidant capacity that might otherwise degrade at elevated temperatures, which fits into the broader picture of how many nutrients are lost in dehydrated fruits.
Some vitamin C loss is unavoidable during drying—research suggests losses can exceed 20-30% at temperatures above 60°C (140°F) without proper pretreatment. Using ascorbic acid helps minimize these losses.
When to discard dried fruit:
Any visible mold growth (fuzzy spots, discoloration)
Off-odors or unusual smells
Slimy or unexpectedly wet texture
Signs of insect activity
Regardless of pretreatment method, trust your senses. If something seems wrong with your home dried foods, discard them rather than risk foodborne illness. Properly prepared and stored dried fruit should look appealing, smell like concentrated versions of the fresh fruit, and have pleasant chewy texture.
Example Fruits and Ascorbic Acid Pretreatment Tips
Different fruits respond somewhat differently to ascorbic acid pretreatment and drying. Here’s practical guidance for some of the most popular choices, building on broader advice about what fruit you can dehydrate at home.
Apples (Gala, Fuji, Honeycrisp, Granny Smith)
Apples are among the easiest fruits dried at home and benefit enormously from ascorbic acid treatment. Peel if desired (peeled slices dry more evenly), core using an apple corer or knife, and slice into 1/4-inch thick rings or wedges. Dip in ascorbic acid solution for 3-5 minutes. Dry at 135-140°F for 6-12 hours until pliable and leathery, or experiment with dehydrated fruit recipes for delicious snacks that incorporate apples in mixes and trail snacks. Well-treated apple slices maintain their creamy white or pale yellow color without developing the brown “apple freckles” common in untreated fruit stand purchases or store bought dried fruits.
Pears (Bartlett, Anjou, Bosc)
Peel pears for best texture, core, and slice 1/4 inch thick. Pears brown rapidly, so work quickly and place fruit directly into your ascorbic acid solution as you cut. Soak 3-5 minutes, drain well. Dry at 135-140°F for 8-16 hours. Pear edges dry faster than centers, so check frequently to avoid overdrying the thin portions while waiting for thicker areas to finish.
Peaches and Nectarines
Remove pits and slice into wedges about 1/4 to 3/8 inch thick. Peeling is optional—leaving skins on creates chewier texture while peeled fruit dries faster and more evenly. Dip 3-5 minutes in ascorbic acid solution. Dry at 135-140°F for 8-18 hours depending on slice thickness. These fruits are prone to significant browning without pretreatment.
Bananas
Peel and slice into 1/8 to 1/4 inch rounds. Bananas benefit substantially from ascorbic acid treatment, staying a pleasant cream color rather than turning dark brown. Dip 3-5 minutes, drain, and blot well—bananas hold surface moisture. Dry at 135-140°F for 8-12 hours until chewy but not sticky. Thin slices become crispy; thicker slices stay chewy, making them one of the best foods to dehydrate for snacks.
Apricots and Plums
Halve and remove pits. For apricots, you can optionally check the skins briefly in boiling water then cold water to speed drying. Soak halves in ascorbic acid solution for 5-10 minutes (longer for these thicker pieces), cut side down. Place cut side up on drying trays. Dry at 135-140°F for 12-24 hours. These take longest due to their thickness but produce intensely flavored results.
Berries (Strawberries, Blueberries, Cranberries)
Strawberries: Hull and slice 1/4 inch thick, or halve smaller berries. Dip 3-5 minutes. Dry 8-16 hours.
Blueberries and cranberries: Check skins by dipping in boiling water 30-60 seconds, then immediately into cold water to crack waxy coating. Treat with ascorbic acid solution 5 minutes if desired. Dry 12-24 hours until shriveled and no longer soft when pressed.
General timing note: All times are estimates. Humidity, slice thickness, fruit moisture content, and equipment efficiency all affect actual drying duration. Use the dryness tests described earlier rather than relying solely on time.
Summary: Making the Most of Ascorbic Acid When Dehydrating Fruit
Ascorbic acid pretreatment represents one of the simplest improvements you can make to your home fruit dehydration routine. With just a teaspoon of powder dissolved in a couple cups of water, you gain significant protection against browning, better nutrient retention, and more attractive finished products that rival commercial sun dried fruits.
The process integrates seamlessly into your existing workflow: mix your solution, slice your remove fruit promptly into the dip, soak briefly, drain and blot, then proceed with whatever drying method works best for your situation. Whether you’re using a dedicated food dehydrator, your kitchen oven, or taking advantage of hot sunny weather, ascorbic acid-treated fruit dries beautifully.
Success depends on combining good pretreatment with other fundamentals: choosing quality firm fruit at proper ripeness, slicing uniformly for even drying, maintaining appropriate temperatures throughout the drying process, testing properly for dryness, conditioning to equalize moisture, and packaging in airtight containers for storage in cool, dark locations.
Don’t be afraid to experiment. Try different fruits, adjust slice thicknesses to your texture preferences, and vary dip concentrations slightly to find what works best for your tastes. Some people prefer candied fruit effects from syrup blanching or hot syrup treatments, but ascorbic acid offers clean fruit flavor without added sweetness—letting the natural character of your prepared fruit shine through, whether you’re focusing on fruits alone or exploring what foods can be dehydrated for snacks and meals.
[ ] Slice uniformly and place fruit directly into solution
[ ] Soak 3-5 minutes, stirring to coat all surfaces
[ ] Lift fruit, drain, and blot with towels
[ ] Arrange single layer on trays with space for air circulation
[ ] Dry at 135-140°F until pliable with no moisture in center
[ ] Cool completely and test for dryness
[ ] Condition in glass jars for 7-10 days, shaking daily
[ ] Package in airtight containers and store in cool, dark location
Start with a small batch—perhaps a few apples or a couple of bananas—to get comfortable with the process. Once you experience the difference ascorbic acid makes in color and quality, you’ll likely make it a standard part of your easy to preserve routine for every dehydrating session.
DannyContent Writer
Hey there, since 2016, my mission has been to provide you with the information and guides you need to make food dehydrating simple and fun. Whether you're a newbie or a seasoned pro, my site offers helpful guides, reviews, and recipes to enhance your dehydrating experience. I take pride in only recommending products I believe in, ensuring my readers' trust. As an affiliate of various programs, including Amazon Associates, your support helps me continue providing quality content. Thanks for stopping by, and happy dehydrating!