If you’ve ever grabbed a pouch of freeze dried meals from an outdoor retailer, you know the appeal: tear it open, add water, and eat a surprisingly tasty dinner on the trail. The problem? Those commercial pouches from brands like Mountain House or Backpacker’s Pantry run $8 to $15 each. Do the math for a week-long backpacking trip or a year’s worth of emergency supplies, and you’re looking at serious money.
Making your own freeze dried food changes that equation entirely. You control the ingredients, customize portions to your appetite, and drop per-meal costs dramatically. Whether you’re building dehydrated backpacking meals for a 2026 thru-hike, preserving your summer garden harvest, or simply want shelf stable protein snacks in your pantry, freeze drying at home opens up possibilities that buying commercial products never will.
So what exactly is freeze drying? Unlike standard dehydrating food methods that use warm air to evaporate moisture, freeze drying removes water through sublimation—ice transforms directly into vapor without ever becoming liquid. This happens at low temperatures under vacuum conditions, which is why freeze dried food retains its original shape, color, flavor, and up to 97% of its nutritional value. Fresh food essentially goes into suspended animation.
The benefits stack up quickly: incredibly long shelf life (often 10 to 25 years for properly stored items), featherweight results perfect for backpacking trips, and the ability to customize everything from sodium levels to allergen-free ingredients. Imagine making your own freeze dried chili with your grandmother’s recipe, or turning peak-season strawberries into crunchy trail snacks that taste almost fresh when rehydrated.
This article walks you through everything you need to know about the freeze drying process—from understanding the science to choosing equipment, selecting the right foods, and following step-by-step instructions to create your own meals. By the end, you’ll have a clear roadmap to start building your own backcountry meals and emergency pantry.
The concept of preserving food through freezing and drying isn’t a modern invention. Long before anyone owned home freeze dryers, people in harsh climates discovered that cold and low humidity could preserve food for months.
High in the Andes Mountains, the Inca developed a method for making chuño that still works today. They’d leave potatoes out overnight to freeze at altitude, then press out the moisture and dry them in the sun over roughly ten days. The result lasted for many months—sometimes years—and sustained communities through lean seasons. It was freeze drying in its most primitive form, relying on nature’s vacuum pump: thin mountain air.
Scientific freeze drying emerged in the late 1800s when researchers began experimenting with vacuum pumps and refrigeration. But the process remained mostly experimental until World War II created urgent demand. The military needed to preserve blood plasma and penicillin for battlefield use, and freeze drying proved ideal—it kept biological materials stable without refrigeration. By the 1960s, NASA had adopted the technology for astronaut meals during the Apollo missions, where every ounce of weight mattered and food had to last.
Commercial freeze dried brands for campers and backpackers gained traction through the 1970s, 80s, and 90s. Those familiar foil pouches became staples in outdoor shops, feeding generations of hikers on everything from beef stroganoff to scrambled eggs. But the equipment remained industrial-scale and expensive.
That changed in the 2010s. Companies began producing compact machines sized for home kitchens, and suddenly regular households could freeze dry their own food. What once required factory equipment now fits in a garage corner. The democratization of freeze drying had arrived.
How Freeze Drying Works (and Why It’s Different from Dehydrating)
Understanding the basic science helps you get better results, even if you never touch a physics textbook. Here’s the simplified version: freeze drying uses cold and vacuum to remove water while preserving everything else about the food.
The freeze drying process unfolds in three distinct stages. First, the food freezes solid—typically to temperatures around -30°F to -50°F. Rapid freezing creates small ice crystals that minimize damage to cell walls, which is why properly frozen produce rehydrates better than slowly frozen food. Second, the machine creates a strong vacuum and applies gentle heat. Under these conditions, the ice crystals sublimate—they transform directly from solid to gas without melting into liquid. This primary drying removes about 95% of the water. Third, temperatures rise slightly to drive off the remaining bound moisture, completing what’s called secondary drying and leaving food at around 2% moisture content.
Think of sublimation like frost disappearing on a cold, dry winter morning. The ice doesn’t melt into puddles; it simply vanishes into the air. That’s exactly what happens inside a freeze dryer, just faster and more controlled.
How does this compare to regular dehydrating food? The differences matter for taste, nutrition, and shelf life. Traditional dehydrators use warm moving air—usually between 95°F and 160°F—to evaporate moisture. This removes 80% to 90% of water content, leaving food chewier and denser. Heat also degrades vitamins, particularly C and B vitamins, reducing nutritional value by 20% to 40% compared to fresh, so understanding how dehydration affects essential nutrients helps you choose the right preservation method for your goals. Dehydrated meals typically stay good for one to three years.
Freeze drying, by contrast, removes 95% to 99% of moisture at temperatures that never cook the food. Colors stay vibrant, shapes hold their structure, and most vitamins survive intact. Freeze dried peas rehydrate to something remarkably close to fresh—bright green, tender, and flavorful. Freeze dried raspberries crumble beautifully into yogurt or baking recipes, tasting like concentrated summer. The texture difference is night and day: crisp and airy versus leathery and dense.
Key Benefits of Making Your Own Freeze Dried Food
Before investing in equipment or planning your first batch, it helps to understand exactly what you’re gaining. Here are the practical benefits that keep home freeze dryers humming:
Very long shelf life that stretches 10 to 25+ years for low-fat foods stored correctly, compared to 1-3 years for standard dried food
Light weight and compact size that’s ideal for long backpacking trips, hunting expeditions, or emergency bug-out bags
Complete control over ingredients—choose organic produce, reduce sodium, eliminate allergens, or skip preservatives entirely
Significant cost savings versus buying $10-$15 commercial pouches, especially for families or frequent hikers who process their own food regularly
Ability to preserve food from your garden harvests at their peak ripeness, turning 100 pounds of tomatoes into 10 pounds of concentrated, shelf-stable goodness
Versatility for everyday cooking: toss freeze dried veggies into soups, blend fruits into smoothies, or add protein to casseroles year-round
Choosing Your Freeze Drying Setup at Home
There are multiple ways people attempt to freeze dry food at home, but only some produce reliable, food-safe results you’d actually want to pack for a week on the Colorado Trail.
The options break down into four categories: purpose-built home freeze dryers, standard household freezers, dry ice experiments, and DIY vacuum chamber rigs. Each has different capabilities, costs, and limitations, much like the tradeoffs you see when comparing food dehydrators versus using an oven for drying. Before you invest money or effort, it’s worth understanding what each can actually deliver.
This article focuses primarily on home freeze dryers because they’re the only realistic choice for consistent, safe, edible results at any practical scale. The alternatives can work for science experiments or small hobby projects, but they won’t reliably fill your pantry with backpacking food you can trust.
Expect real commitments with home freeze dryers: machines cost several thousand dollars, run for 20-40 hours per batch, and need dedicated space away from living areas due to vacuum pump noise. But for anyone serious about making your own freeze dried food, the investment pays dividends over time.
Using a Modern Home Freeze Dryer
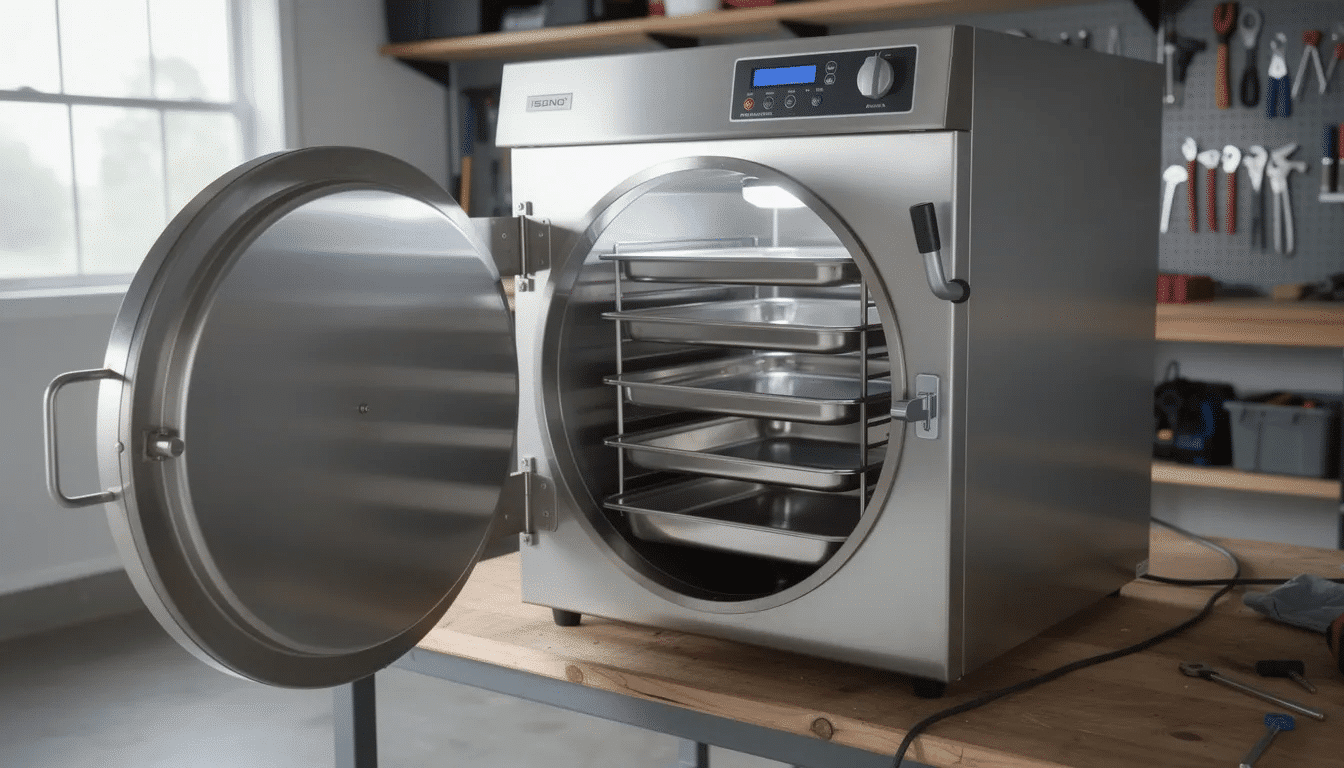
A home freeze dryer looks like a boxy appliance with a front-loading door, multiple stainless steel trays, and an attached vacuum pump. Most people install them in garages, basements, or utility rooms where noise and heat dissipation aren’t issues. The Harvest Right freeze dryer dominates the consumer market, though other brands exist.
As of 2024-2025, expect these approximate price ranges:
Small units (suitable for 1-2 people): around $2,000-$2,500
Medium units (families or regular users): $2,500-$3,000
Large units (serious preppers or homesteaders): $3,000-$3,500
Prices vary by sales, accessories, and pump type. Oil-free pumps cost more upfront but reduce maintenance.
The basic workflow is straightforward: load prepared food onto trays, close the door, select your cycle, and let the machine work. The unit automatically freezes everything, pulls a vacuum, maintains drying temperatures, and warms food at the end. Cycles typically run 20 to 40 hours depending on food type—watery fruits like strawberries might finish in 20-30 hours, while dense meats or thick stews can take 40+ hours.
Recurring costs include electricity (roughly $1-$2 per batch or 20-50 kWh per cycle), pump oil changes for oil-based systems, and occasional maintenance. But frequent users often recoup their machine cost within one to three years compared to buying commercial freeze dried backpacking meals. The cost savings compound quickly when you’re processing garden produce or bulk meat purchases.
Why Freezers, Dry Ice, and DIY Rigs Fall Short
Standard household freezers cannot freeze dry food, period. What happens instead is freezer burn—moisture slowly sublimates over months, leaving degraded, off-flavored food. You might notice ice crystals forming on frozen chicken after several months; that’s moisture migrating out of the food and depositing elsewhere. The result is dried-out, poor-tasting food that hasn’t actually become shelf stable. Uncovered fruit slices left in a chest freezer for six months will taste terrible and still harbor moisture that supports bacterial growth.
Dry ice experiments appear in online tutorials, typically involving coolers and various setups. The theory is sound—dry ice creates extremely cold temperatures and sublimates into carbon dioxide gas. But controlling the process is nearly impossible for home users. Food may freeze, but moisture removal is inconsistent and incomplete. You can’t verify whether items have dried sufficiently for safe long-term storage, and the whole process requires handling dangerous materials.
DIY vacuum chamber experiments attract hobbyist makers who enjoy building things. While technically possible to create sublimation conditions with lab equipment, these rigs handle tiny batch sizes, require constant monitoring, and produce questionable results for food safety. Fine for freeze drying a few flower petals; not recommended for building an emergency pantry you’ll feed your family from.
Any of these alternatives might work for science fair projects or curiosity’s sake. But if you’re serious about producing shelf stable meals for backpacking trips or long-term storage, a purpose-built Harvest Right freeze dryer (or equivalent) is the practical path forward.
What You Can (and Can’t) Freeze Dry
Most people are surprised to learn how many everyday foods freeze dry beautifully. The process works on most foods you’d find in your kitchen, with a few notable exceptions, and some adventurous preservers even experiment with freeze drying food without a machine using extended freezer time.
Success depends primarily on three factors: water content, sugar level, and fat level. High water content foods work excellently—the process removes that moisture and leaves behind concentrated flavor. Moderate sugar content is fine, but extremely sugary foods can remain sticky. High fat presents the biggest challenge because fats don’t sublimate; they can go rancid and limit shelf life.
Almost all fruits work wonderfully. Most vegetables work great, especially after blanching. Lean cooked meats freeze dry well. Dairy products like cheese and yogurt drops are popular choices. Even complete meals like pasta dishes, soups, and stews come out excellent. The following sections break down specific recommendations by category.
Best Foods to Start With
Beginners should start with simple, forgiving foods before attempting elaborate recipes. Single ingredients teach you how your machine behaves, how long different foods take, and what properly dried food looks and feels like. Here are proven starting points:
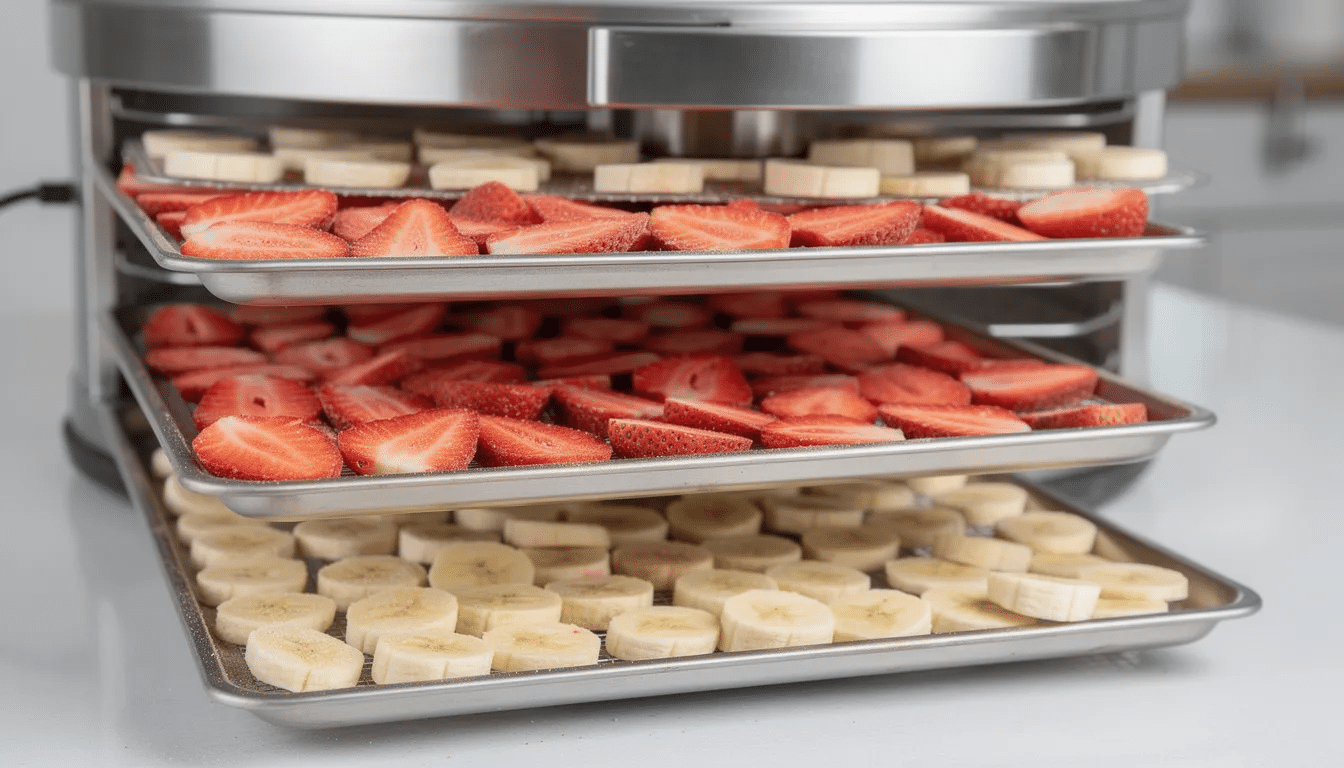
Fruits make excellent first batches because they’re visually obvious when done:
Strawberries (sliced or whole if small)
Bananas (sliced into coins)
Mango chunks
Blueberries (pierce skins for faster drying)
Apples (sliced thin, pre-treated with lemon water to prevent browning)
These rehydrate easily for smoothies, make crunchy snacks eaten dry, or work as trail mix additions.
Vegetables build your ingredient pantry for soups and meals:
Peas and corn (blanch briefly, then freeze)
Green beans (blanch and cut into pieces)
Bell peppers (dice or slice into strips)
Onions and celery (dice for soup bases)
Blanched veggies rehydrate faster and maintain better color than raw-frozen ones.
Dairy creates shelf-stable treats:
Shredded cheese (separates well when dried)
Yogurt drops (dollop onto trays)
Cottage cheese crumbles
Proteins require cooking first but dry excellently, and just as with jerky, it’s important to remember that a dehydrator doesn’t fully cook meat—you need to cook proteins thoroughly before any drying method:
Pre-cooked chicken breast strips
Lean ground beef or game meat crumbles (drain fat thoroughly)
Turkey pieces
Dried proteins go into instant mashed potatoes, rice bowls, or ramen for quick protein boosts.
Trickier Foods and What to Avoid
Some foods either don’t freeze dry well or simply don’t benefit from the process. Knowing these limitations saves time and prevents disappointing batches.
High fat foods present the biggest challenges, and just as with jerky or biltong, understanding how long dehydrated meat really lasts underscores why extra fat shortens safe storage time:
Pure oils, butter, and mayonnaise won’t dry properly
Very fatty bacon stays greasy and goes rancid quickly
Foods over roughly 30% fat content have shortened shelf lives even when dried
Extremely sugary or sticky items often remain tacky:
Thick honey and syrups never fully crisp
Caramel candies and similar confections stay chewy
High sugar foods sometimes work but don’t become crunchy like fruits
Already shelf-stable foods gain nothing from freeze drying:
Dry pasta, white rice, and other grains
Sugar, salt, and spices
Items available at most grocery stores in dried form
Mixed dishes containing some fat still work well. A chili made with lean ground beef or a pasta with moderate meat sauce will freeze dry successfully—just set realistic expectations. These meals might stay optimal for 5 to 10 years rather than the 25+ years possible with low-fat items.
One important safety note: handle any low-acid foods carefully and follow food safety guidelines. Fully cook meat before freeze drying. Don’t assume freeze drying makes questionable food safe—it preserves whatever you put in, good or bad.
Step-by-Step: How to Freeze Dry Food at Home
This section provides the core workflow you’ll follow for every batch, whether you’re drying strawberries for snacks or preparing elk chili for a hunting trip. The process has four main stages: food prep, pre-freezing, running the machine, and testing/packaging.
Total time per batch typically runs 24 to 40 hours of machine time, plus your prep time on either end. Watery fruits and vegetables finish faster; thick stews and dense meat take longer. Plan accordingly—most people start a batch before bed or before work and check it the following evening.
Preparing and Pre-Freezing Your Food
Good preparation directly improves drying time and final texture. Skipping steps here adds hours to your cycle and risks uneven results.
Follow these food prep fundamentals:
Cut solid foods into uniform pieces roughly ½ inch to 1 inch thick for even drying—inconsistent sizes mean some pieces overdry while others remain moist
Pre-cook complete meals like chili, pasta sauce, stews, and curries exactly how you’d eat them, then cool thoroughly to room temperature
Blanch vegetables when appropriate (broccoli, carrots, green beans) for 1-3 minutes to deactivate enzymes, preserve color, and improve rehydration
Drain excess moisture and fat from cooked foods—standing liquid extends drying time significantly
Spread food evenly on trays lined with parchment paper, leaving space between pieces for airflow
Pre-freezing in your regular freezer overnight (12-24 hours) before loading the machine cuts cycle time by up to 30%. The freeze dryer doesn’t have to spend hours doing what your freezer handles for free. It also helps delicate items like berries hold their shape better through the process.
Don’t overload trays. Crowding blocks airflow and traps moisture, leading to wet spots and potential spoilage. Single layers only.
Running the Freeze Dryer
Every machine has specific instructions, so consult your manual for exact procedures. But the general pattern is similar across units:
Insert pre-frozen trays into the machine and close the door securely, ensuring a good seal
Start the appropriate cycle; the unit will lower temperature to around -30°F or colder and begin pulling vacuum
Let the cycle run uninterrupted—expect 18 to 40 hours depending on food type (fruits faster, meats and soups slower)
Most machines automatically add extra dry time and will signal when complete; if food seems cold or slightly soft when you check, add several more hours manually
During the cycle, you’ll notice frost buildup on the inside of the door window early on—this is normal. As drying progresses, that frost clears because moisture has moved from food to the condenser. A clear window usually indicates primary drying is complete or nearly so.
Resist the urge to open the door mid-cycle. Breaking vacuum extends total time and can cause temperature fluctuations that affect results.
Checking for Doneness and Cooling
Learning when a batch is truly done comes with experience. Rush this step and you’ll have moist food that spoils; over-dry and you waste electricity without benefit.
Perform these checks when the cycle completes:
Break a thick piece (a cube of chicken, a chunk of potato, or the center of a meat clump)—it should snap cleanly, feel completely dry inside, and be light as styrofoam
For meals like chili or pasta, crush a clump between your fingers and check for any cold, gummy, or rubbery center
Spot-check items from different trays and from both center and corner positions—edges dry faster than middles
Smell the food; properly dried items have concentrated aromas without any off-notes
If anything feels cool, soft, leathery, or moist inside, the batch needs more time. Close the door and extend drying by 2-4 hours, then check again. It’s better to over-dry slightly than under-dry.
After the cycle ends, let trays sit in the closed machine for 30-60 minutes. This allows food to warm to room temperature, preventing condensation when you open the door or package items.
Making Complete Freeze Dried Meals
Moving from individual ingredients to complete ready-to-eat meals unlocks the real potential of making your own freeze dried food. This is where you stop buying commercial pouches and start creating your own backcountry meals.
The advantages compound: you control calories for your activity level, adjust sodium for health needs, use your favorite meal recipes, and save substantial money. A commercial backpacking dinner costs $8-$15; your homemade version might cost $2-$4 in ingredients, similar to well-planned dehydrated backpacking meals you make at home.
The key rule: fully cook and taste-test meals before freeze drying. Season properly, ensure meat reaches safe temperatures, and make something you’d actually enjoy eating. The freeze dryer preserves exactly what you put in—including under-seasoned or overcooked food.
Backpacking and Hunting Trip Dinners
For multi-day backpacking trips, backcountry hunting in September through November, or thru-hikes where every ounce matters, homemade freeze dried backpacking meals offer unbeatable customization. Here are proven dinner options:
Lean meat chili with black beans and tomatoes: Cook your favorite chili recipe fully, using lean ground beef or game meat. Drain any excess fat. Portion into individual meal sizes on trays and freeze dry. Rehydrates in 10-15 minutes with hot water.
Pasta dishes: Spaghetti with meat sauce, mac and cheese with chicken, or pasta primavera all work well. Cook pasta slightly al dente (it softens during rehydration), combine with sauce, and dry as complete meals. Add cheese sparingly to extend shelf life.
Rice-based meals: Jambalaya, curry over basmati rice, beans and rice with seasoned meat, or fried rice all freeze dry excellently. Rice rehydrates faster than pasta. Use extra-lean ground meat or game meat.
Practical tips for backpacking food: if you already rely on dehydrated food for lightweight trips, you’ll find these same principles carry over to freeze dried meals:
Aim for 500-800 calories per dinner pouch depending on body weight and trip intensity
Label each bag clearly: meal name, approximate calories, and date dried (e.g., “Elk Chili – 650 kcal – Oct 2025”)
Pack food in vacuum-sealed bags or mylar bags with oxygen absorbers for maximum protection
Test rehydration at home before relying on a meal for an important trip
Everyday Staples and Snacks
Many people discover they use freeze dried food as much in daily cooking as on the trail. Once you’ve built inventory, ingredients are always ready without thawing or spoilage concerns.
Fruits for cereal and baking:
Strawberries, raspberries, and blueberries for granola, muffins, and overnight oats
Apple and pear slices for baked goods or snacking
Banana chips for trail mix or smoothie additions
Vegetables for soups and casseroles:
Diced onions, celery, and carrots (mirepoix base) toss directly into simmering stocks
Peas, corn, and green beans add to any soup or stew without prep time
Bell peppers and veggies for omelets or stir-fries
Protein snacks:
Seasoned lean ground beef or venison crumbles for quick taco bowls or ramen upgrades
Chicken breast cubes for salads or rice bowls
Turkey for casseroles and soups
Dairy treats:
Yogurt drops as crunchy shelf-stable snacks
Cheese crumbles for pasta dishes or snacking
The smart approach: whenever you cook large batches in 2025-2026, freeze dry the extras. Make a double batch of chili on Sunday, eat half for dinner, freeze dry the rest. Over months, you’ll build a substantial pantry without dedicated production days.
Storing, Rehydrating, and Shelf Life
Creating perfectly freeze dried meals means nothing if poor storage destroys them within months. Proper packaging and conditions transform temporary preservation into decade-long stability.
The enemies of stored dried food are oxygen, moisture, light, and heat. Oxygen enables oxidation that degrades fats and vitamins. Moisture rehydrates food and enables bacterial growth. Light breaks down nutrients. Heat accelerates all degradation reactions. Combat all four for maximum shelf life.
Ideal storage conditions: cool, dark pantry or closet with stable temperatures below about 70°F. A basement works well in many climates. Avoid garages with temperature swings or anywhere exposed to direct sunlight.
Packaging and Storage Options
Package food immediately after it cools from the cycle. Every minute exposed to room air allows humidity absorption that shortens shelf life.
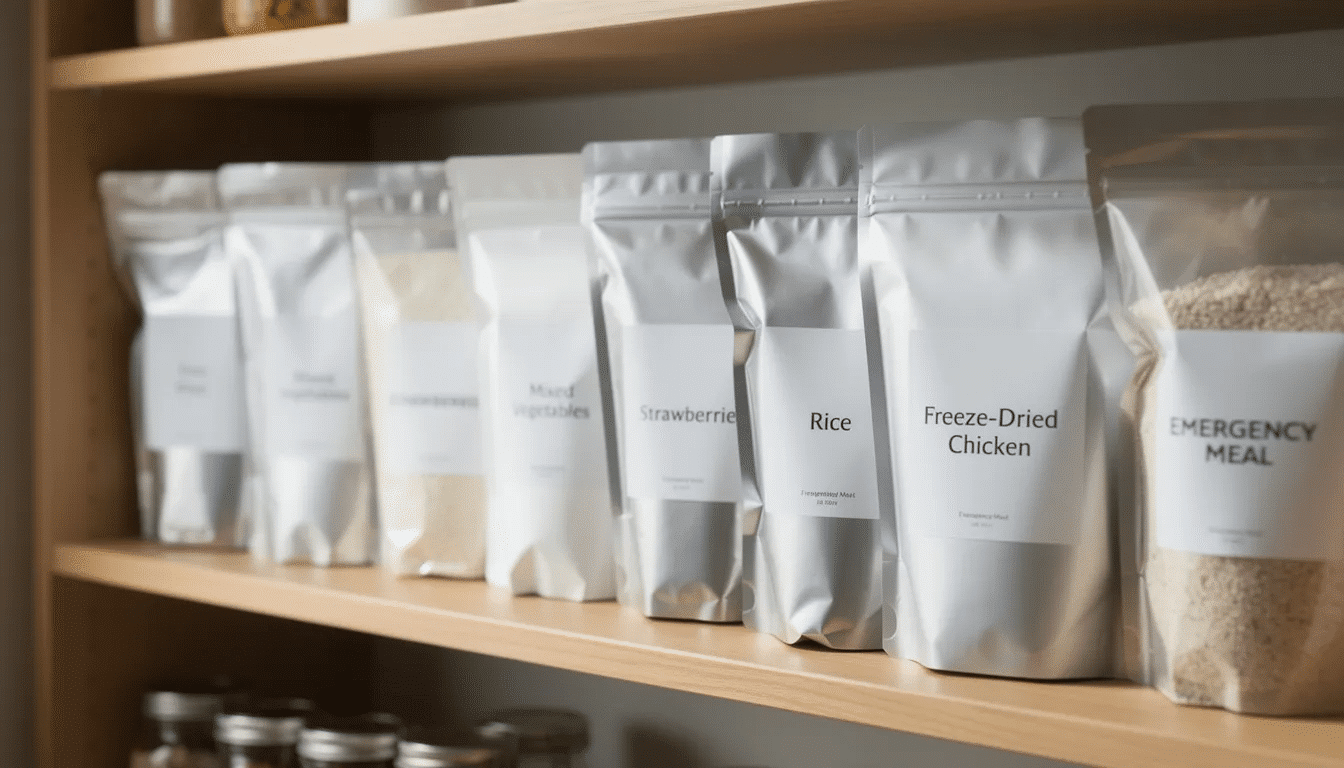
Mylar bags with oxygen absorbers provide maximum protection:
Use 300-500cc oxygen absorbers per gallon-sized bag
Heat-seal bags completely for airtight closure
Ideal for long-term storage (5-25+ years) of low-fat fruits, vegetables, and rice-based meals
Store sealed bags in buckets or bins for pest protection
Vacuum-sealed bags work well for medium-term storage:
Good for 1-5 year storage, especially items you’ll rotate through
Easier to open and reseal for frequently accessed snacks
Less oxygen protection than mylar with absorbers
Airtight glass jars suit regularly used ingredients:
Store in cool, dark cupboard
Works for smoothie fruits, baking ingredients, or soup bases you access often
Add an oxygen absorber if storing longer than 6 months
Labeling best practices:
Product name (“Strawberry slices” or “Beef chili”)
Freeze dry date (“FD: April 2025”)
Best-by estimate based on fat content
Store packages off floors and away from exterior walls to minimize temperature swings and moisture exposure.
How to Rehydrate Freeze Dried Food
Rehydration is usually simple—add water and wait—but amounts and timing vary. Getting ratios right means the difference between a satisfying meal and a soupy or crunchy disappointment.
General rehydration guidelines:
For most dried meals, start with roughly equal volume of hot water to food, then add more gradually if needed
Use boiling water for soups, stews, and complete meals; let sit covered 10-20 minutes, stirring once or twice
Dense proteins and thick chunks need more time (15-30 minutes) and hot water throughout; keep containers insulated
Fruits and snacks often taste great dry; soak briefly in cool water or juice if you prefer softer texture
Rehydrate easily with simple steps: pour water, wait, eat
For backpacking, pouring boiling water directly into a plastic bag or mylar bag works fine—the bag becomes your bowl. Seal, wait, massage occasionally, and eat directly from the package.
Pro tip: Test every new recipe at home before packing it for a backcountry trip. You’ll dial in perfect water ratios and avoid unpleasant surprises when you’re hungry and tired on a mountain.
Realistic Shelf Life Expectations
Shelf life depends on food type, fat content, packaging quality, and storage temperature. Published ranges assume ideal conditions; real-world results vary.
Approximate shelf life ranges:
Low-fat fruits and vegetables in mylar with oxygen absorbers: 10-25+ years when stored properly in a cool, dark location
Complete meals with moderate fat (pasta with meat sauce, lean chili): 5-15 years with good packaging
High fat items or meals with cheese, cream sauces, or fatty meats: best used within 3-5 years for peak quality
These are guidelines, not guarantees. Always check appearance, smell, and texture before eating older items. Rancid fats smell obvious. Off-colors or unusual textures indicate degradation. When in doubt, discard it.
The simplest quality strategy: rotate your stock. Use older packages first, add fresh batches each year, and your inventory stays perpetually fresh without waste.
Getting Started: Practical Tips for Your First Batches
If you’ve read this far, you understand the process. Now it’s time to actually do it. Start small, learn quickly, and build from there.
For your first machine load, try a mix of easy items that teach you different behaviors. Fill one tray with strawberry slices, another with frozen peas, a third with cooked rice, and perhaps one small pan of chili. You’ll see how each dries differently, learn what “done” looks like for various foods, and gain confidence before attempting elaborate own meals.
Keep a simple log from your first batch forward. Note the date, foods processed, thickness, total cycle time, and how well items rehydrated. Over dozens of batches, this log becomes invaluable—you’ll remember that your machine runs 4 hours longer for thick stews, or that your family prefers chili portioned into 2-cup servings. Small refinements compound into expertise.
Set a concrete goal to maintain momentum. Maybe you want 10 days’ worth of dinners ready for a planned 2026 backpacking trip. Perhaps you’re aiming for a one-month emergency supply by next winter. Specific targets focus your efforts and give satisfaction when achieved. Check off each meal as you complete and package it.
The investment in a Harvest Right or similar machine feels significant upfront. But the math works for anyone who uses it regularly. Commercial freeze dried backpacking meals cost $10 or more per pouch; yours cost a fraction of that. Store-bought emergency food supplies run hundreds of dollars for a week’s worth; homemade supplies cost a fraction. Garden produce that might rot becomes ingredients lasting decades.
Beyond cost effective benefits, there’s real satisfaction in self-reliance. Opening a closet full of meals you prepared yourself—labeled with your handwriting, filled with your favorite recipes—provides peace of mind that money can’t buy. Whether you’re preparing for outdoor adventures, uncertain times, or simply smarter cooking, making your own freeze dried food puts you in control of what you eat and how long it lasts.
Start your first batch this weekend. Load the trays, press the button, and begin building a pantry that will serve you for years to come.
DannyContent Writer
Hey there, since 2016, my mission has been to provide you with the information and guides you need to make food dehydrating simple and fun. Whether you're a newbie or a seasoned pro, my site offers helpful guides, reviews, and recipes to enhance your dehydrating experience. I take pride in only recommending products I believe in, ensuring my readers' trust. As an affiliate of various programs, including Amazon Associates, your support helps me continue providing quality content. Thanks for stopping by, and happy dehydrating!