Canning is a good method for keeping food edible over the long haul, but it’s imperative to get the technique right. Knowing how long do you boil jars for canning and what steps come after that are essential if you want your canned goods to be safe and delicious. Sterilizing jars is an integral part of the canning process, so let’s explore this topic in more detail by looking at preparing jars, boiling them, and safely removing them from boiling water.
How Long to Boil Jars for Canning
Preparing Jars for Canning
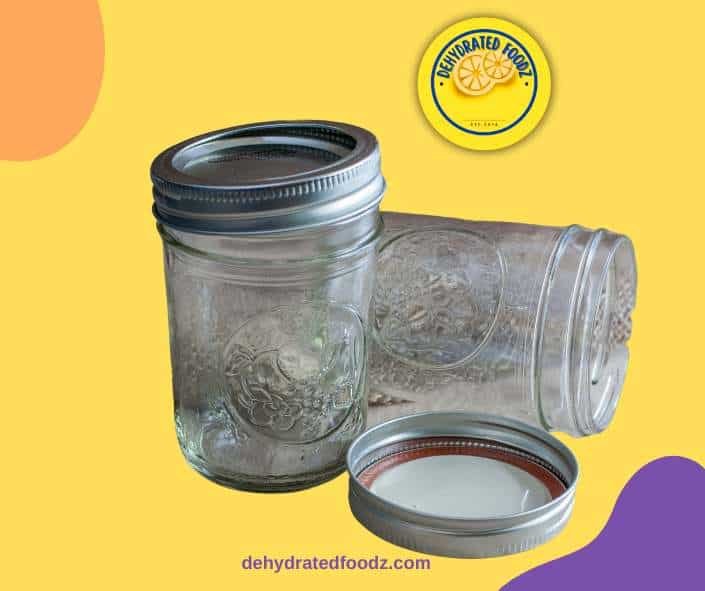
The first step is cleaning. Wash each jar with hot soapy water and rinse them well. This will help remove any debris that could prevent a proper seal when processed in boiling water or a pressure canner. It would be best if you also cleaned all of your other supplies, such as lids, rings, funnel, and lifter, prior to use as well.
When you clean your jars, please take the opportunity to examine them for any cracks or chips. Dispose of imperfect ones or reuse them for non-canning purposes. If hard water leaves scales and film on your glass jar, soak it in a solution containing 1 cup of vinegar (at 5% acidity) per gallon of water for several hours to remove these blemishes.
Boiling Jars for Canning
Once you’ve washed and rinsed your jars, it’s time to start the following process. Getting jars ready for canning is critical to making sure the food stays safe. Boiling the glass containers before filling them with food helps kill bacteria and creates a sterile environment, ensuring your canned goods last longer.
Make sure also to clean your stewpot first. Add a cooking rack at the bottom of the pot and also fill the glass jars with water, then submerge each jar carefully and boil for 10 minutes. Keep a lid on the stewpot so that steam doesn’t escape, but don’t worry if there’s a slight bubbling or splashing from the jars.
Removing Jars From Boiling Water
Once you’ve boiled glass containers for the recommended amount of time, you’ll need to remove them one by one by emptying the water from the jars. You can use a jar lifter or tongs and place them on a clean kitchen towel or similar material. Caution as the water is hot and the jars may still be warm.
Do Jars Have to Be Fully Submerged When Canning
Yes, jars must be fully submerged in water when they are canning. This is because the boiling water bath helps to create a vacuum seal that seals in the food’s flavor and texture. When jars are not fully submerged, air pockets can form, which keep the lid from sealing correctly or could cause bacteria or other contaminants to enter your canned goods.
After putting lids and rings on all the jars, place them in the canning pot. It is important to fully submerge the jars and ensure they are covered with approximately one inch of water. This will prevent them from becoming exposed during boiling.
What Happens If Lids Don’t Pop When Canning Food
Don’t worry if you don’t hear the satisfying pop or ping when preserving a jar – as long as it’s sealed, you’ve achieved your goal. Remember: the seal is what matters most.
If the lid makes a clicking noise when you press it with your finger, your can is not closed and requires reprocessing. On the other hand, if it remains stationary, you’ve got a perfect seal! Always wait for your canned foods to cool completely and allow several hours for sealing before testing!
Why it matters: Unsealed jars? Unsafe food. Bacteria can grow, spoilage can occur, and you risk consuming contaminated food.
Can You Use Instant Pot for Canning
Using an instant pot as a pressure canner is not recommended because it cannot maintain the specific pressure required for the safe canning of food.
Can You Use a Pressure Cooker for Canning? The Basics
Canning in Pressure Cooker: Not Recommended by USDA
Why? The USDA advises against using pressure cookers for canning. Their recommendation: use a pressure canner that holds at least four quart-sized jars, facing upright on the rack with lid in place.
Can Canning Lids Be Reused? The Truth About Reusing Lids for Safe Home Canning
No, canning lids should not be reused. It’s important to note that canning lids are meant to be used only once.
To ensure the safe preservation of food, it is essential to use new canning lids each time you preserve. Reusing them may lead to a poor seal, causing food spoilage, illnesses, or botulism. Nonetheless, canning jars and bands can be reused in good condition, without cracks or rust. Always follow proper canning guidelines and protocols to keep your food safe.
When Was Canning Invented?
Since the late 18th century, canning has been a food preservation method. It was invented by French confectioner Nicolas Appert, who discovered that food could be preserved in sealed glass jars when heated. This revolutionary discovery allowed people to store food for long periods without spoiling it.
Canning is still a commonly used method for preserving food. Still, advancements in the process have made it safer and more efficient. In modern canning, food is placed in containers like jars or cans, then sealed tightly. Next, the containers are subjected to high temperatures to eliminate bacteria or microorganisms that may cause spoilage. This heat also helps to create a vacuum seal inside the container, which prevents oxygen from entering and causing further spoilage.
Preserving food through canning is a convenient method that requires appropriate equipment and knowledge and can be quickly done at home.
Canning is a fantastic method for preserving your favorite foods, whether you want to store seasonal produce or stock up on canned goods.
FAQs in Relation to How Long Do You Boil Jars for Canning
How long do you boil jars for canning?
It is recommended that you should boil jars for at least 10 minutes.
Do I need to boil jars before canning?
When canning food, you don’t need to sterilize your jars if they’re submerged in boiling water for more than 10 minutes or processed with a pressure canner. However, it is vital that you first sterilize containers that will only remain in the boiling bath for less than ten minutes.
Can I reuse jars after boiling them for canning?
Yes, you can reuse jars after boiling them for canning if they are not chipped or cracked. However, it’s important to note that the metal lids should not be reused as they may not seal properly.
Can I Reuse Canning Lids
Reusing glass canning jars is okay, but avoid reusing the canning lids. The gasket material in the old caps may not create a proper seal on the jars, making the food inside unsafe. During processing, the gasket on new lids softens and spreads slightly to cover the jar-sealing surface.
Conclusion
Boiling jars for canning is an essential step in the food preservation process. It helps kill bacteria, create a sterile environment, and ensure your canned goods will last longer. Just make sure to clean your jars first, boil them for at least 10 minutes, and remove them one by one with a jar lifter or tongs. These simple steps will help ensure your canned goods are safe and delicious.
Discover the best food dehydrators to buy and learn how to preserve your favorite foods with our easy-to-follow recipes and tips. Start preserving today!

